Keep track of resident’s property (type of item, where it’s stored, when it’s checked out) with Personal Possessions. You can require signatures to sign out items, tag items with QR codes, and even add personal possession events to your Audit Checklist.
This article covers how to use Personal Possessions. If you need to know how an Admin user sets up and manages the Personal Possessions sub-application, check out the linked article HERE.
Personal Possessions Navigation #
You can get to Personal Possessions from the Case Manager or the Facility Manager.
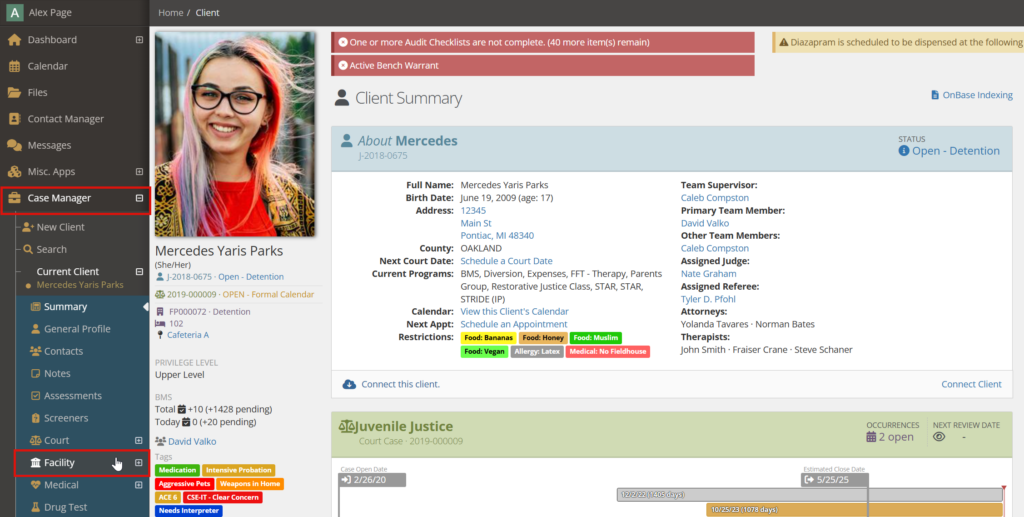
Starting with the selected client in Case Manager, expand Facility:
Inside Facility, expand Personal Possessions:
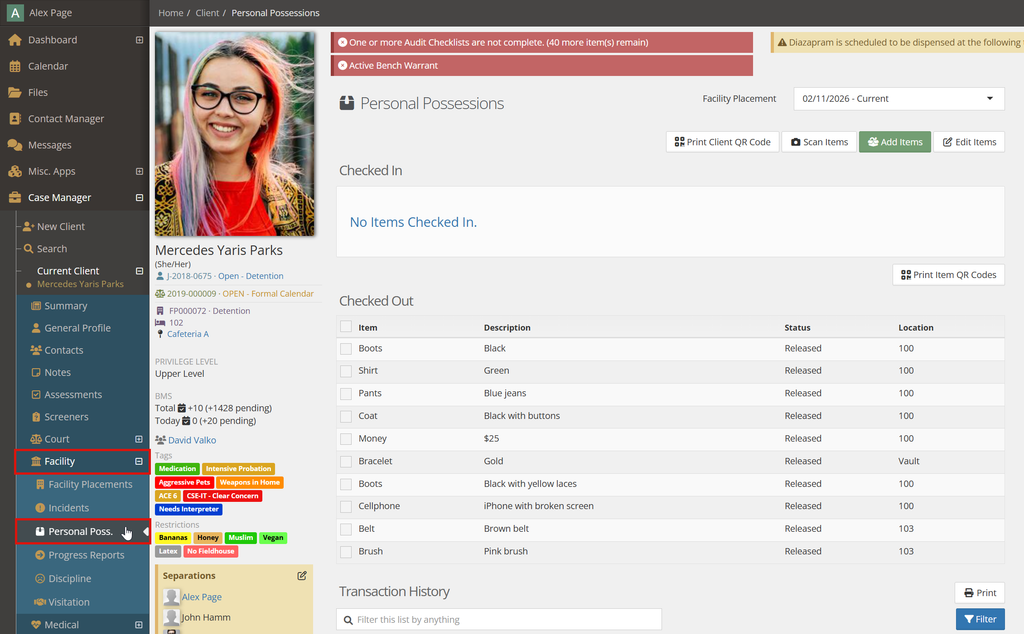
You’re ready to start adding items.
To find a client from the Facility Manager instead, click into Facility Manager and choose Personal Possessions:
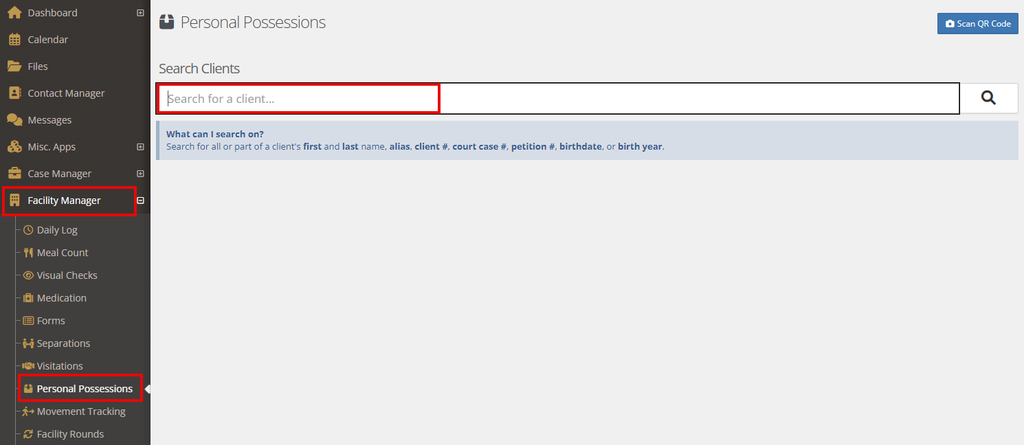
Search for the client and click into the correct file:
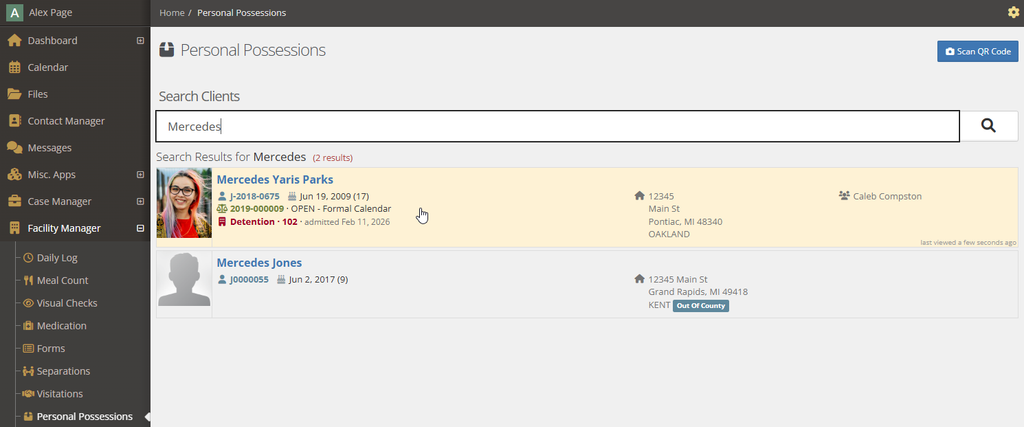
This will link you over to the Personal Possessions (nested under Case Manager) for that client. If this client is not in a Facility Placement at the moment, you’ll see a message that allows you to start a Facility Placement Intake:

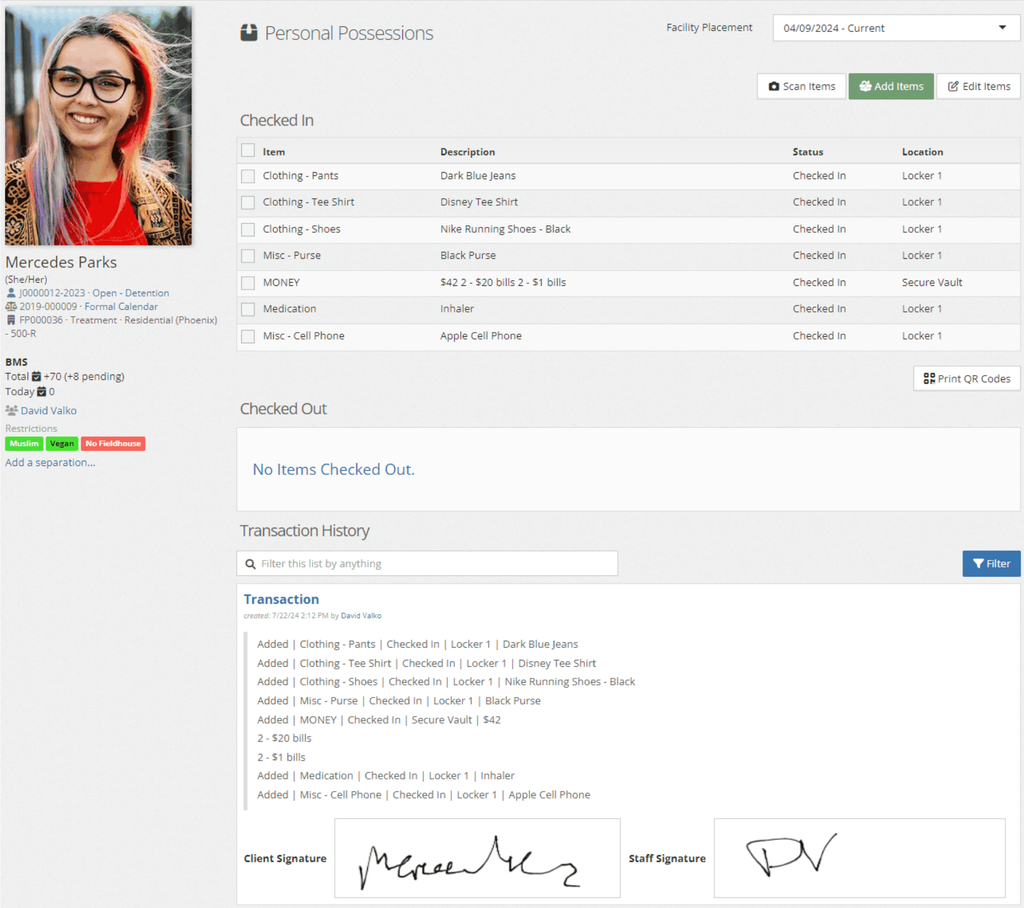
You’ll be able to see existing items in the Checked In, Checked Out, and Transaction History sections for any clients who are currently in a Facility Placement.
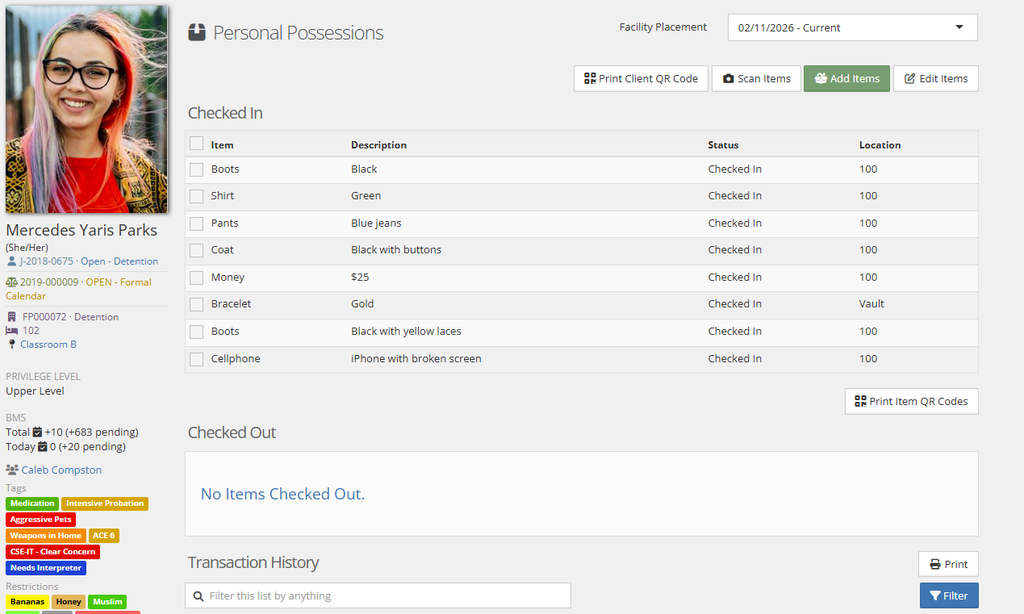
Adding Items to Personal Possessions #
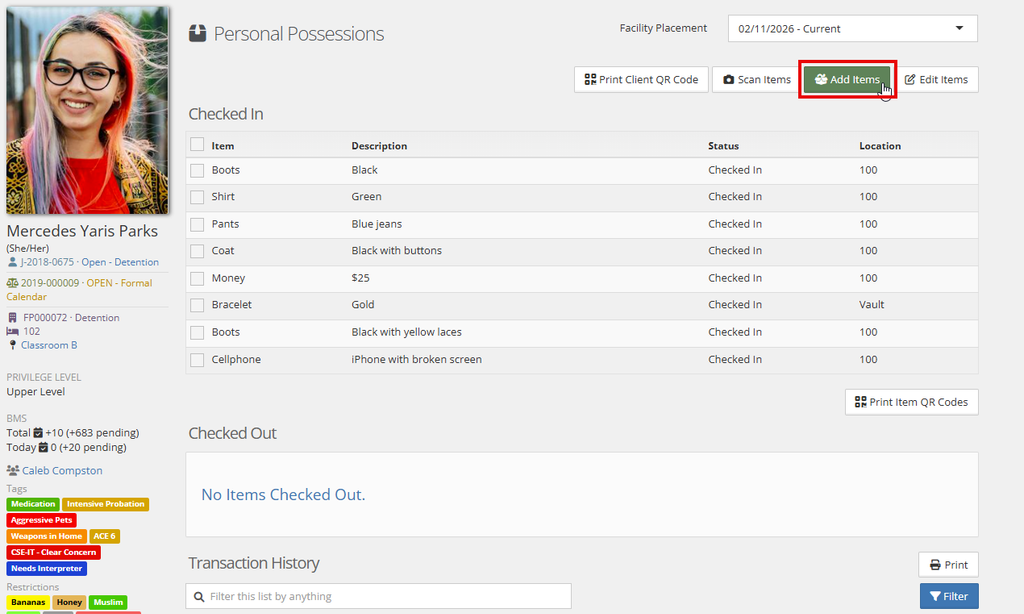
To add items to their inventory, click the green Add Items button:
Fill out all fields that are required:
- Type: what kind of item is it? (see the Admin article if you need to customize this list)
- Description: how can you tell the item apart from others?
- Status: is the item Checked In, Checked Out, Released, or Missing?
- Location: where is the item stored?
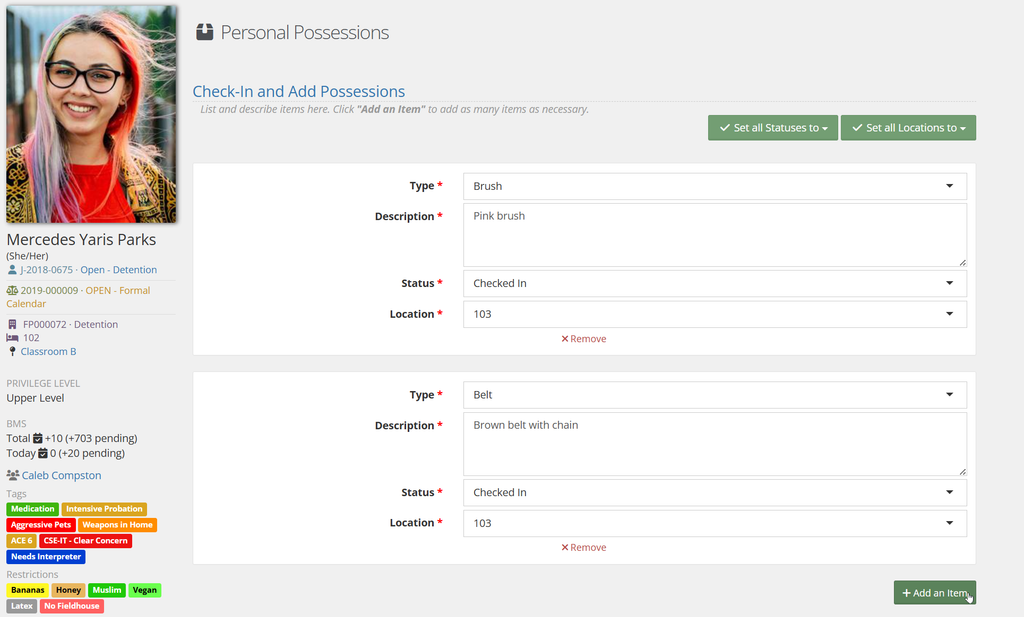
Use the + Add an Item button to create as many new items as you need. For bulk editing, use the green buttons at the top of the listing to set statuses for all items listed or set locations of all items.
Adding Items – Signatures #
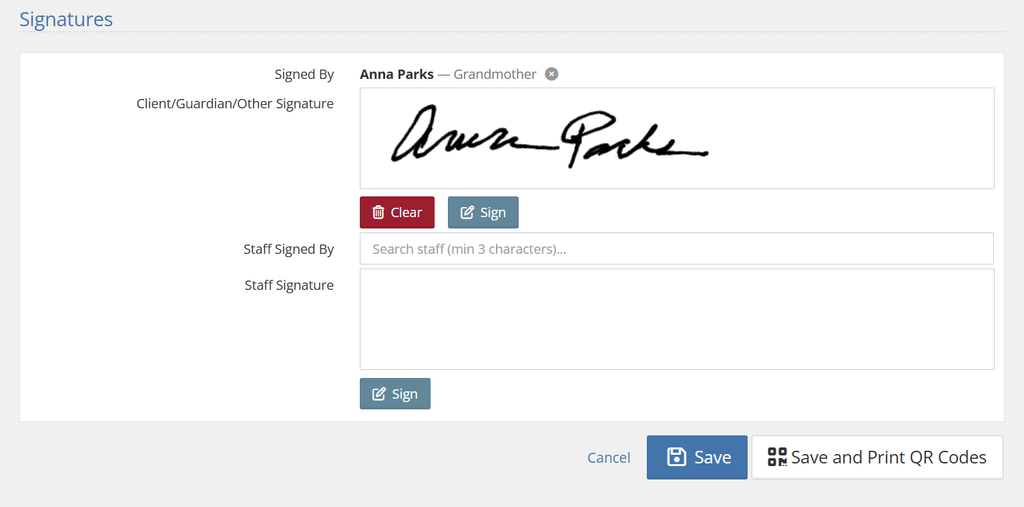
Use the signature fields to have staff and/or the resident sign off on possessions. YouthCenter will log the username of the staff who did the inventory. Signatures can be taken using a mouse, touchscreen, or with a connected hardware device such as a Topaz signature pad.
Adding Items – Saving or Print QR Codes #
Once you’ve added the items, the options are to Save or Save and Print QR Codes as seen in the screenshot above. Save will take you back into the Personal Possessions area with the newly-saved items.
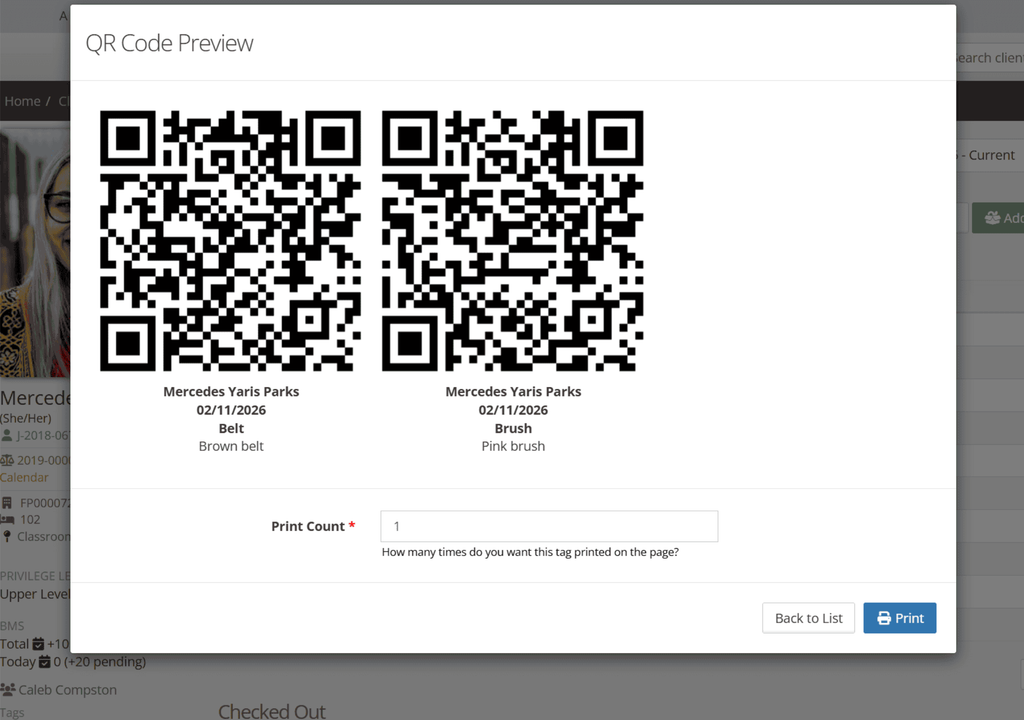
Print QR Codes will present a unique, scannable code for each item. You can use this to tag the location (locker, bag, tote, etc.) for every item that it contains. The code allows you to scan the item later for checkout or other actions. See here for details on allowing your camera access to YouthCenter. Clicking Print from here will open up your system dialogue so you can choose Print or Save settings:
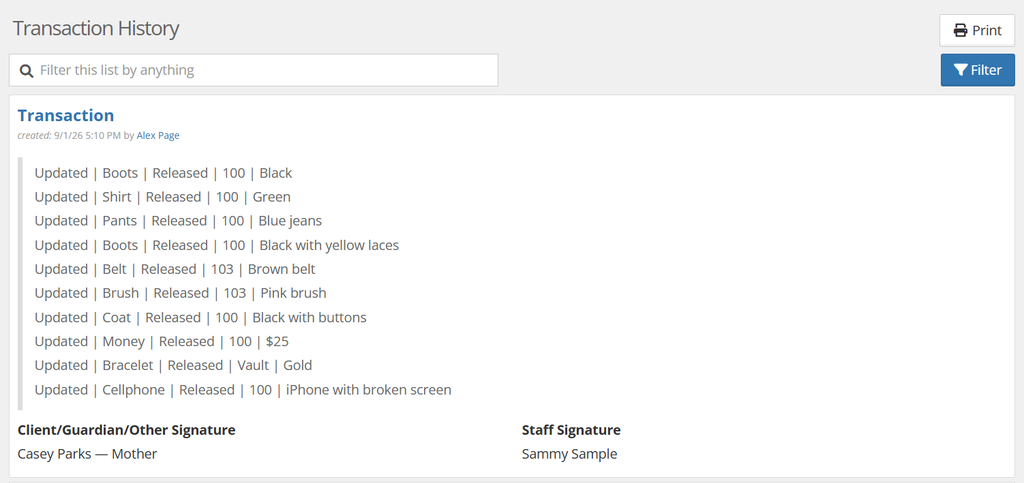
You’ll see an inventory of the youth’s Personal Possessions and transactions history after Saving or Printing:
Checking Items Out #
Check items out if they’re being temporarily given to the client or a third party. Get to Personal Possessions directly from the Case Manager or use Facility Manager to jump there (see above).
If your facility uses QR codes, you can also use the Scan QR Code button in Facility Manager to jump to the client’s inventory:
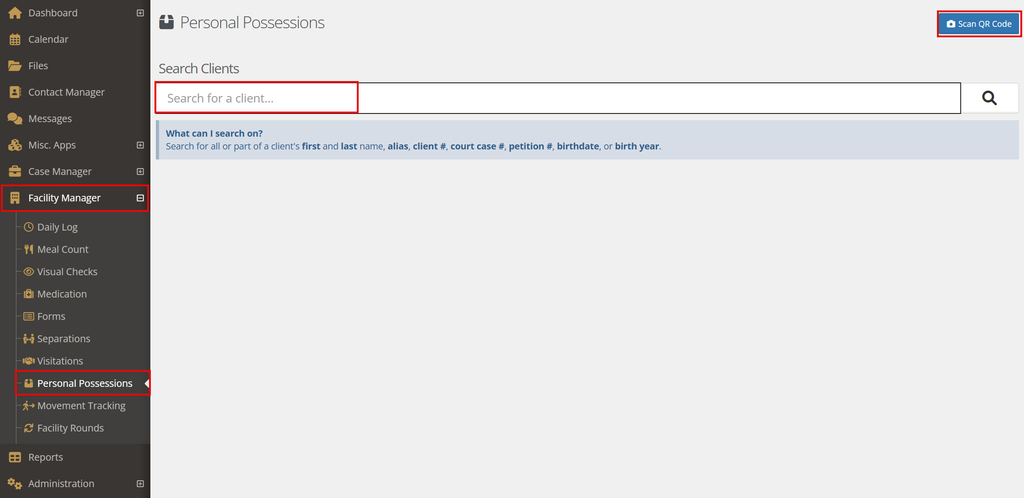
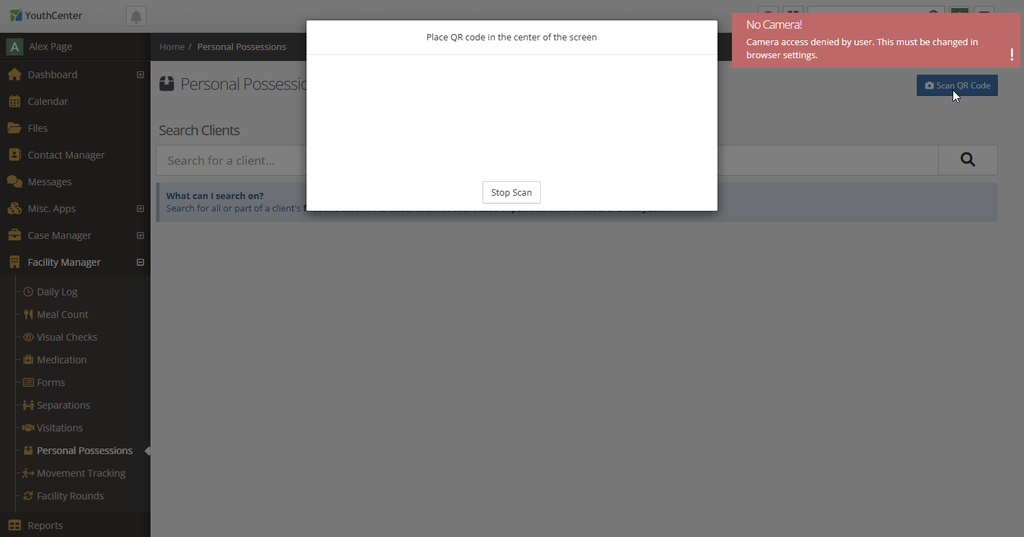
Clicking the Scan button will activate the camera so you can capture a QR Code from the client’s inventory. If you need help activating the camera, see this section:
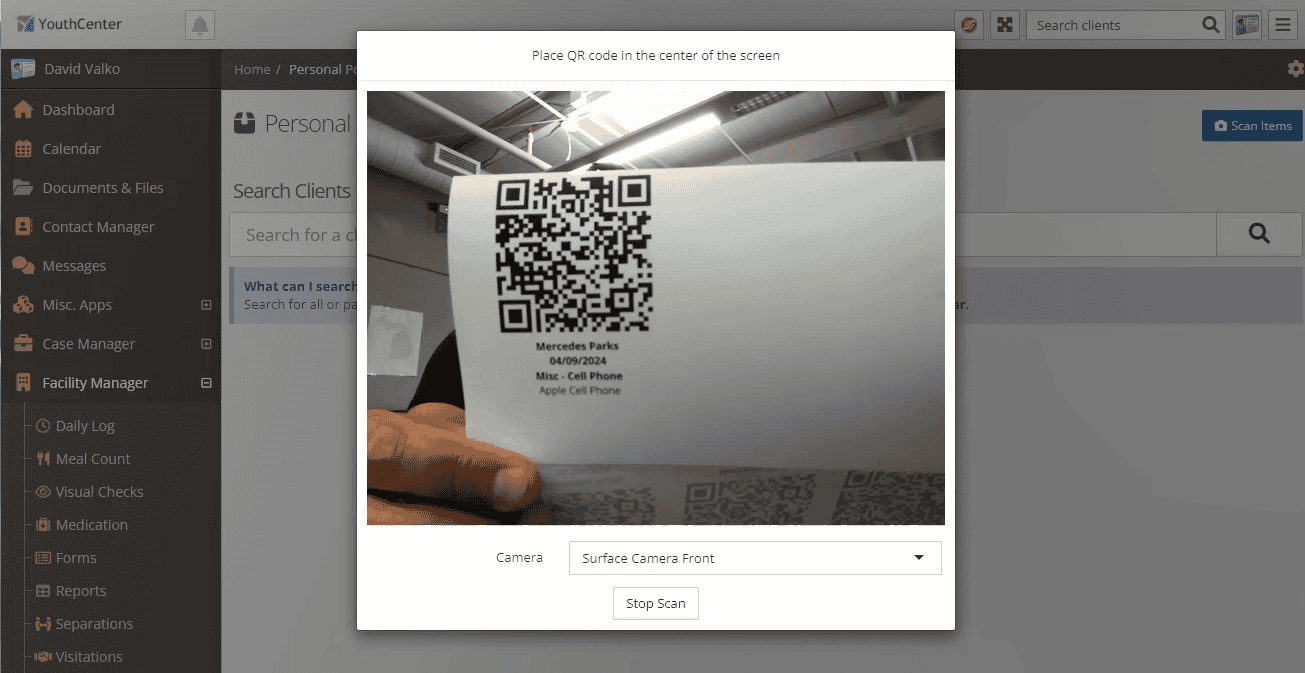
Scanning the QR code with the camera will link over to the youth’s inventory with the scanned item already selected. To select more items, choose the Scan Items button here (for more QR codes) or select them manually:
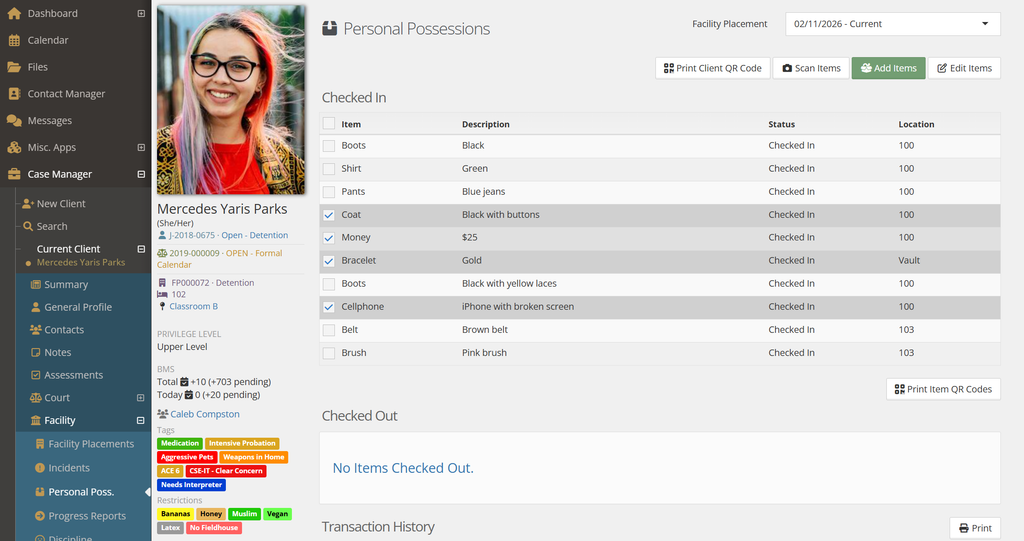
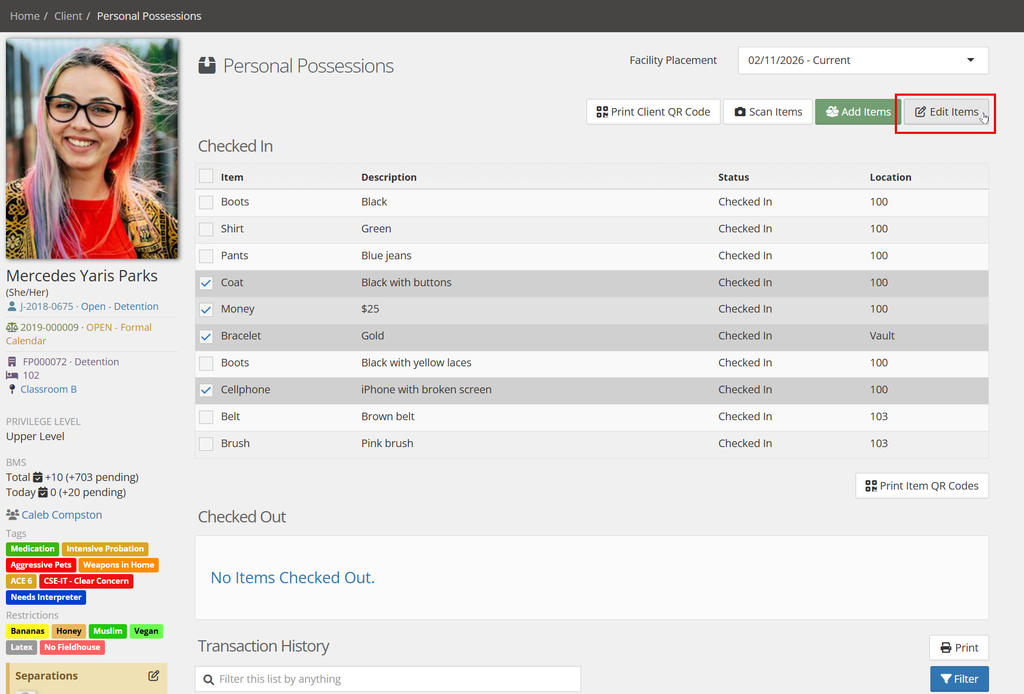
Once all desired items are selected, click the white “Edit Items” button in the upper right corner:
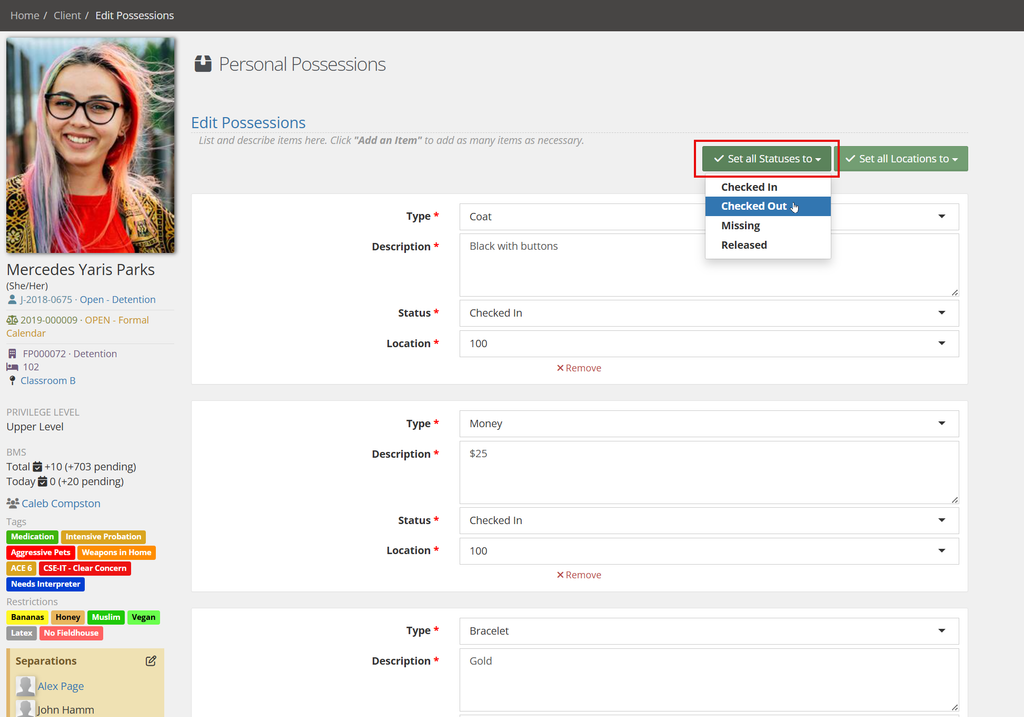
This brings you to the Edit screen where you can apply changes to all the selected Possessions at once. To check out the items, click Set All Statuses to and select Checked Out:
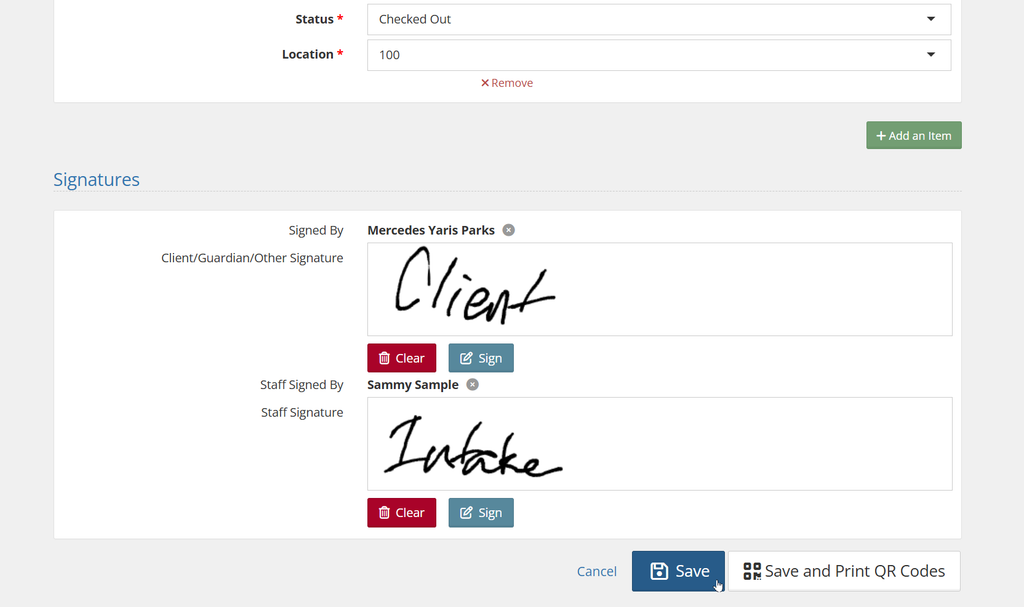
Scroll down to have the client and/or staff sign off on this transaction, then click Save to apply changes:
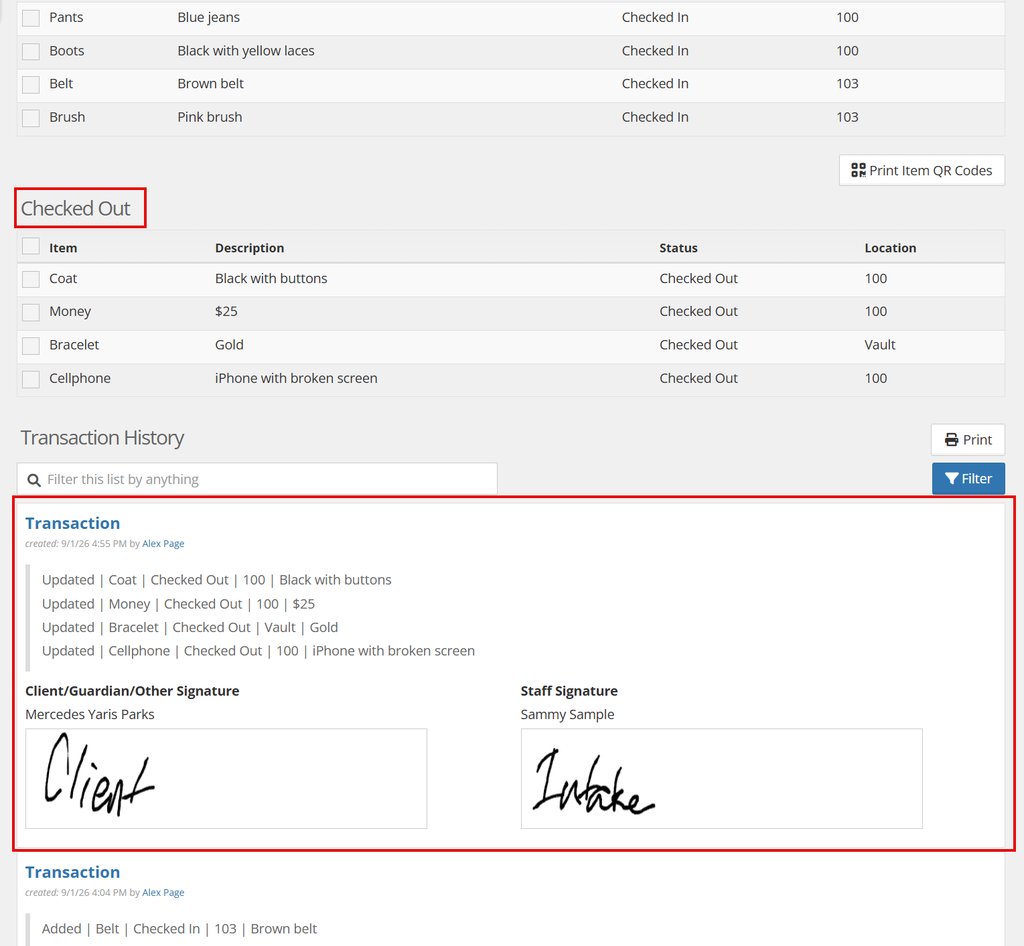
The new transaction history and new status of the chosen items will show up immediately:
Release Items from the Facility #
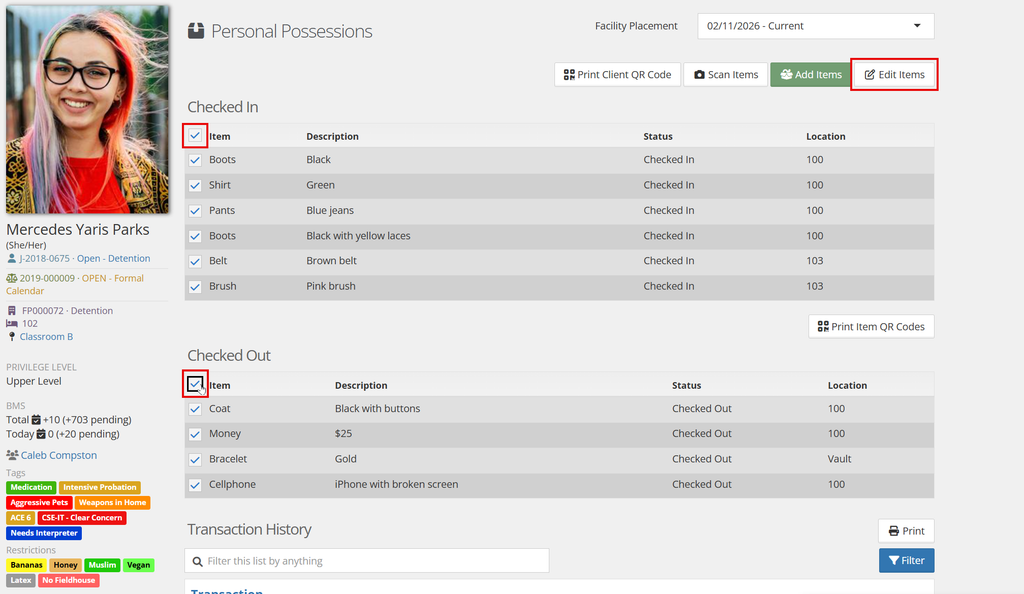
Release items when the resident is finished with their stay and is getting discharged from the facility. Use the Item checkbox to select all items in the inventory. Be sure to click this for both Checked In and Checked Out items to capture everything. Next, click the Edit Items button:
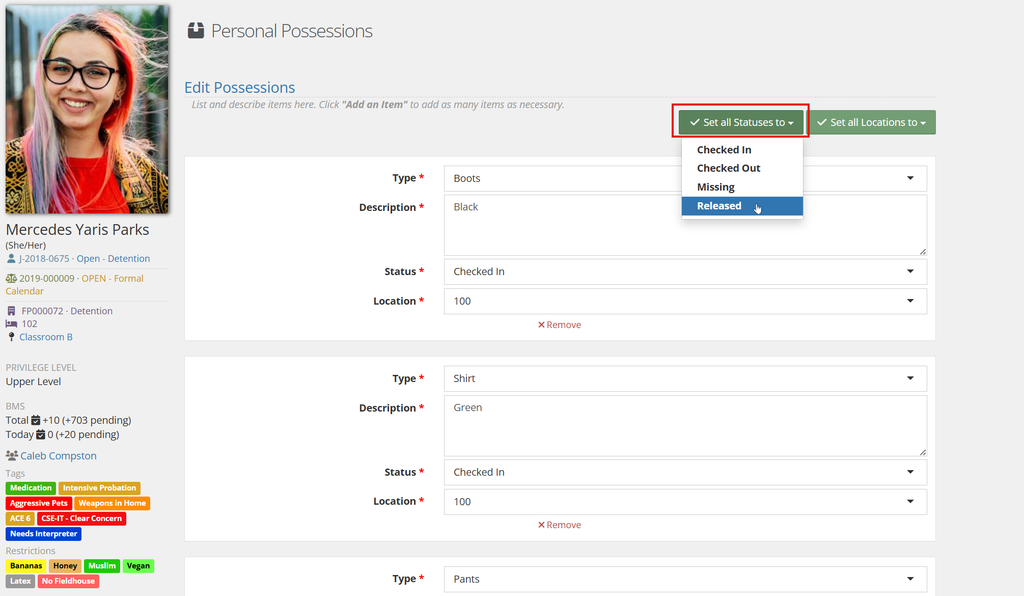
Use the Set all Statuses to drop-down and choose Released:
Scroll down to have the client and/or staff sign off on this transaction, then click Save to apply changes:
The new transaction history and new status of the chosen items will show up immediately:
Allowing Camera Access for QR Codes #
You can use YouthCenter to generate a QR code for a client’s inventory of personal possessions. Print out and apply this QR code to a wristband (for the client to wear) or label (to attach to a bin/locker). When you scan the QR code later, you’ll be linked back to the full inventory on YouthCenter so you can easily confirm that all items are accounted for.
Your camera needs to allow access in YouthCenter to use this feature. If your camera is not currently allowed, you’ll see this No Camera error message:
Allow camera access using your browser’s settings. This information is subject to change rapidly and some browsers may be different than what you see here.
Allowing Camera Access – Chrome #
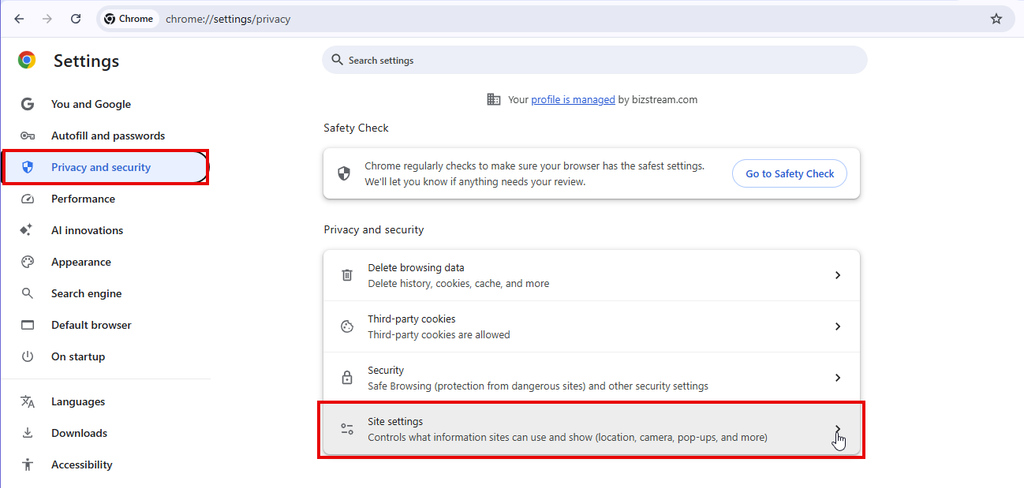
Click the three dots on the top right to get into your Settings. From here, go into Privacy and Security and click into Site Settings:
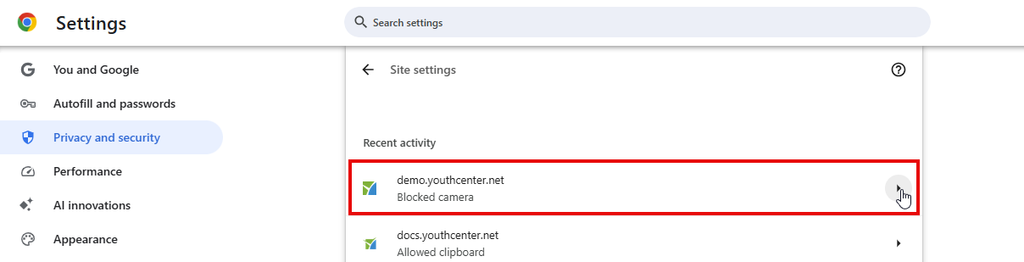
This will show some recent activity (or you can search to find your YouthCenter site) that needs the permission. Click onto the activity:
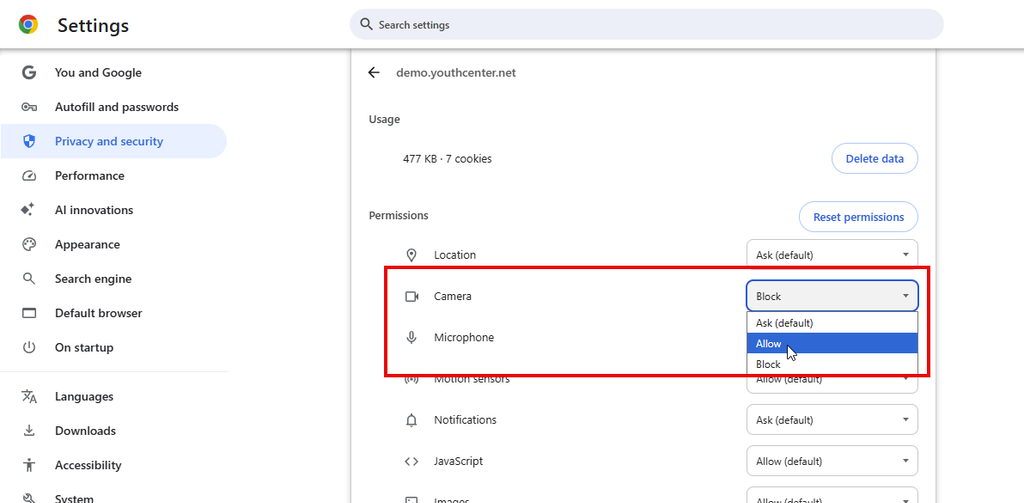
Find Camera under Permissions and choose Allow. You can now close this tab and return to YouthCenter.
Allowing Camera Access – Edge #
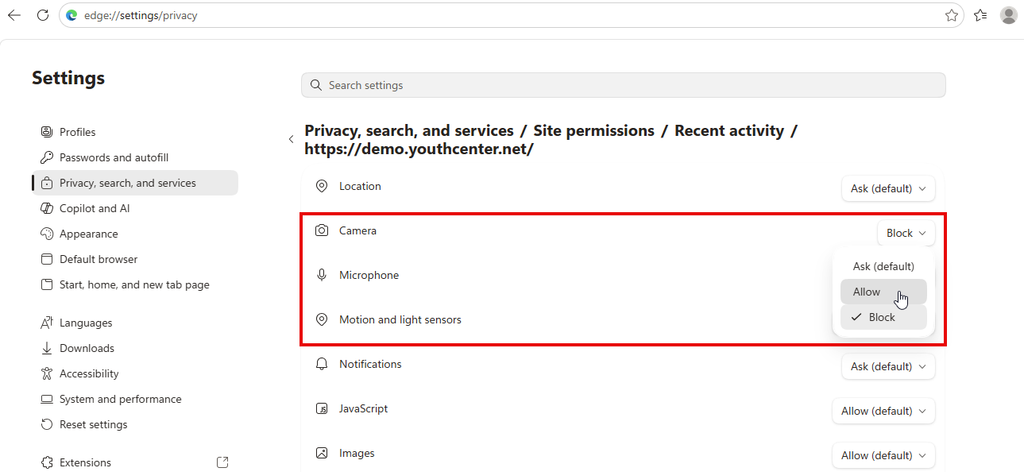
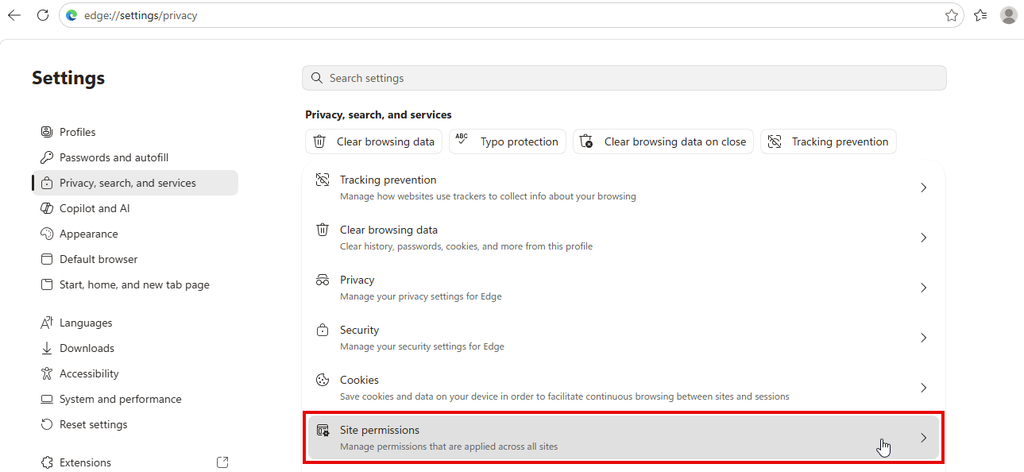
Click the three dots on the top right to get to your Settings. From here, click into Privacy, Search, and Services to find Site Permissions:
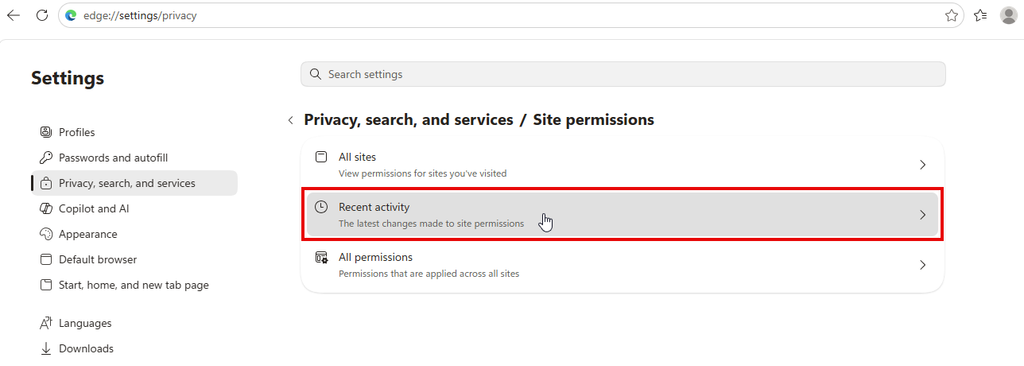
Click into Recent Activity to view the blocked camera:
Find the Camera and choose Allow. You can now close this tab and return to YouthCenter.