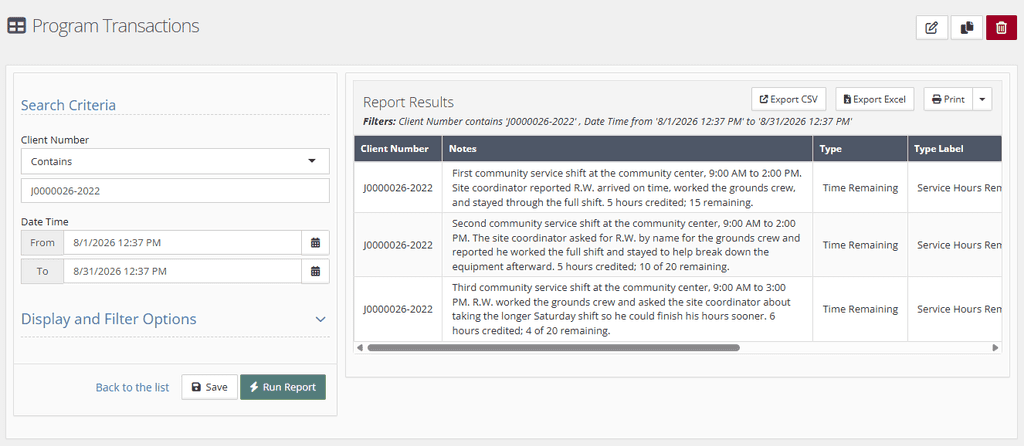
The Transactions and Daily Point Tracking features can be used to monitor time-based Programs (such as community service or restitution) or to support point-based systems in Detention or Residential settings.
To see it in action, review this webinar.
Adding Points/Transactions to a Program #
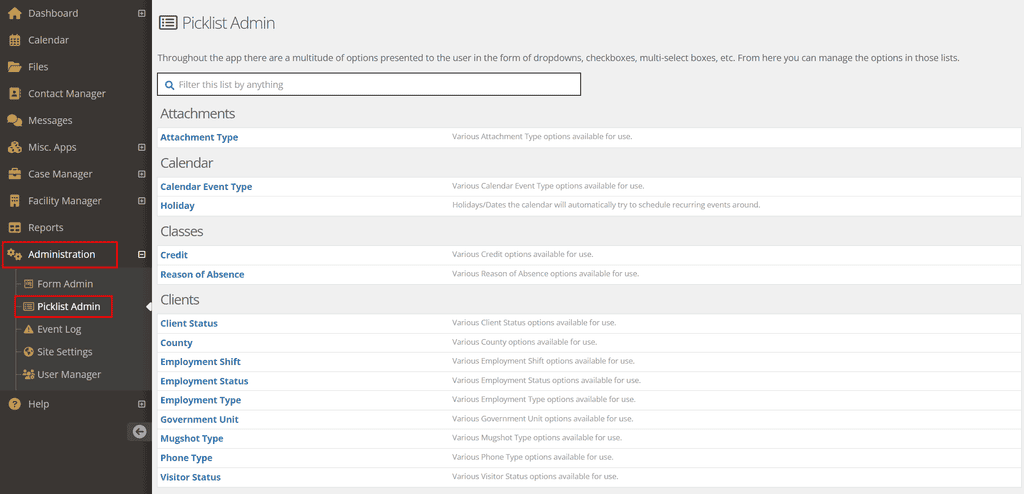
To find Programs, click into the Administration application and choose Picklist Admin.
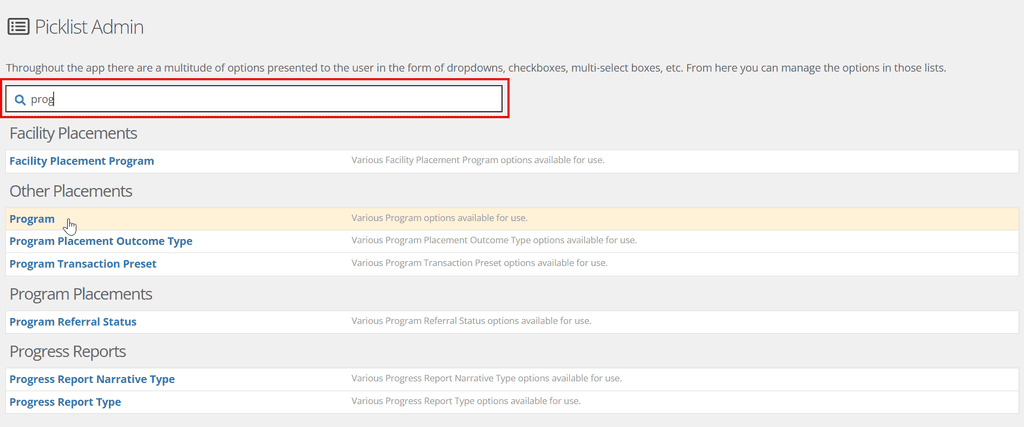
Search or scroll through to the list to find Program and click into it:
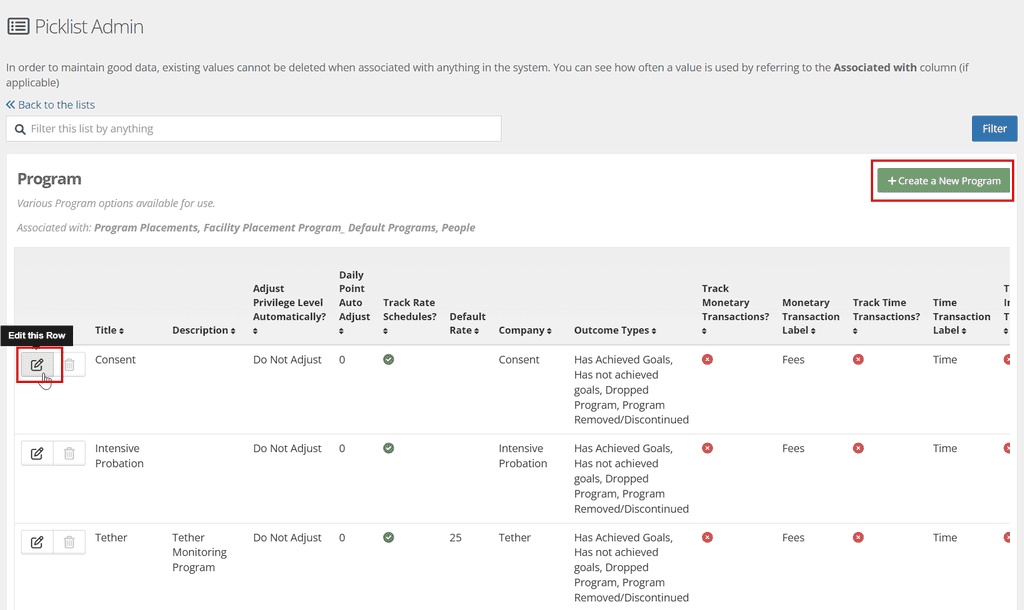
Once you see the Program screen, search for the Program you need to edit or add a new one. Use the pencil/notepad icon on the left to Edit or the green + Create a New Program to make a new listing:
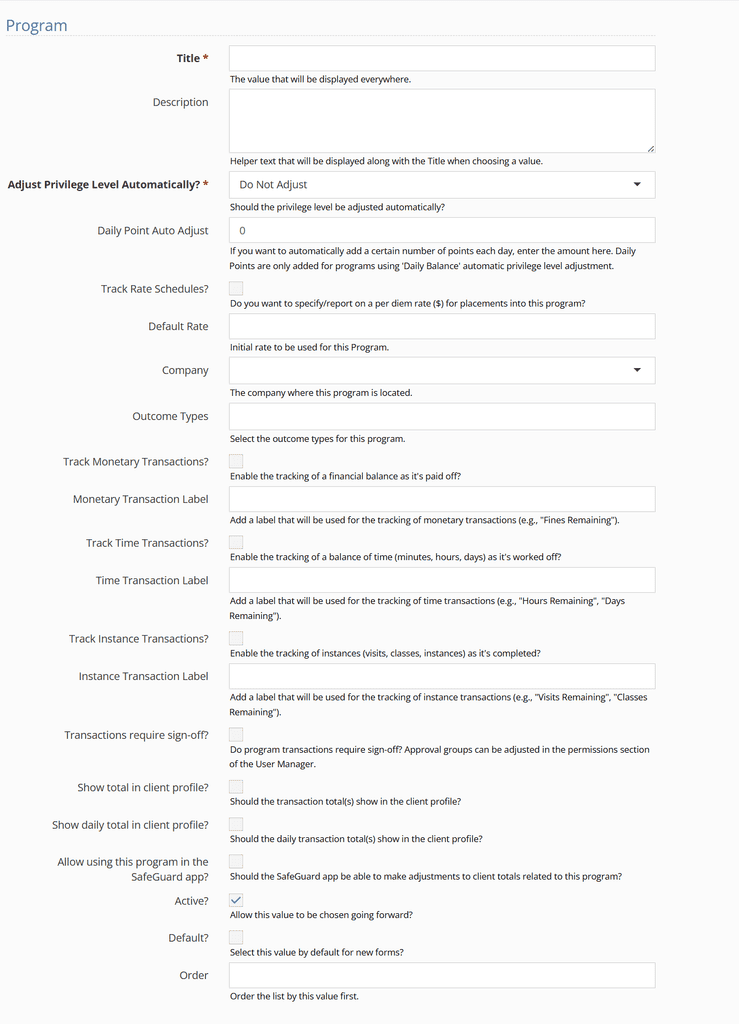
The Program setup page has many options for customizing your Program Placement. Read on to see how those options are used for Privilege, Points, and Transactions.
Privilege Level Adjustment #
Points can be attached to Privilege Levels. If you plan on using Points, you can set the Program to affect these levels (default setting is Do Not Adjust).
You can choose to adjust based on Total Balance or a Daily Balance that increases automatically. If you choose nothing, this will default to a manual adjustment (Do Not Adjust) that allows the user to choose any value when making a transaction:
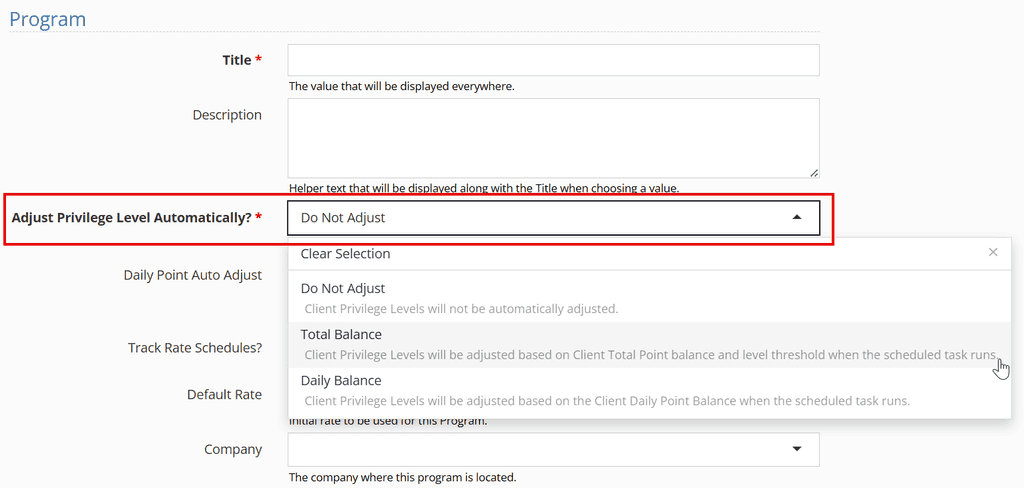
Please note: Clients can only go up in privileges. They cannot go down automatically to prevent negative impact on other areas, such as commissary.
Labeling Transactions #
Transaction labels are displayed in the Program Placements timeline and the Program Placement itself. Use them to describe the units (hours, classes, dollars, etc.) and whether the balance is added or subtracted.
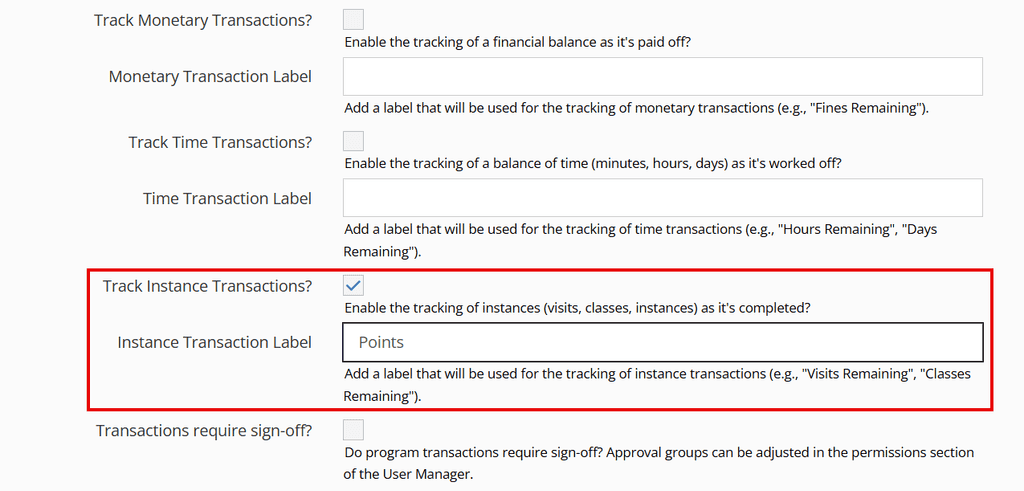
For example, “Points Accrued” is used for a points balance that keeps going up and “Sessions Remaining” is for a set number of sessions that is being worked down to zero. See the screenshot below for some more examples:
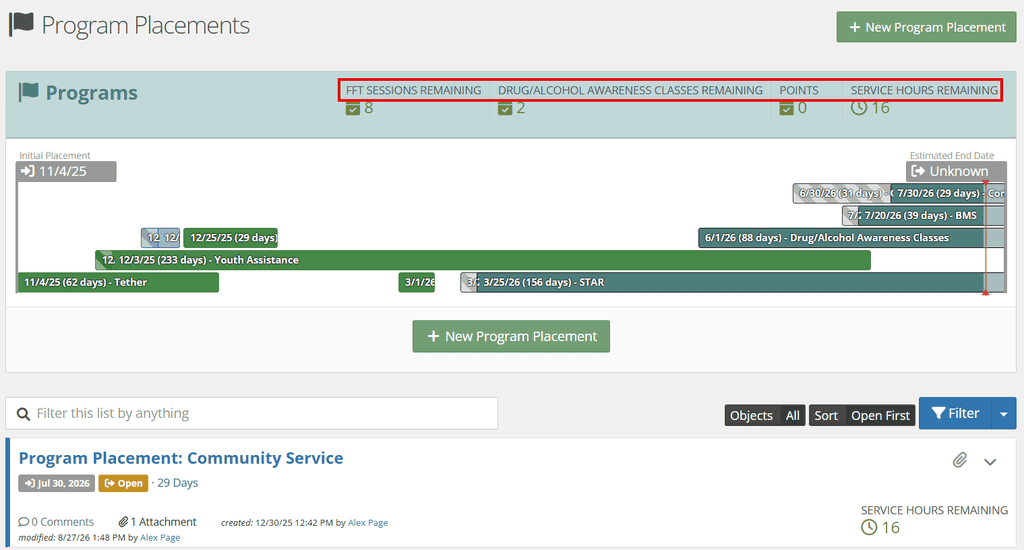
Add a label in the Program options. Be sure to also check off the box to allow YouthCenter to track the transaction type:
Transaction Approval (Sign-Off) #
If transactions require a sign-off or approval, mark this in the Program Options. This will alert specific staff to approve the balance.
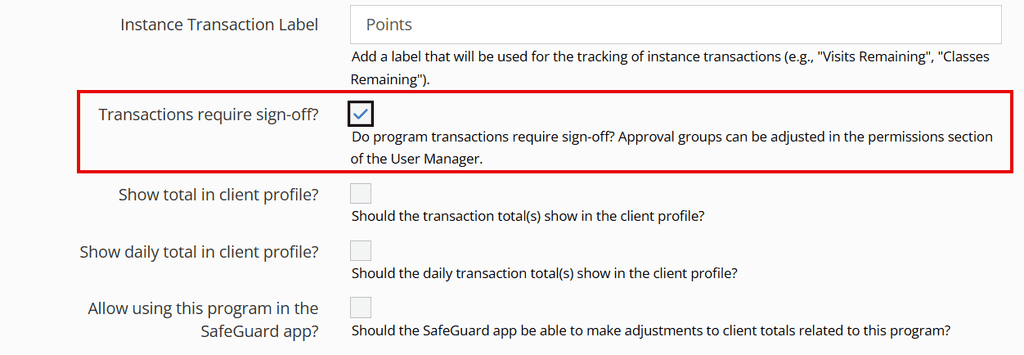
See below for managing Permissions on Transaction Approval.
Adding points to Client Profile #
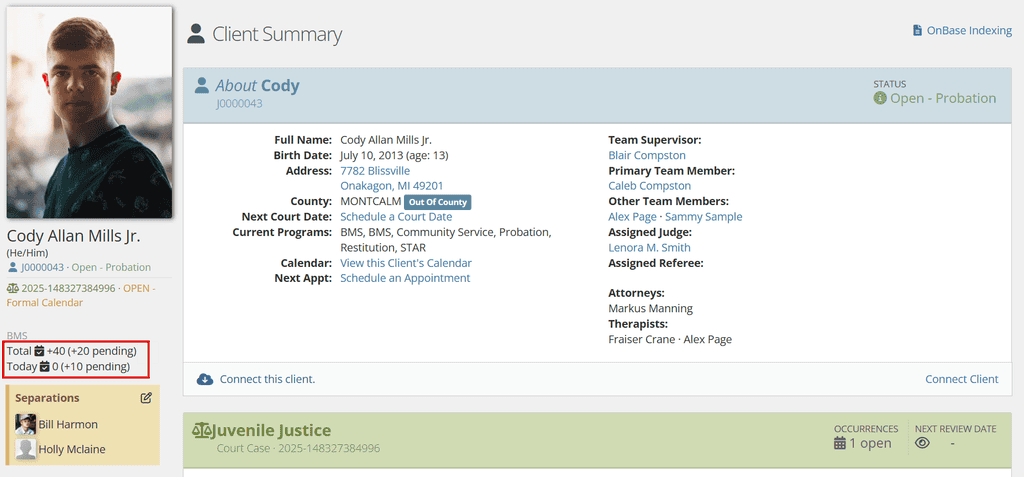
Point totals can be displayed right in the Client Profile, as seen in this sample client:
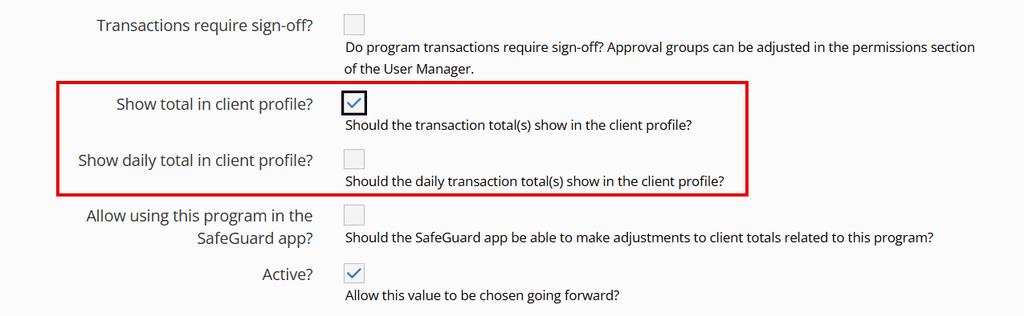
Use the Show total and Show daily total checkboxes to control this:
Adjust Transaction Balances in the Program Placement #
Once you’ve enrolled a youth into a Program that includes Transactions, you can give them a balance to work down or start adding Transactions to work up to a goal. Transactions can be negative or positive.
Click into the Program Placement itself to start adding Transactions:
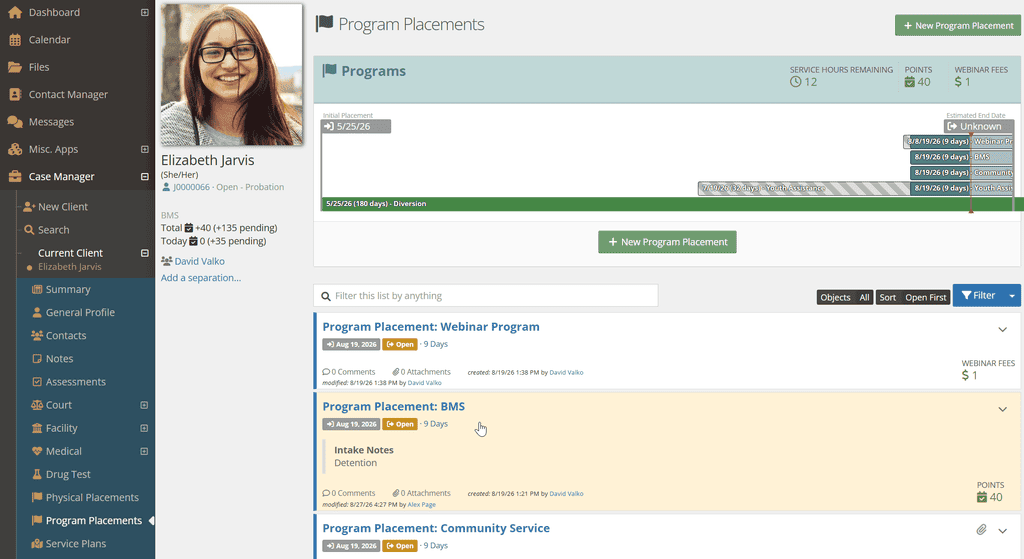
This Program already has some Transaction history. The current balance and the balance in the history are different because some Transactions are pending approval. Jump to this section to read more on Transaction Approval.
Use the green New Transaction button to add points for this specific Program:
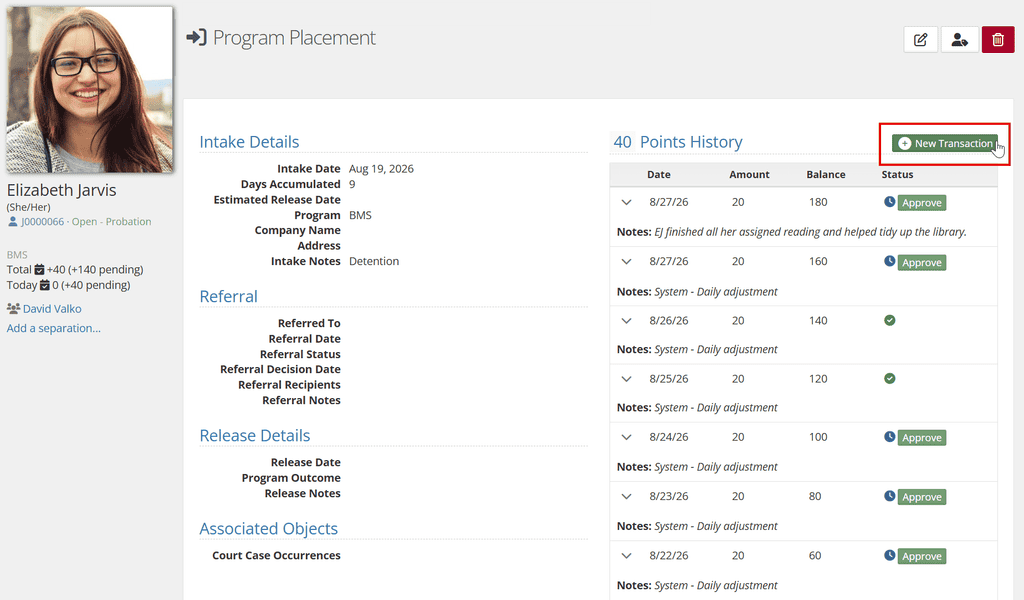
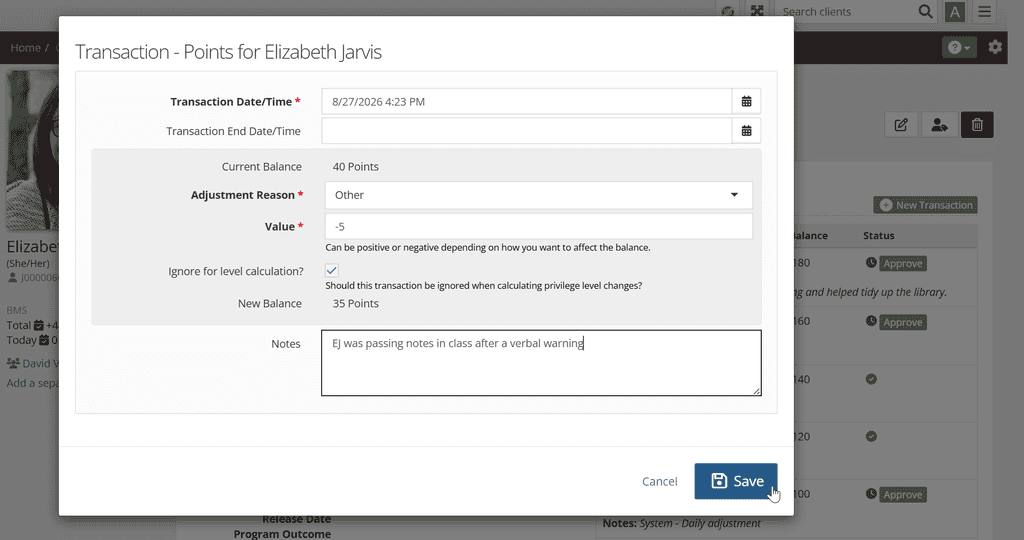
Log the date/time of the Transaction and the negative or positive adjustment. You can also add Notes:
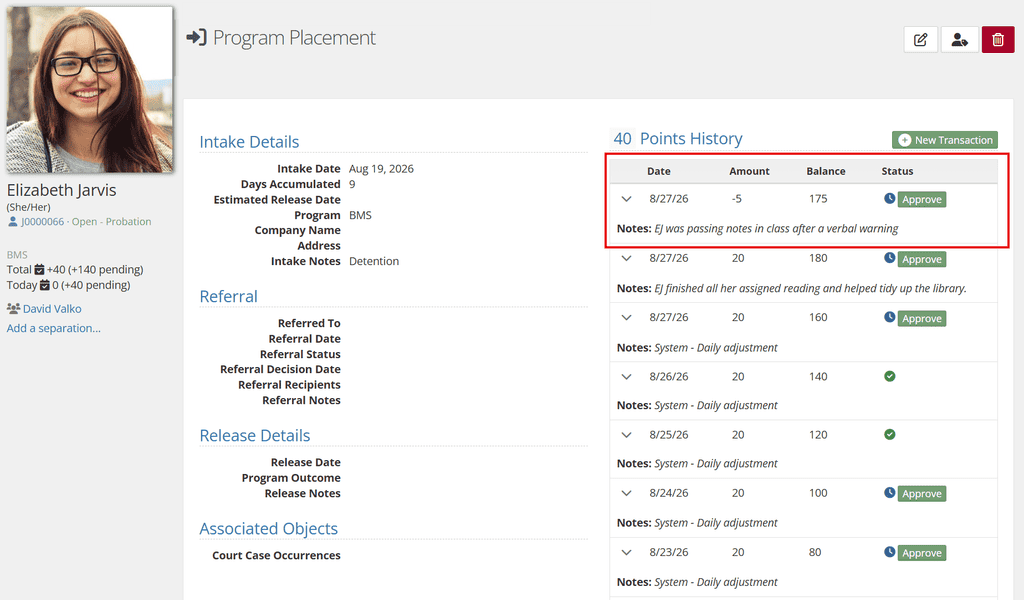
New Transactions show up right away in the Transaction log (in this case, the balance did not change since the Transaction needs approval first):
Adjust Transaction Balances in Dashboard #
You can make transactions right from the Dashboard using certain widget types. This avoids adjusting transactions inside each individual Program Placement.
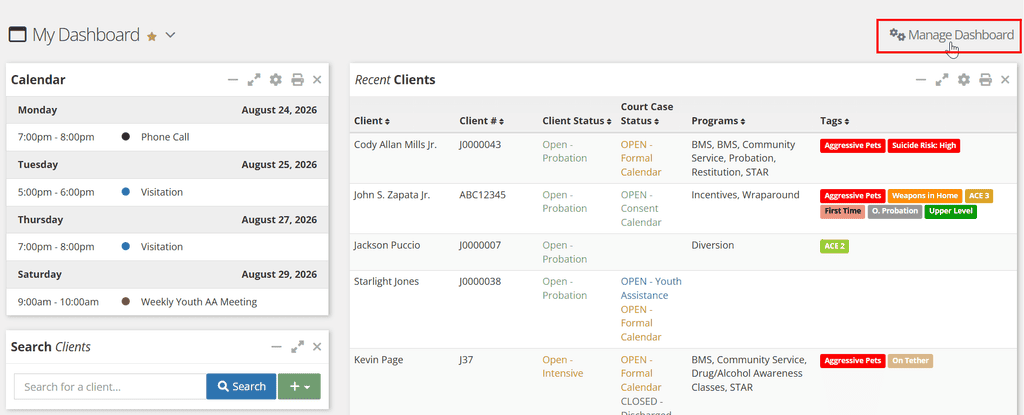
This metric can be found in several widget types – a “Clients in Placement” widget is used in this example. If you already have one, skip to this section. If you don’t, add one by clicking into the gears icon on the top right to Manage Dashboard:
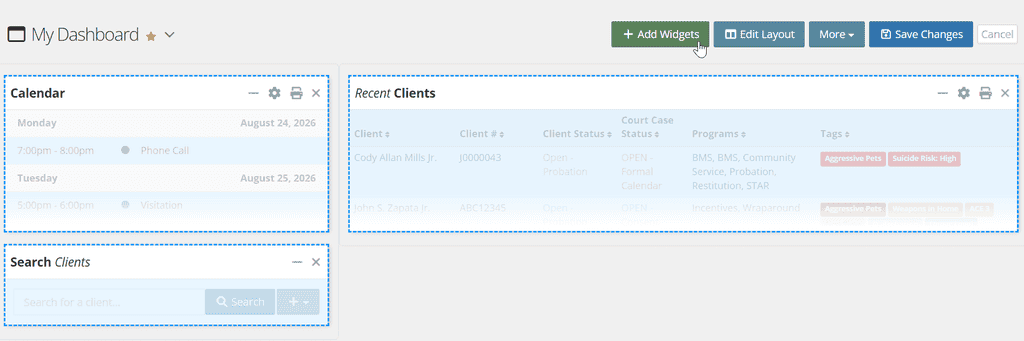
Click on the green + Add Widgets button:
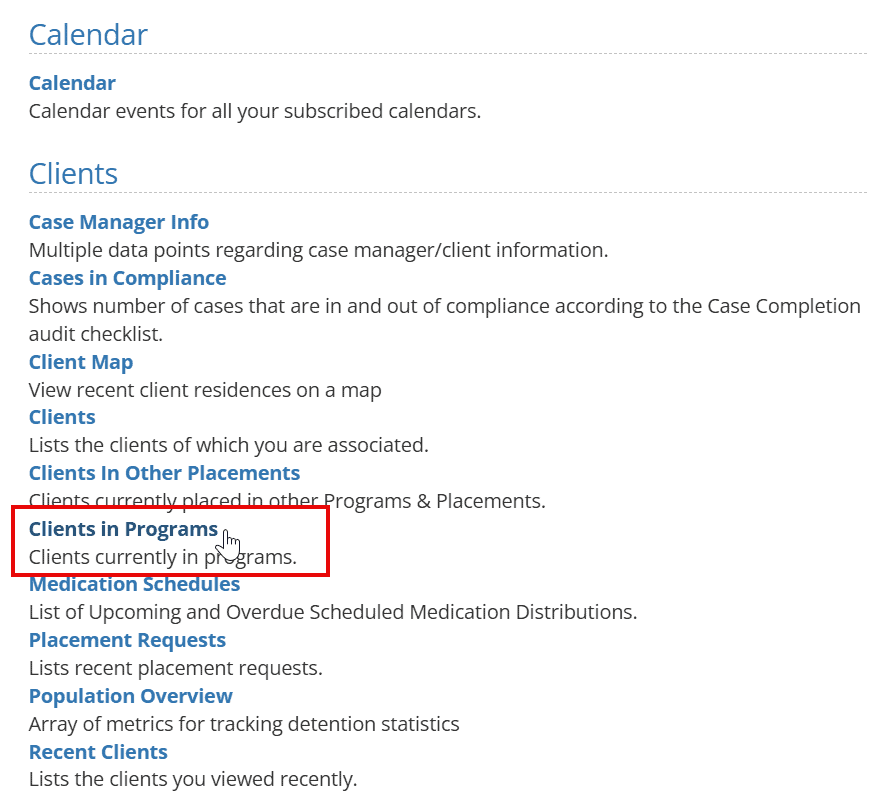
Select Clients in Programs under the Clients category, then arrange the widget as desired on your dashboard:
Widget Settings for Transactions #
Once you have your Dashboard arranged (or if you are still in Edit Dashboard mode), click into the Settings icon on the top right of the widget to edit the options:
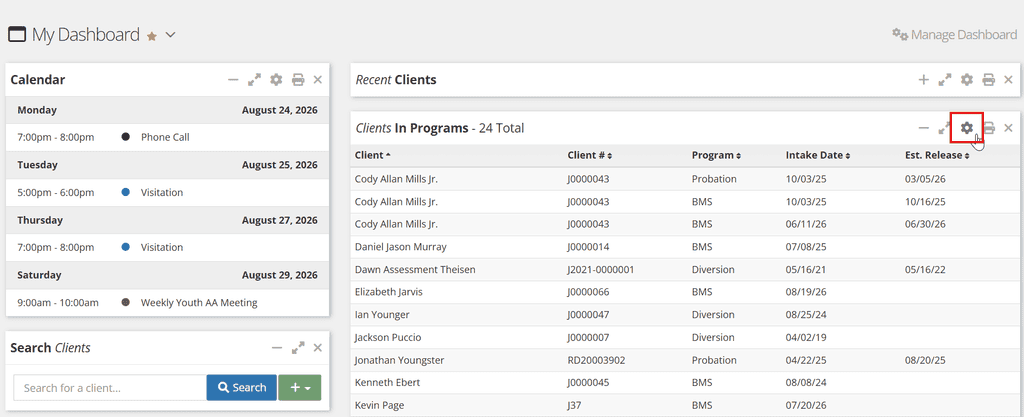
Add Placement Balance(s) and Placement: Adjust Balance(s) to allow you to make transactions in the Dashboard. It’s also useful to add Filter by Program, so the widget holds only specific clients with transactions:
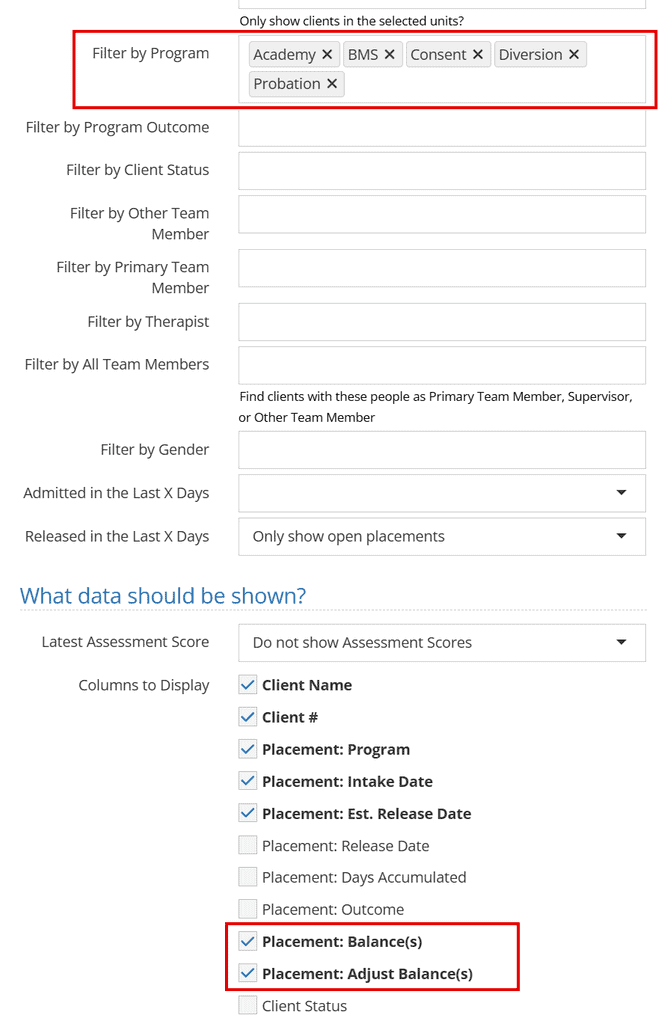
Click Apply to save changes. Now you can access the Transactions for these specific programs by using the green buttons:
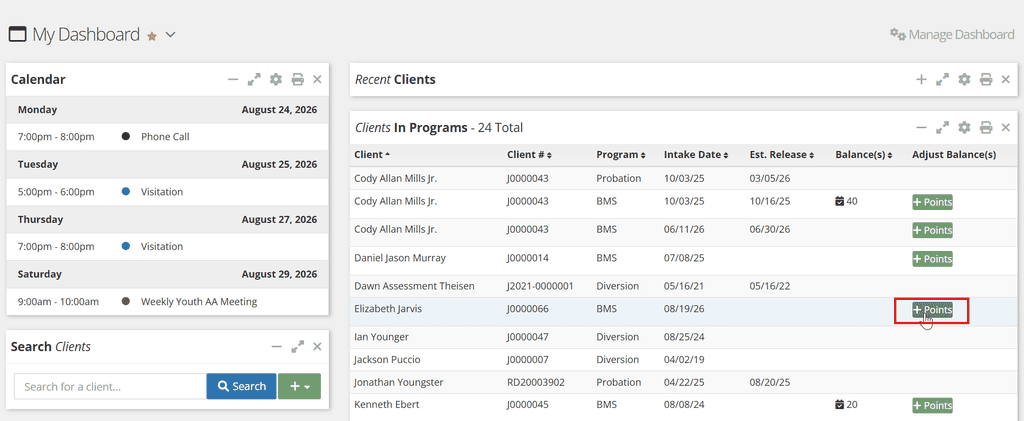
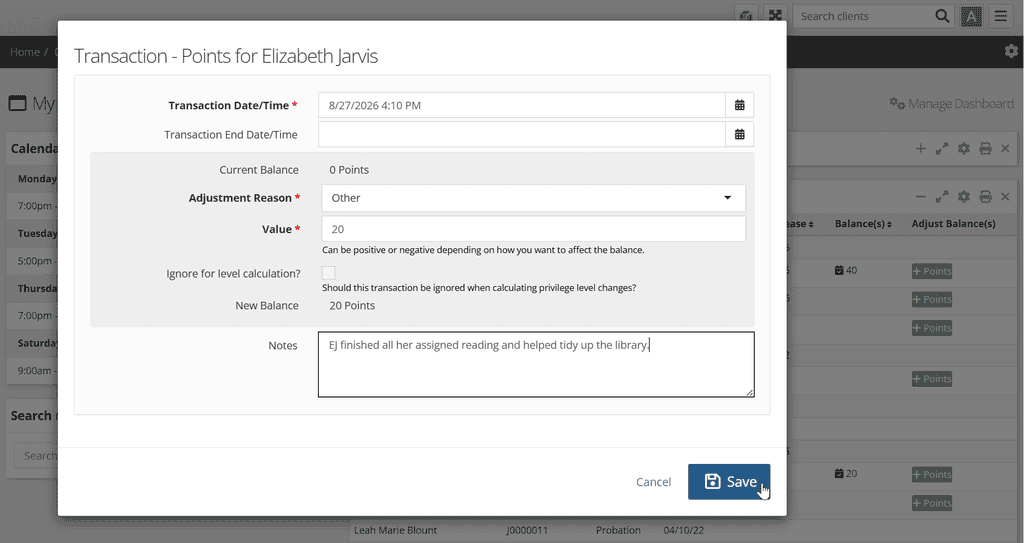
When using the green button for + Points, a box appears with options for that Transaction. This allows you to calculate a new balance, confirm the date/time of the transaction, and add Notes just like the Transactions adjustment in the Program Placements:
Transactions Presets (Default Transactions) #
Some groups have points/transactions that are regularly used within their programs. These can be predefined and accessible in Program drop-downs.
To create these, go to the Administration application and choose Picklist Admin. Search or scroll to the item “Program Transaction Preset” and click on it to make changes:
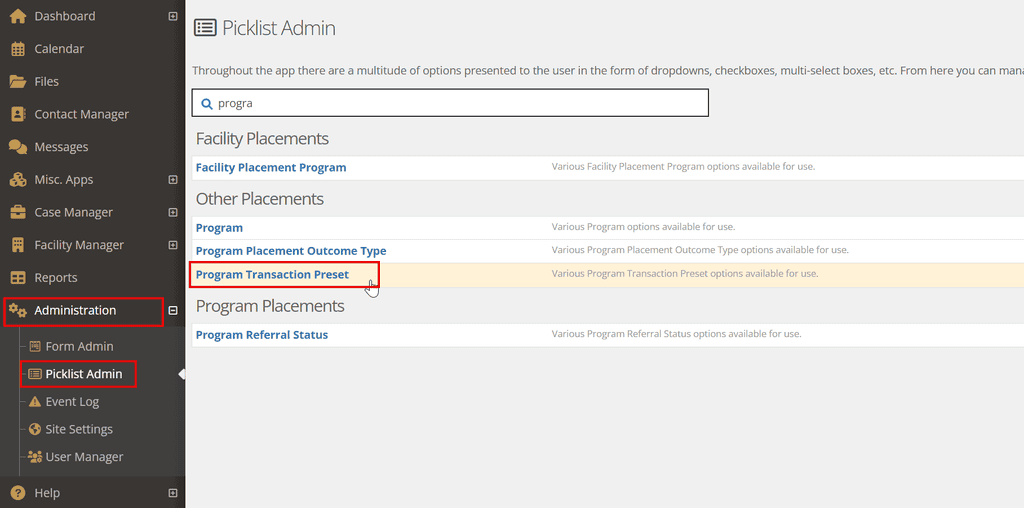
Use the green + Create a New Program Transaction Preset button or edit an existing item:
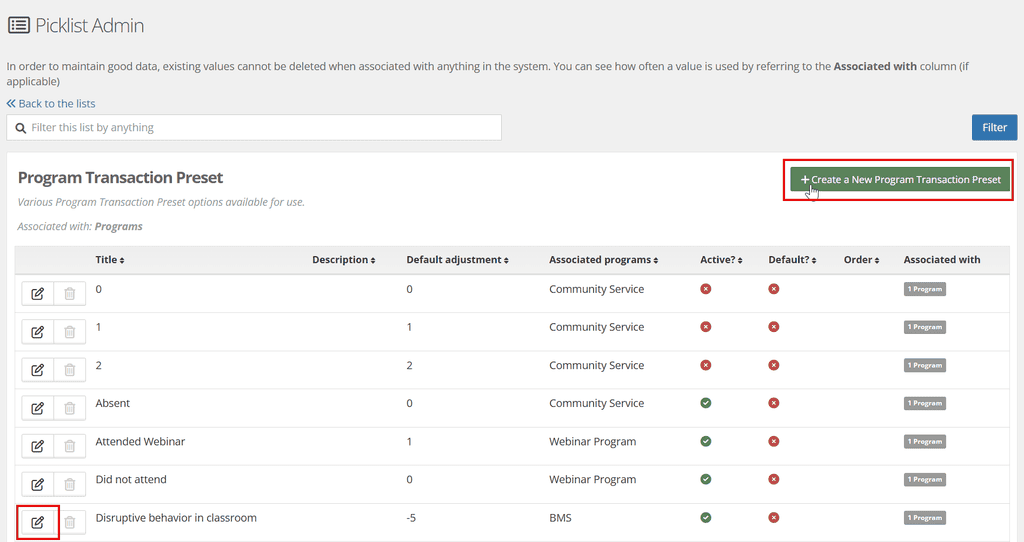
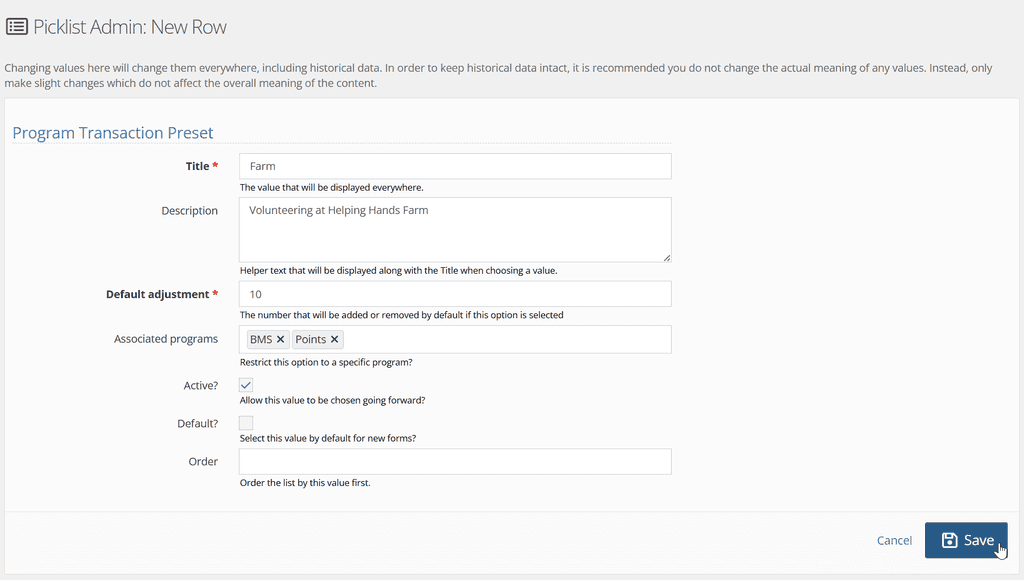
Fill in the fields below to match your needs:
- Title – how should this transaction preset look for your users in the drop-down menu?
- Description – helper text that goes along with the Title in the drop-down menu.
- Default Adjustment – what is the default amount (negative or positive) that is applied when this preset is chosen?
- Associated Programs – which Programs does this Preset apply to? Note: if left blank, the option will be available across all programs.
- Active – is this preset currently available?
- Default – do you need this option to appear first in the items for Adjustment Reason?
- Order – do you need the options to have a custom order? Note: if left blank, options will appear in alphabetic order.
Once your changes are Saved, your option will appear as an available Adjustment Reason when a new Transaction is logged. You can see the Description/helper text and the amount of points that will be applied for this Reason:
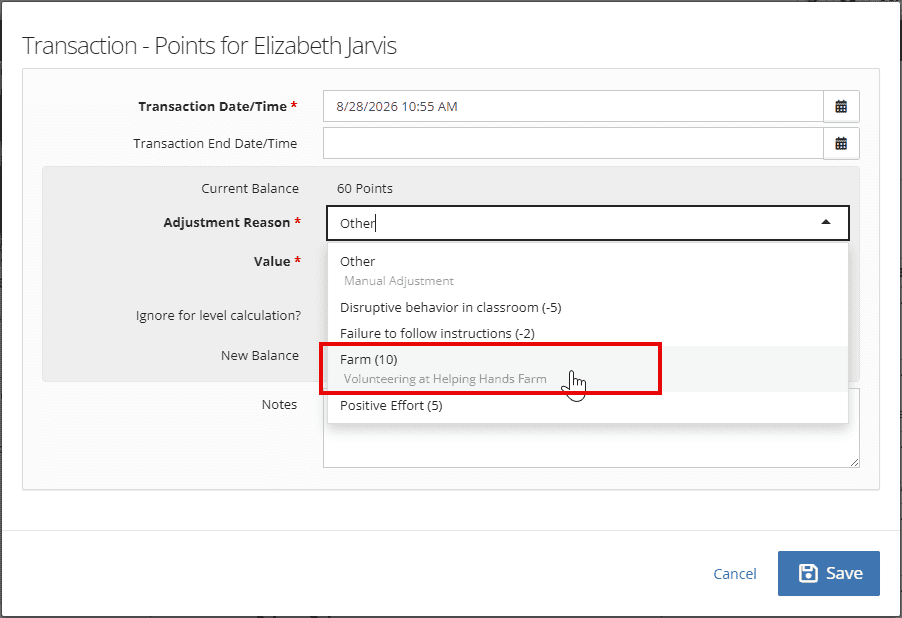
If you need to adjust more or less points than the Preset, choose a Manual Adjustment instead (any Reason that does not have a number value in the title).
Permissions & Transaction Approvals #
You can mark certain Transaction types as needing Approval with the Transactions Require Sign-Off setting. This pushes the Transactions to “pending” until the appropriate user group approves them. See above for details on this setting.
Transaction Approval is controlled by Permissions and User Groups. To add groups that can do sign-offs, navigate to Administration and find User Manager. From here, click into Permissions:
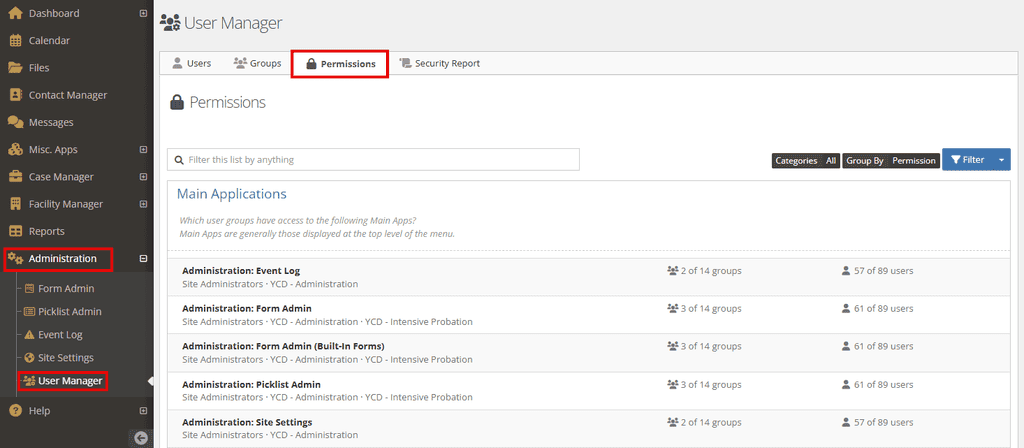
Search for “Program Transaction: Approval” in Permissions and click into the item to Manage:
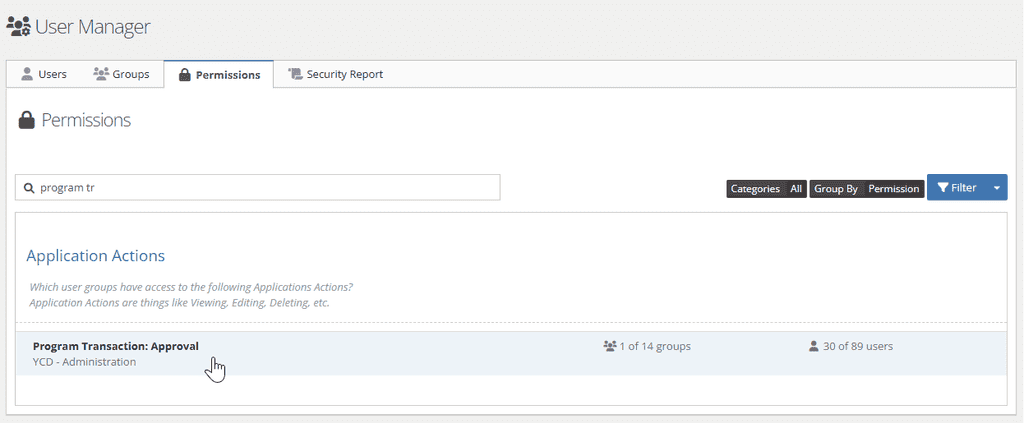
You’ll be able to see the current User Groups who have this Permission and add as many as you need. Save to apply changes:
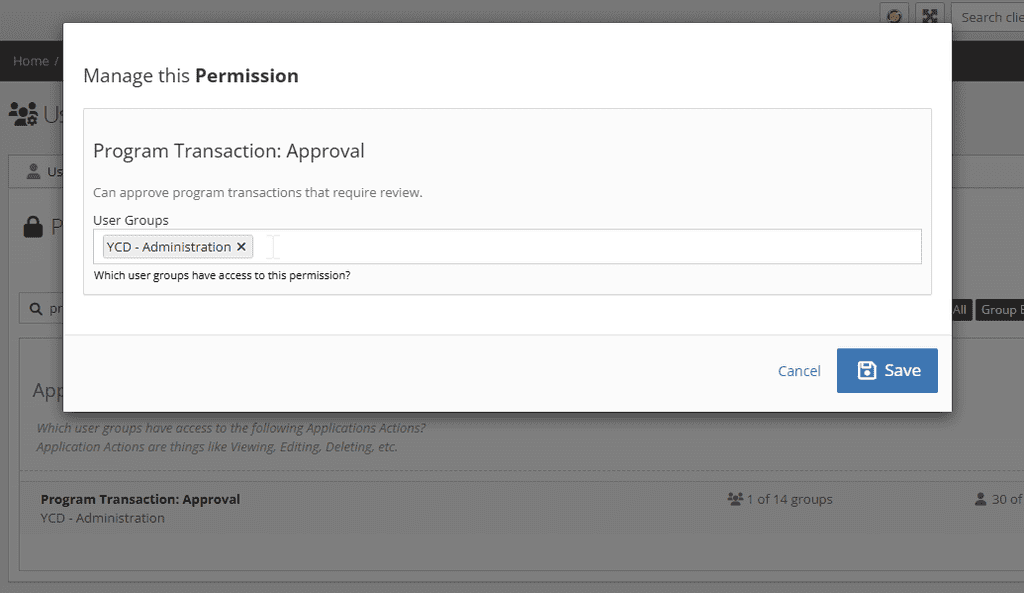
The newly added User Groups are immediately reflected in the Permissions area:
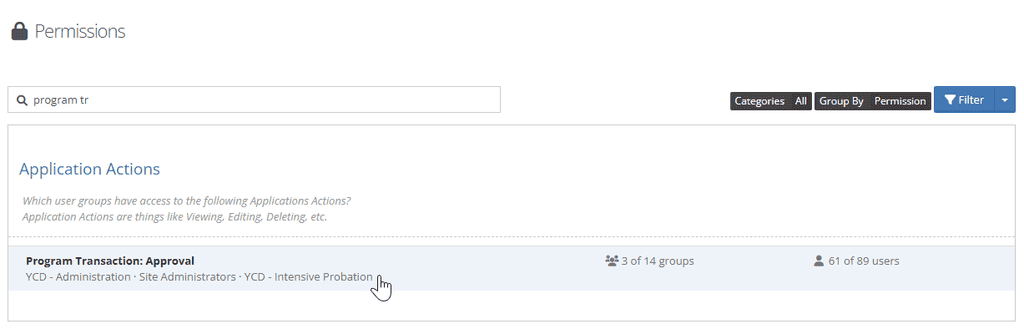
Users who belong to these chosen groups can start approving Transactions right away.
How do I know that transactions need approval? #
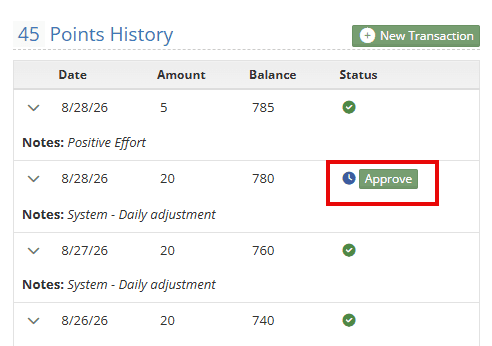
Transactions that require sign-off will be Pending until they’re approved. Approved transactions have a green check mark and pending transactions have a pending blue clock icon and the Approve button (for approvers only):
If a user doesn’t have permissions to approve a transaction, they’ll receive a brief notification when they make the transaction:
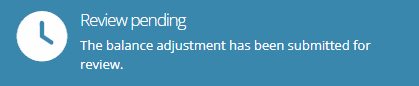
Users who can approve transactions will be notified in many ways:
- Notification Bell – transaction approvers will receive a notification here. Click on the bell for more details and the link to approval.

- Email – transaction approvers will receive an email notification to sign off on the transaction.
- Dashboard widget – use the steps outlined here to create a widget that displays transactions (filter this by Programs that need transaction approval)
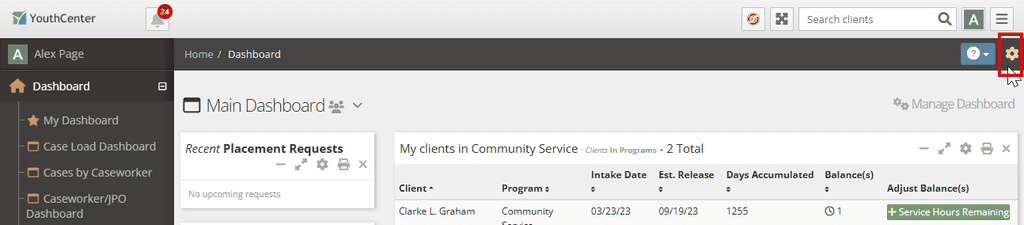
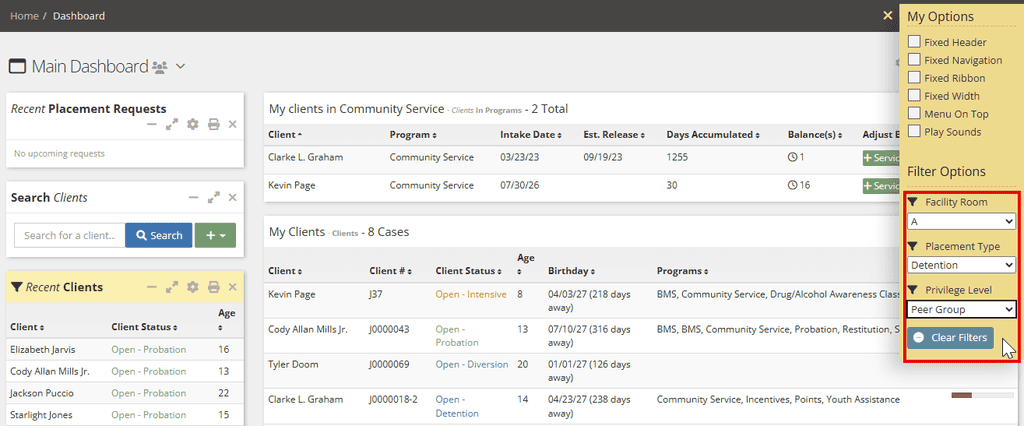
- Global Filter – this can narrow down items by Facility Room, Placement Type, and/or Privilege Level. Filtering by Privilege Level can help find transactions that need approval, especially when there is a large population or crowded dashboard. The Global Filter is located in the top right corner – click the yellow gear icon. Any items that are affected by an active Global Filter are highlighted in yellow:
Reporting on Transactions #
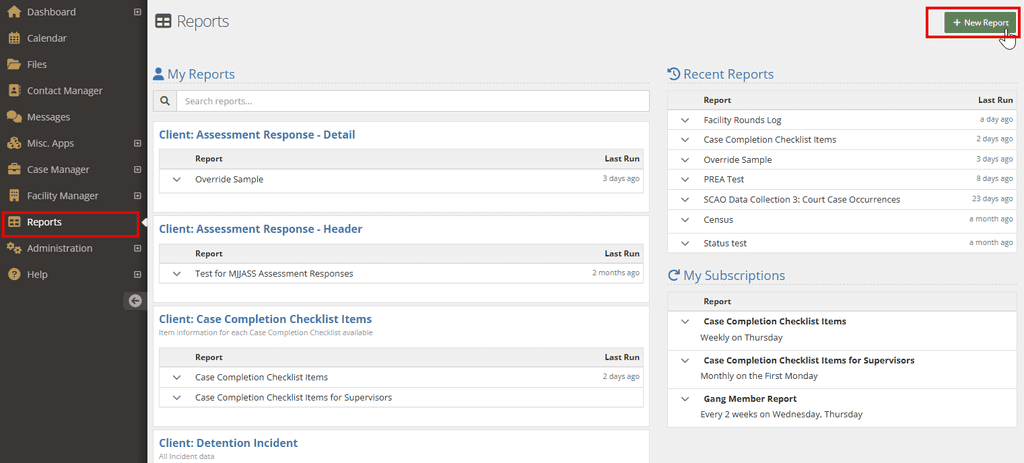
Transaction Reports in YouthCenter can help to see overall trends in your points and transactions. Click into the Reports application and then click the green + Add Report button to get started:
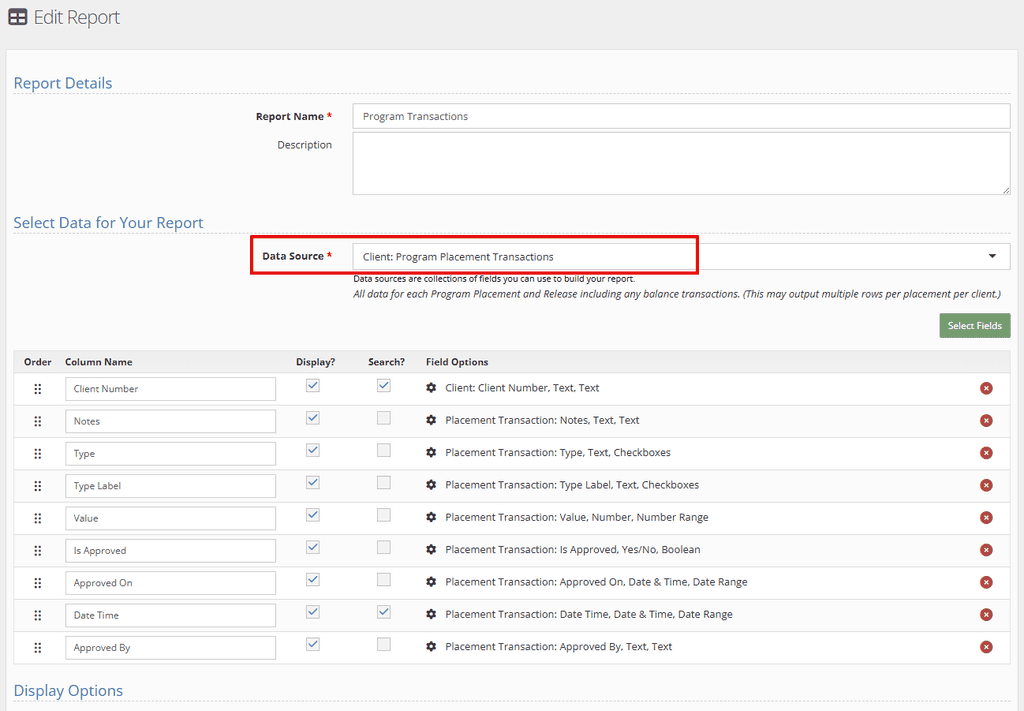
Title your report and choose “Client: Program Placement Transactions” as the Data Source. Choose any Data Fields as needed. See below for an example of a report based on Transactions:
Click Save & View to see your report display page, then Run Report. Here’s an example of those report results: