
If a client’s image needs additional detail added to it, or if you wish to remove a Client Image from the YouthCenter system, you can do so through the General Profile application.
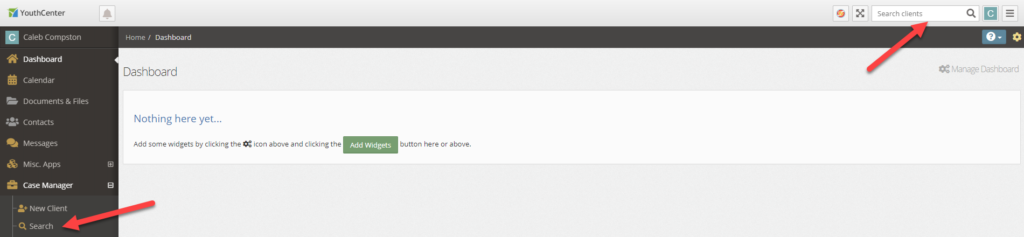
Granted that you have proper permissions to edit or delete a Client Image, you must first select a client through either the Search application under the Case Manager application or by using the Search Clients search bar in the top right of the screen.
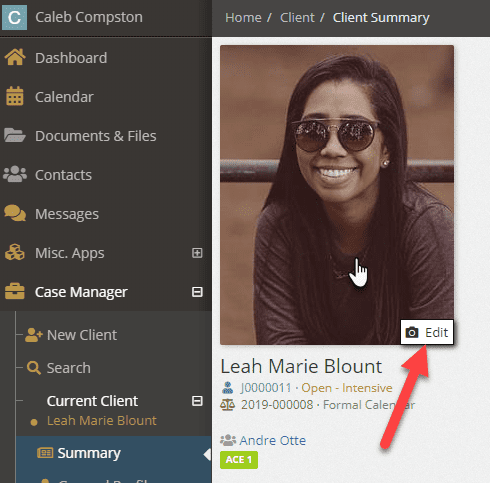
Once a client has been selected, hover over the client’s image and select the edit button.
Editing a Client Image #
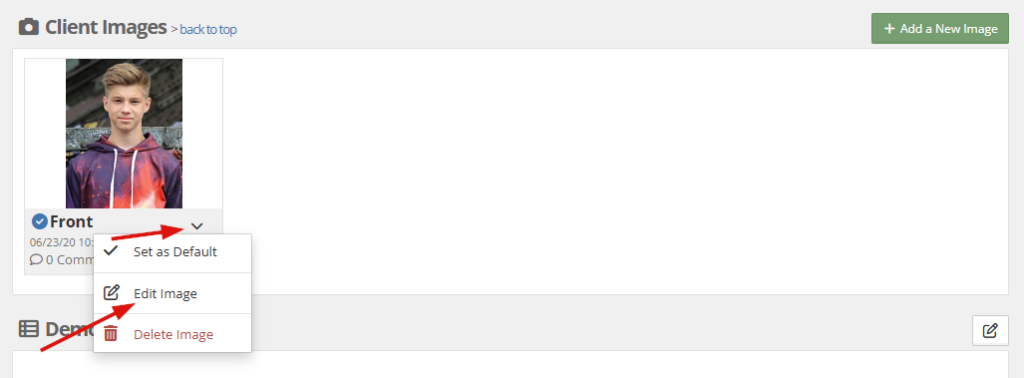
Select the down caret next to the Client Image you wish to edit and select Edit Client Image from the drop-down:
Make any required changes, and then press the blue save button.
Deleting a Client Image #
Select the down caret next to the item you wish to delete and select Delete Client Image from the drop-down. A confirmation dialog will appear confirming you wish to delete a Client Image. Confirming you wish to delete a Client Image will destroy that Client Image permanently from the system.
Note: All of the above functionality can be limited by your administration team. If the described functionality does not appear to be present, contact your administration team to verify you have the proper permissions.
For more information on adding a Client Image, please see the documentation shared here.
For more information on making Client Images square, please see the documentation shared here.