The Medical application is where you may store medical insurance information, attachments, and custom forms related to the medical care of your client.
The medical application can be found when you have selected a client and opened the Medical menu item as shown.
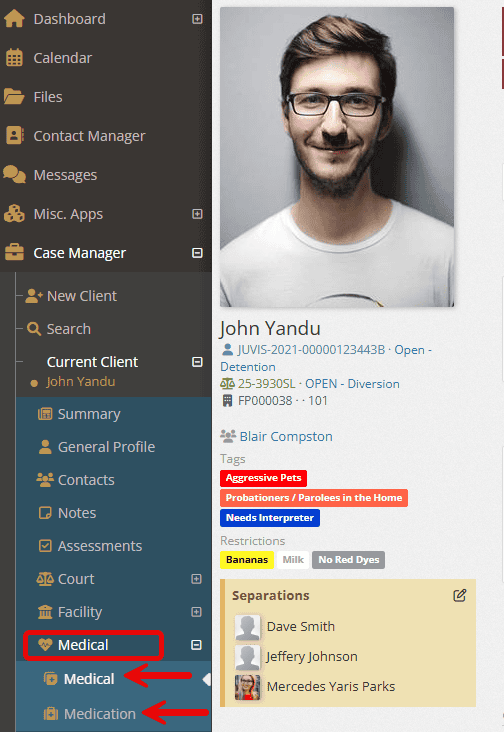
The Medical application is broken up into 3 sections:
- Medical Insurance
- Medical Attachments
- Custom Forms and Reports
1. Medical Insurance #
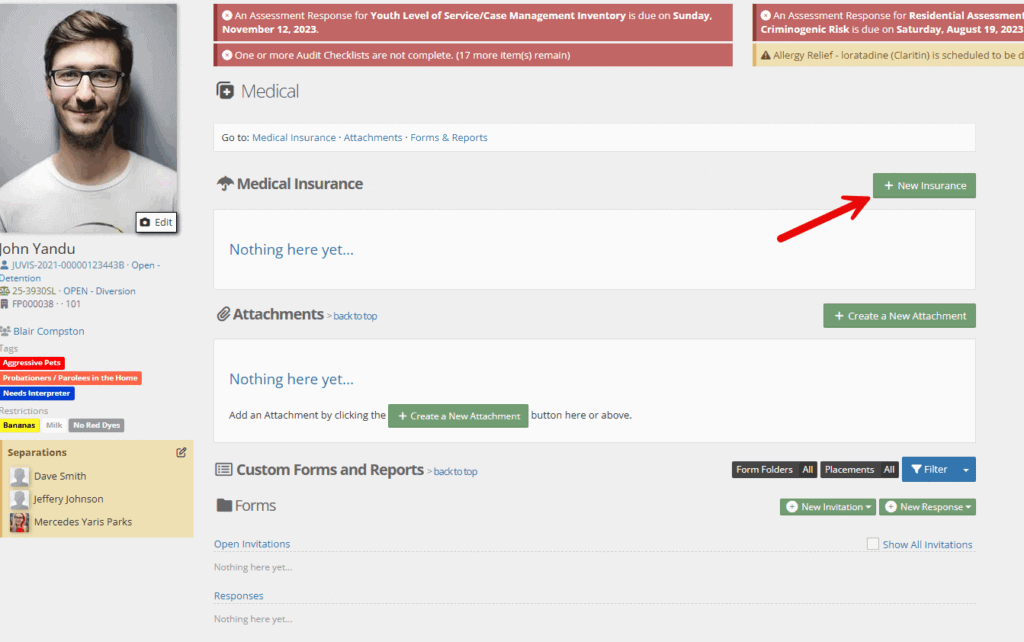
To add an insurance provider and associated cards to the client, select the “New Insurance” button.
This will bring up the Insurance Editor as shown:
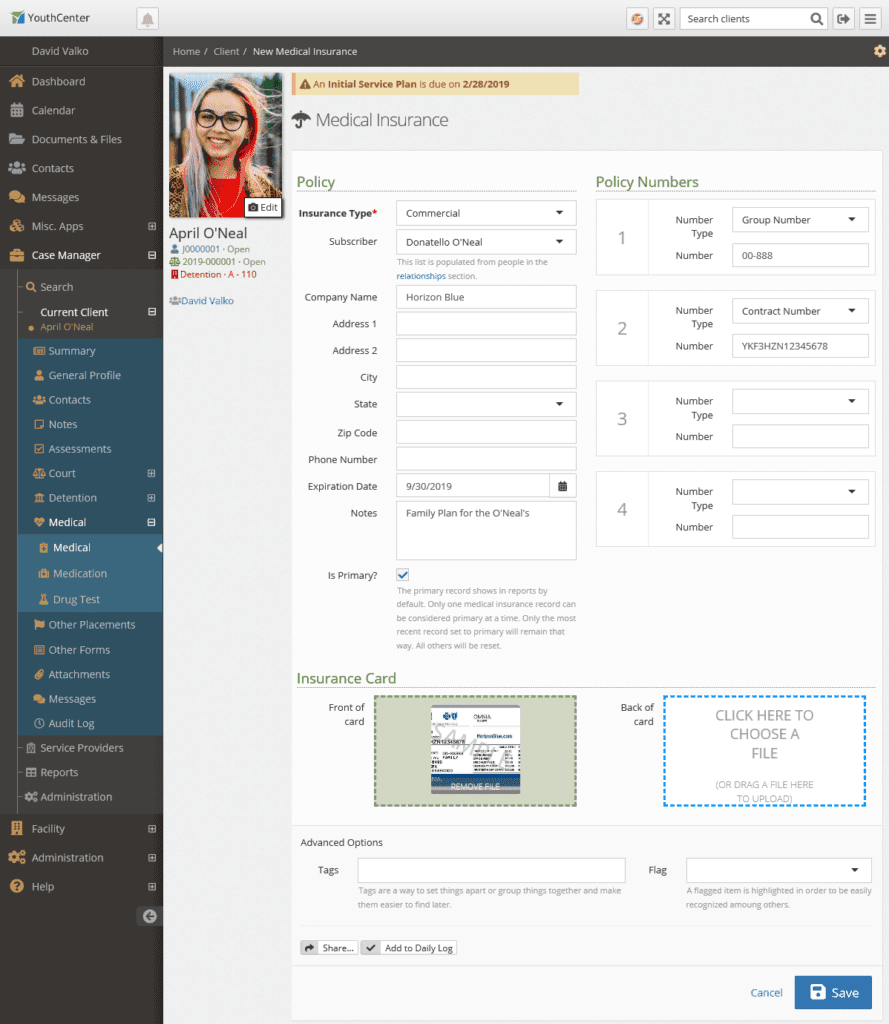
Add insurance information as required by your organization to the fields provided. You may add a scan or photograph of the insurance card front and back for reference as well.
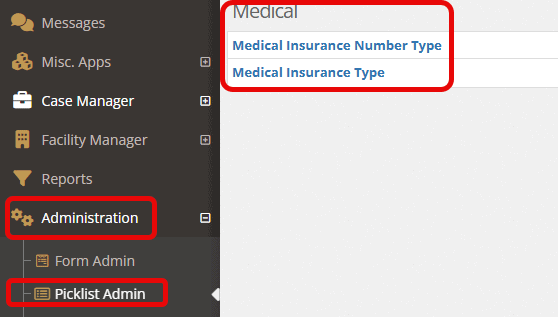
Administrators may customize “Insurance Types” and “Number Types” by opening the “Administration” tab followed by “picklist admin.” Search for “medical.”
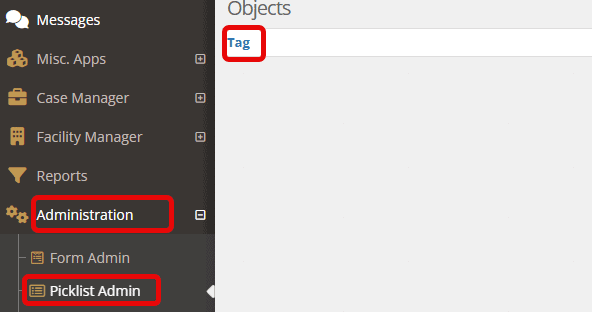
The Advanced Options allow you to tag the Medical Insurance object and flag its importance. Administrators may set up custom tags for the Medical object by going to the “administration” tab, choosing “picklist admin.” Search for “tag” and select.
The Share and Add to Daily Log options are also available with the Medical Object to allow for notifications to others of the Medical activity.
When complete, save the Insurance Object using the save button at the bottom of the form.
Once saved, you will see the details of the Medical Insurance as shown below.
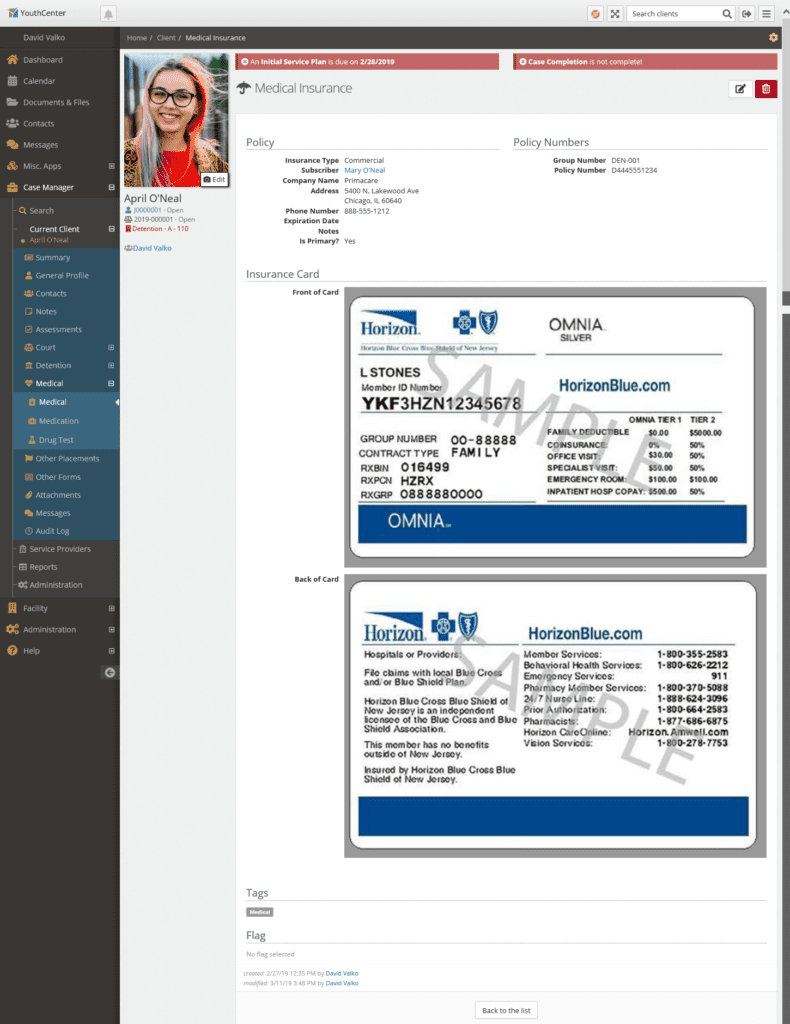
You may add more than one insurance if needed. The insurance selected as primary will be shown at the top of the list and include a flag.
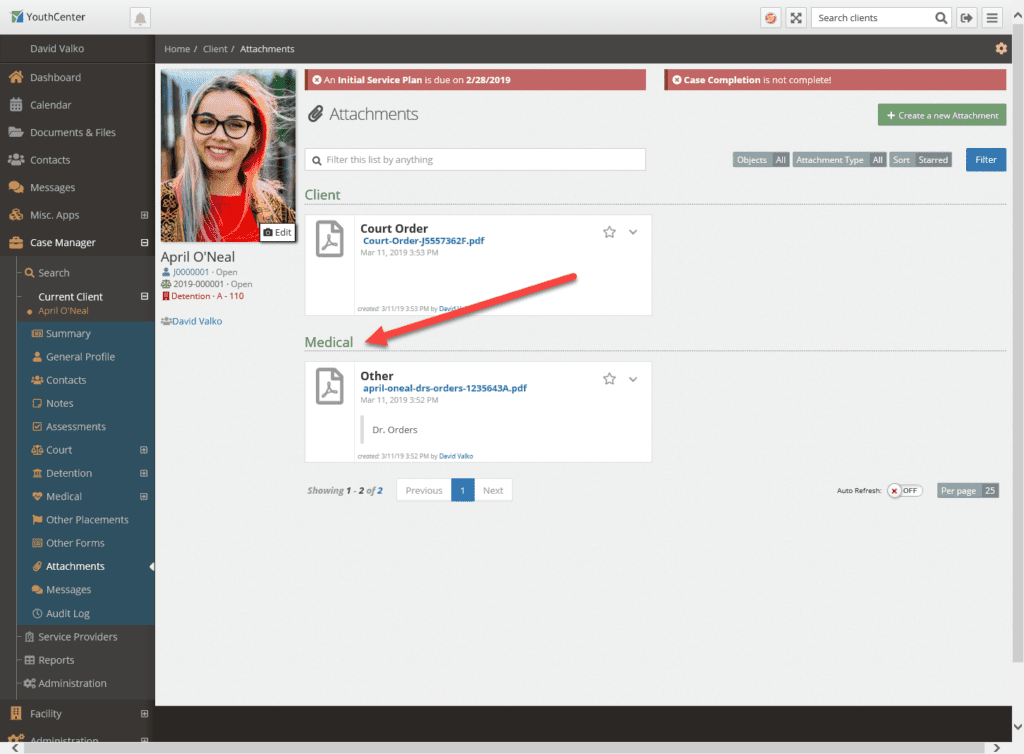
2. Attachments #
Medical Attachments are intended to be associated medical-related items as prescriptions, medical orders, etc., related to the client. These could be scans in PDF, JPGs, or Word Documents. To add a medical attachment, use the “+ Create a New Attachment” button as shown:
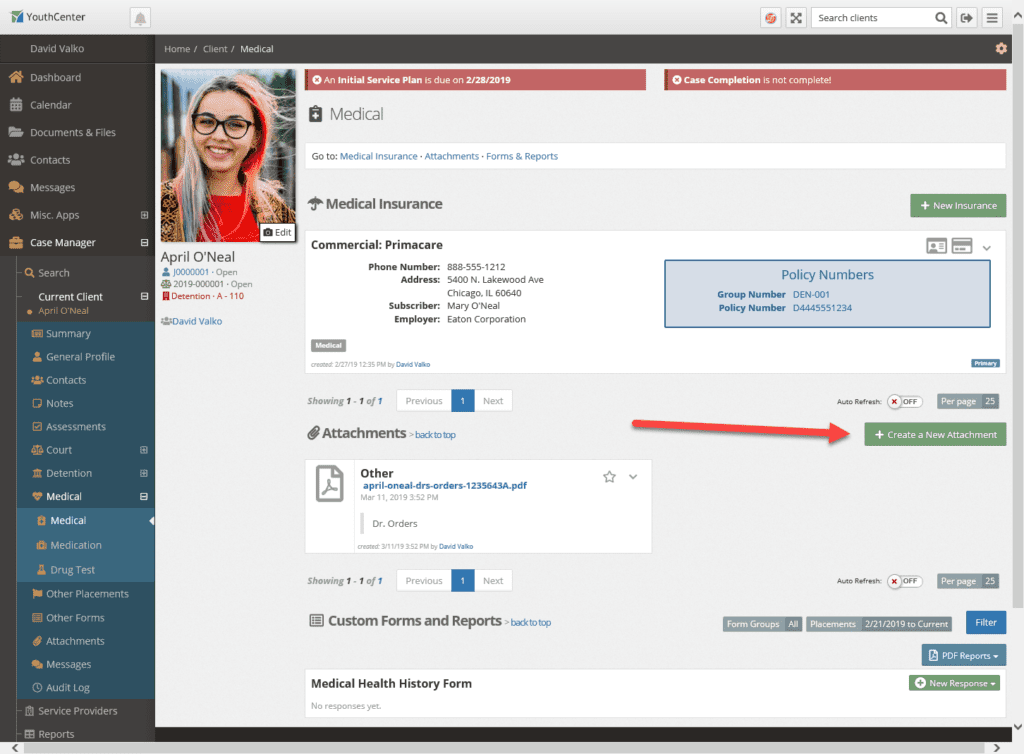
Once added, Medical attachments will also show in the “Attachments” menu tab, under the medical grouping:
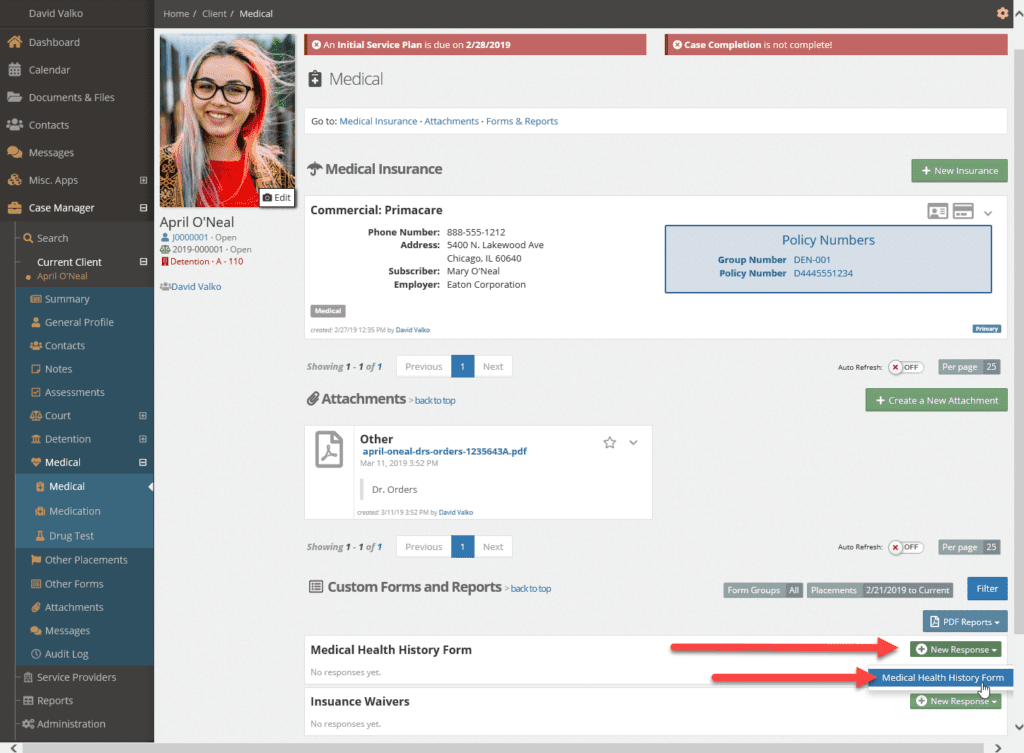
3. Custom Forms & Reports #
Form builder forms that are associated with the Client Tab: Medical will appear below the attachments on the Medical Page. To add a response to a Medical Form, use the “+ New Response” dropdown to show the available forms and select the form you want to fill out.
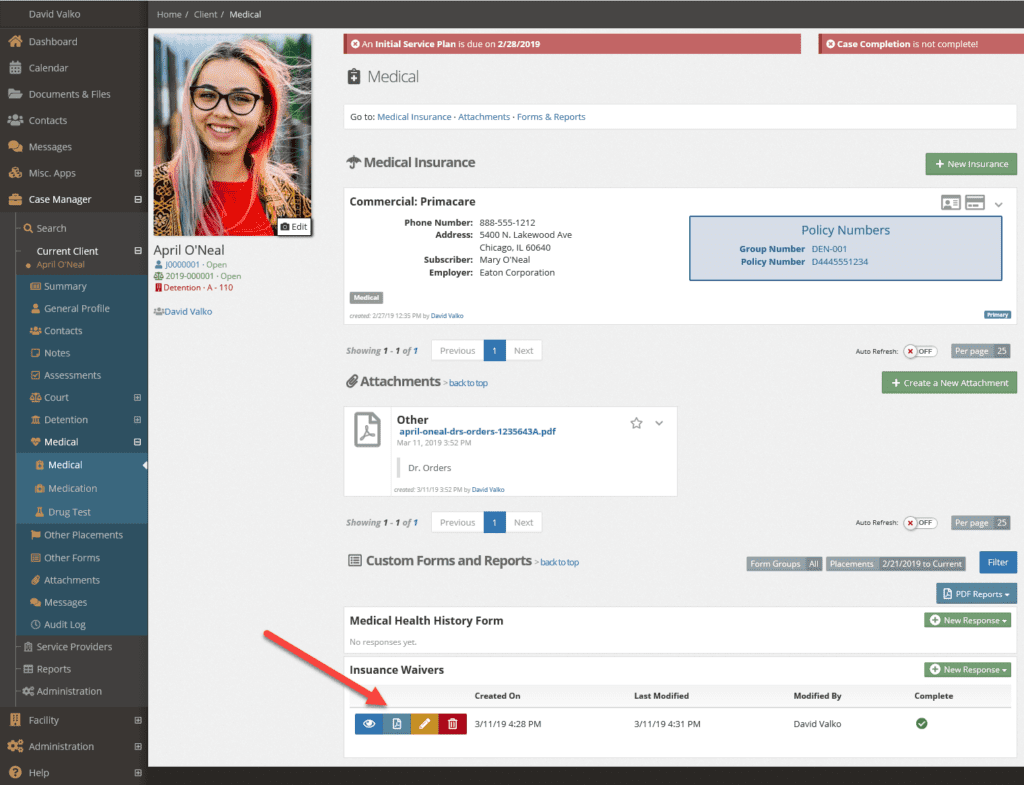
Once you’ve filled out a form, the response will show up in the listing under the form group as shown below. Depending on the setup of the form and your permissions, you will have options to view, create PDF, edit, or delete the form response using the buttons shown:
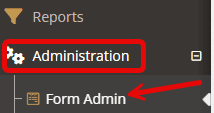
Administrators can add and edit forms by opening the “administration” tab followed by “form admin.”