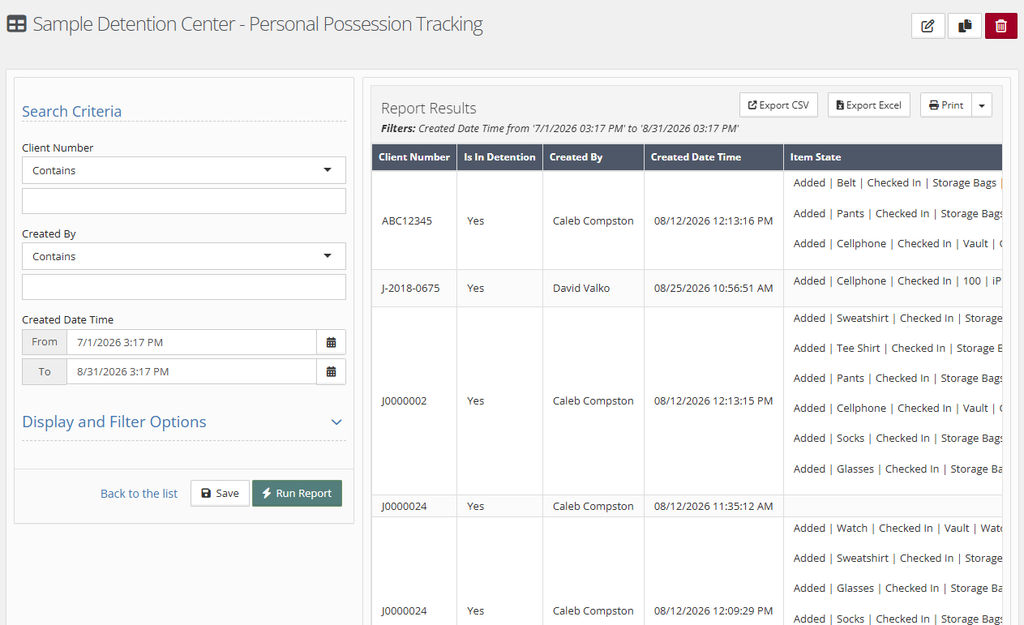
This feature allows for a seamless tracking of personal possessions to log the type of item, location, and status (checked out, checked in, or released). You can require signatures to sign out items, tag items with QR Codes, and even add personal possession events to your Audit Checklist.
This article covers how to set up and manage the Personal Possessions sub-application for Admin users. If you’re looking for a how-to guide on using the Personal Possessions area, check out the linked article HERE.
Setting up Personal Possessions in Picklist Admin #
Customize the options for Personal Possessions per the needs of your organization.
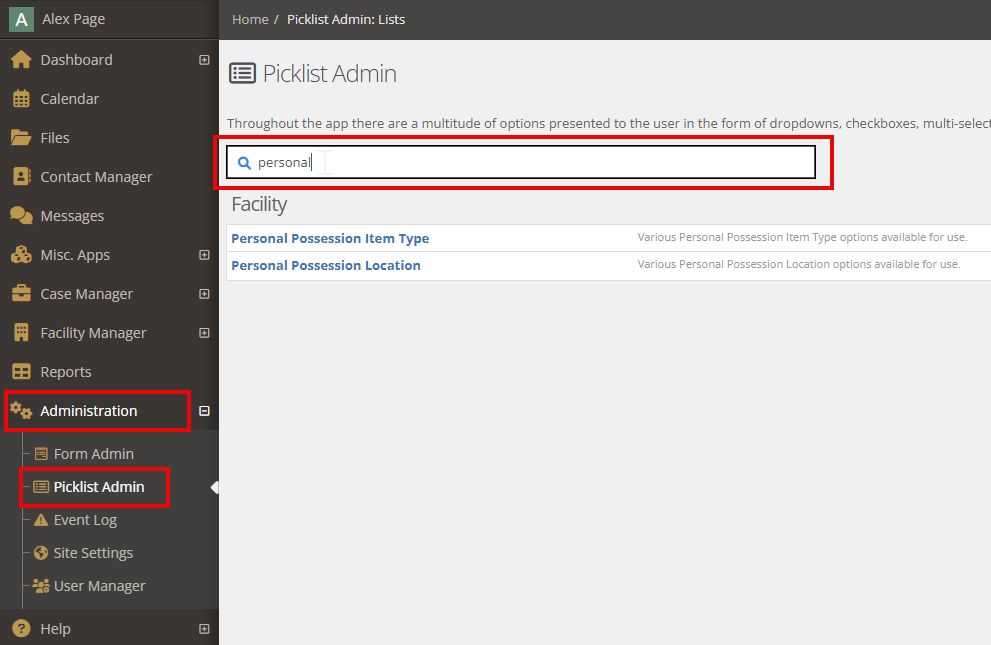
- Go to your Administration application and choose Picklist Admin.
- Search for “Personal Possession” under Picklist Admin. There are two items to customize:
Setup – Personal Possession Item Type #
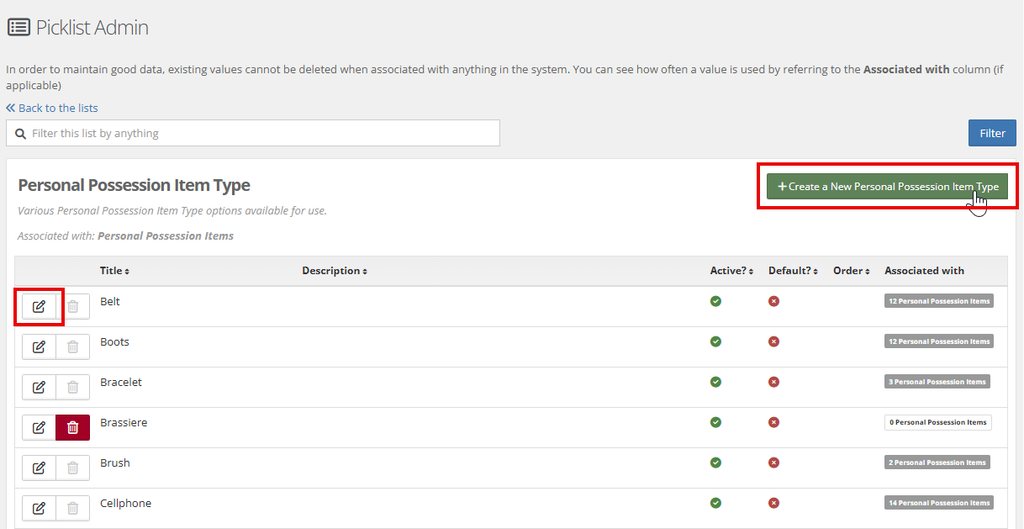
To create new items, use the green + Create a New Personal Possession Item Type button.
You can also edit an existing item using the Edit/notepad and pen icon.
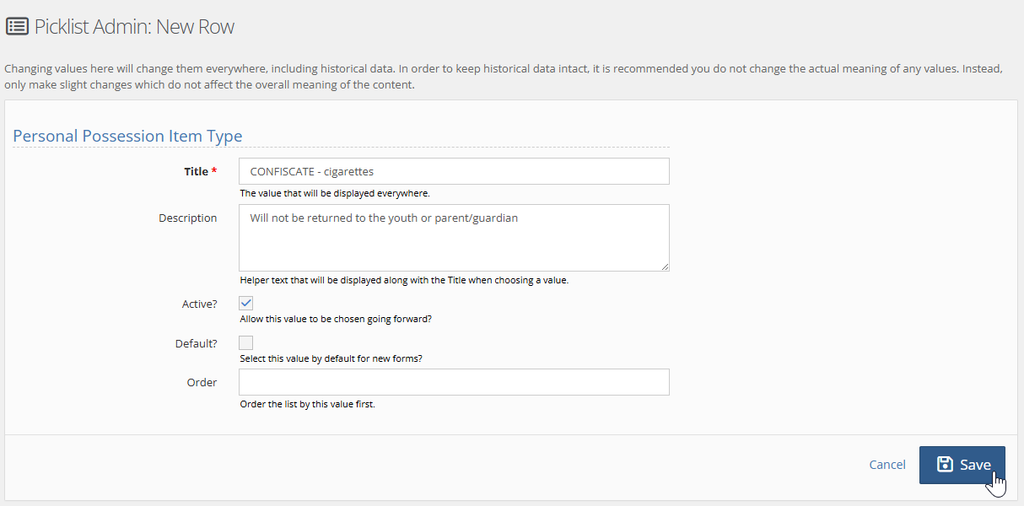
Title your items with a short name and use the Description for more details.
- The Description becomes helper text that shows up under this item in a drop-down when your staff is checking it in for a client. Think about how these items will appear for your team. If your Intake forms include categories, you can use titles that match those categories: for example, “Clothing – shirt” and “Clothing – jacket”. Users will be able to enter more details about the specific items during check-in.
- You can also use the Title to hold instructions/policies, such as “confiscate” for drug paraphernalia.
Other available fields:
- Active – should this item be available for current and future Facility Placements?
- Default – should this item be listed first in the drop-down menu?
- Order – do you need a customized order for your drop-down? If left blank, items will be in alphabetical order.
Setup – Personal Possession Location #
You can list specific locations for storing Personal Possessions such as lockers, bins, vaults, bags, or a safe.
- There is a Title for the name of the location and a Description that will be shown as helper text in the drop-down menu of Locations.
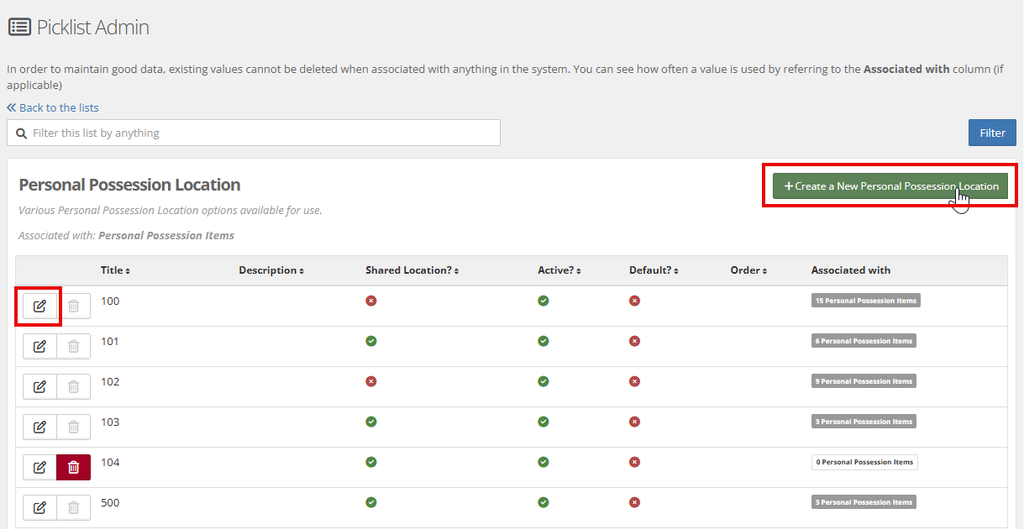
Consider how locations should be organized in your drop-down menu by using different naming conventions.
- For example: “Locker 1A” or “Upstairs Bin 3”.
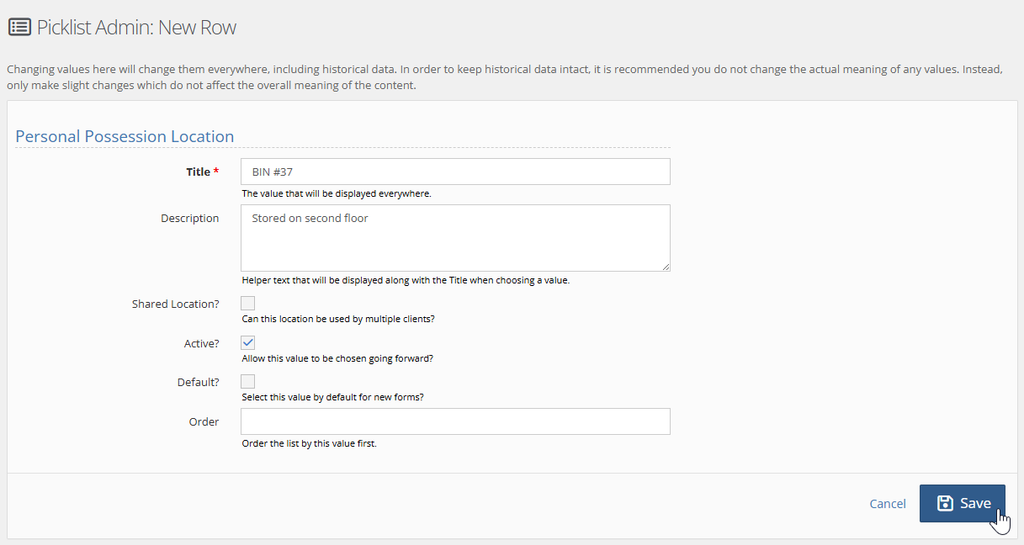
Other available fields:
- Shared Location – once this location is full/used is it still available for other clients? Note: if left blank, this defaults to not shared.
- Active – should this item be available for current and future Facility Placements?
- Default – should this item be listed first in the drop-down menu?
- Order – do you need a customized order for your drop-down? If left blank, items will be in alphabetical order.
Use the Shared Location checkbox to hide locations that have been used and shouldn’t be used until empty again. If the box is checked, this bin/locker/etc. is read as a shared location that will still be open for other items even if an item is already stored there.
Requiring Signatures for Transactions #
You can configure YouthCenter to require signatures from clients for any of their personal possessions (Intake, Check-Out, Check-In, Release, etc.).
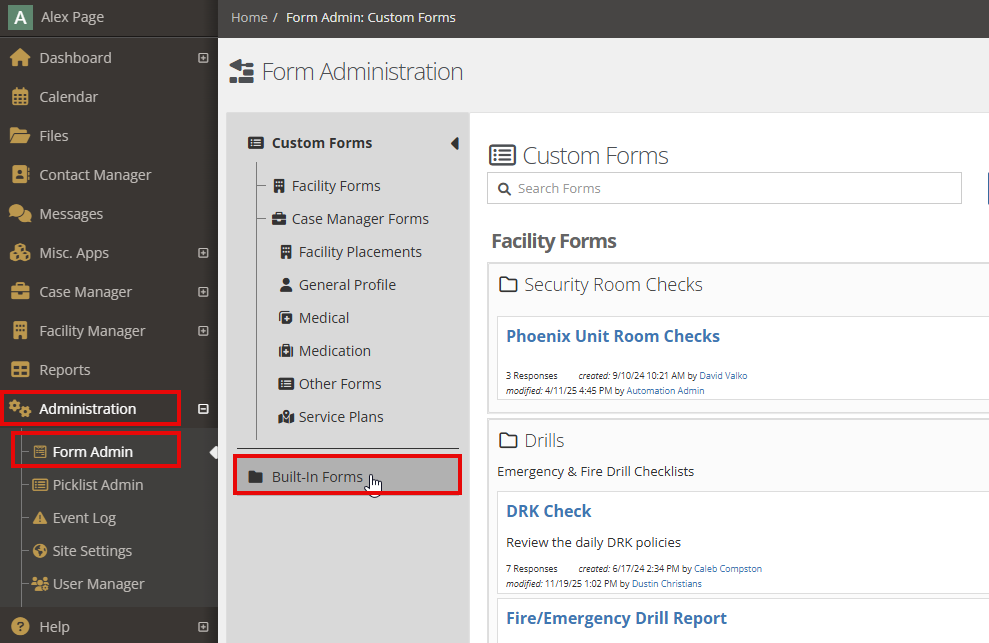
- To set this up, go to the Administration application and select Form Admin.
- From here, click on Built-In Forms:
Next, click into Personal Possessions Transactions:
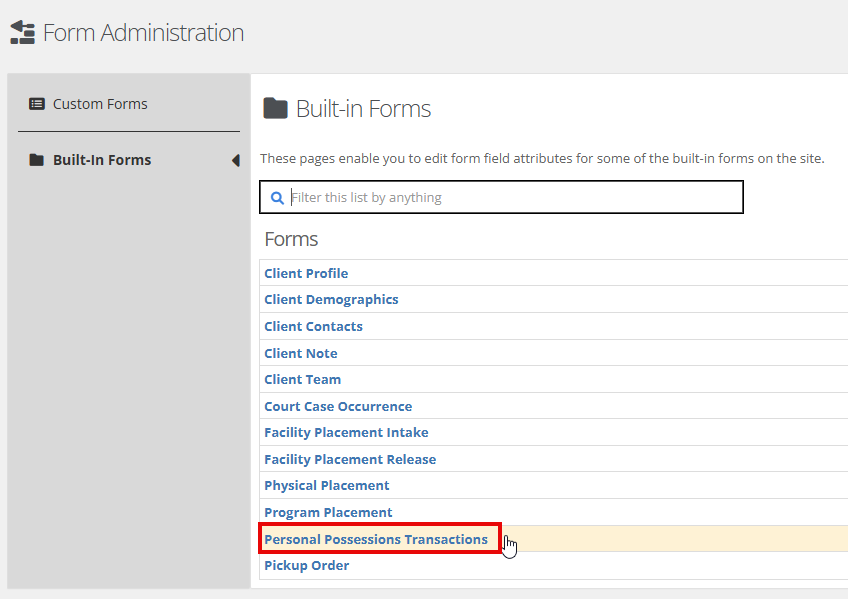
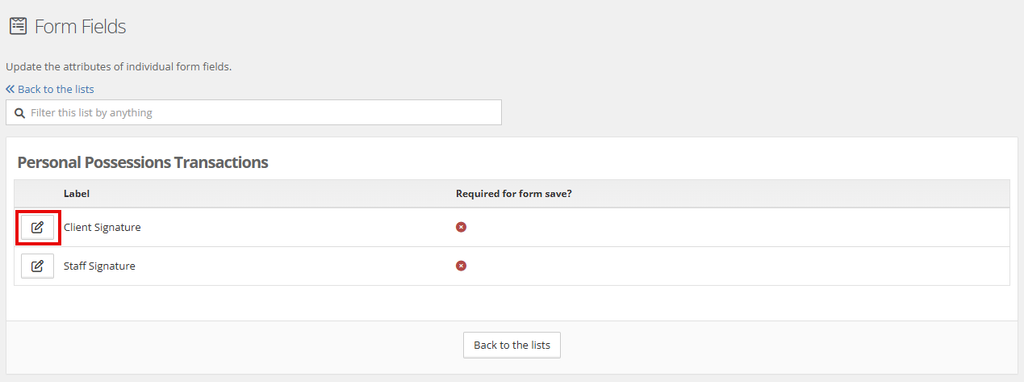
This will show the two choices for Personal Possession Transactions: Client and Staff Signature. Click into the notepad and pen icon to Edit either one:
Check the box for Is Required for Form Save? in order to require this type of signature for Personal Possessions. Be sure to click Save to apply changes:
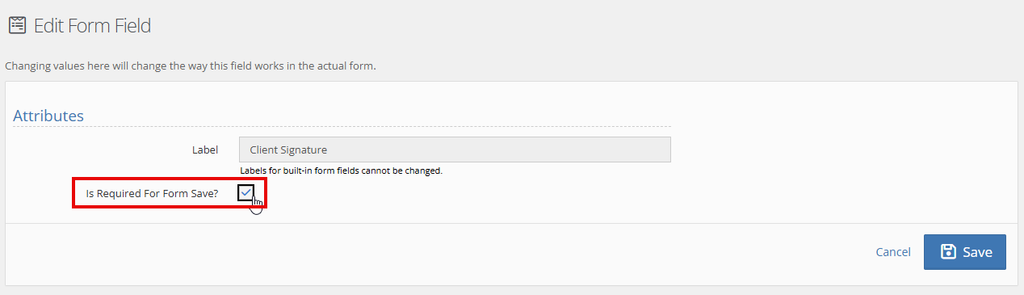
If the box is UNchecked, the field will still show up as an option for Personal Possessions (Intake, Check-Out, Check-In, Release, etc.) but it will not be required to sign before saving the action.
Adding to Audit Checklist #
The Audit Checklist helps your organization to confirm all information is entered before closing out a client. See this article for more information on Audit Checklists in general.
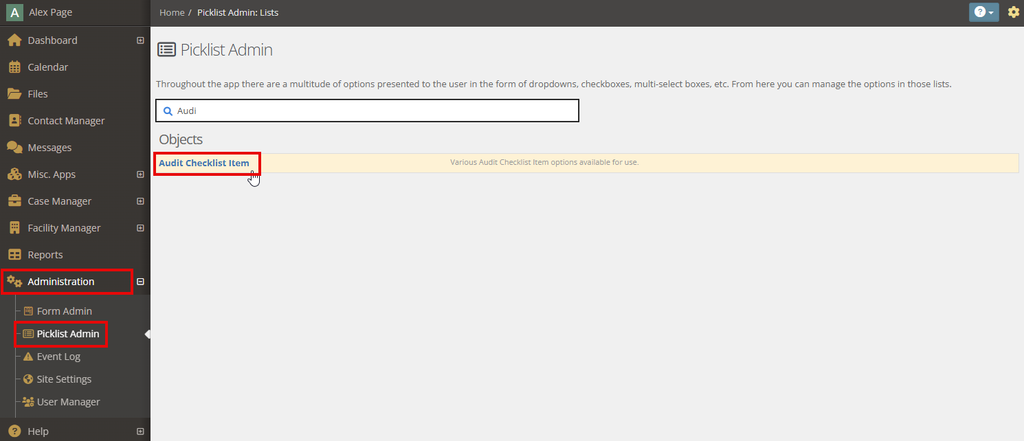
To add Personal Possession activities to the Audit Checklist, go to your Administration application and choose Picklist Admin. Once you are in Picklist Admin, search or scroll to find Audit Checklist Item:
You’ll see the available Audit Checklist items. Use the green +Create a New Audit Checklist Item button to add a item for Personal Possessions:
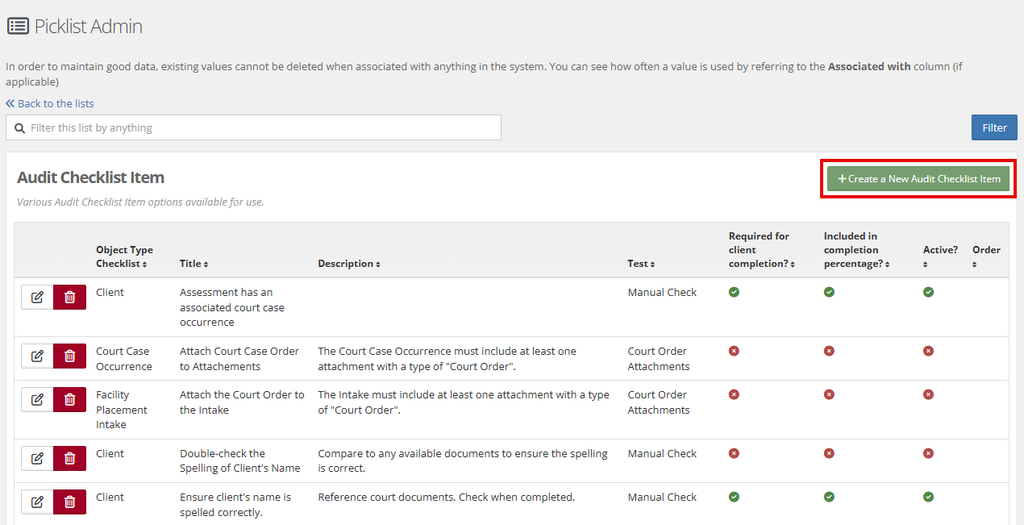
There are two options tied to Personal Possessions. To select these:
- choose Facility Placement Intake as the Object Type Checklist
- give the item a clear Title
- add a Description (helper text) for your users as needed
- select either Personal Possession Items or Personal Possession Items Released as the “test”
- check Required for client completion and/or Included in completion percentage as needed
- leave the Active box checked
- add an Order number if you want to customize where this option shows up in the Audit Checklist
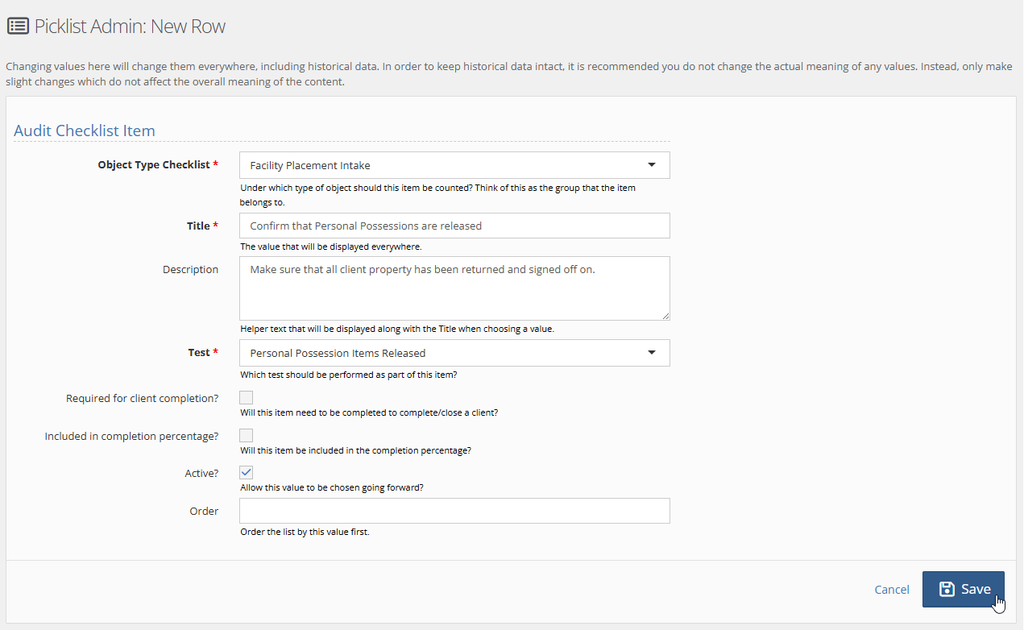
Click “Save” to apply changes.
Please Note: changes to the Audit Checklist that are required for completion or included in completion percentage will appear for all clients, past and present.
Reporting on Personal Possessions #
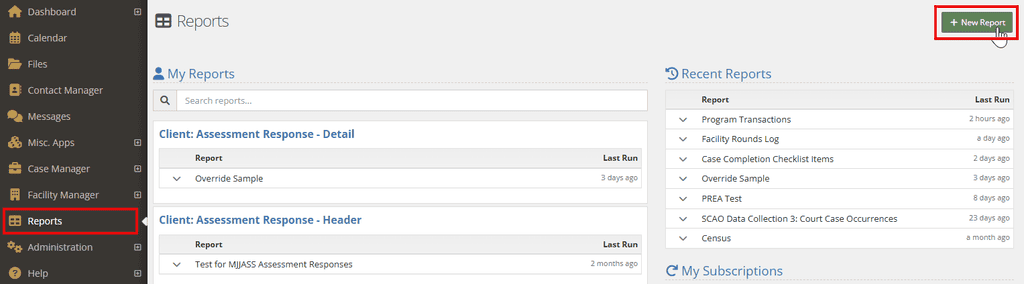
Navigate to the Reports application and click the green + New Report button to start building a report:
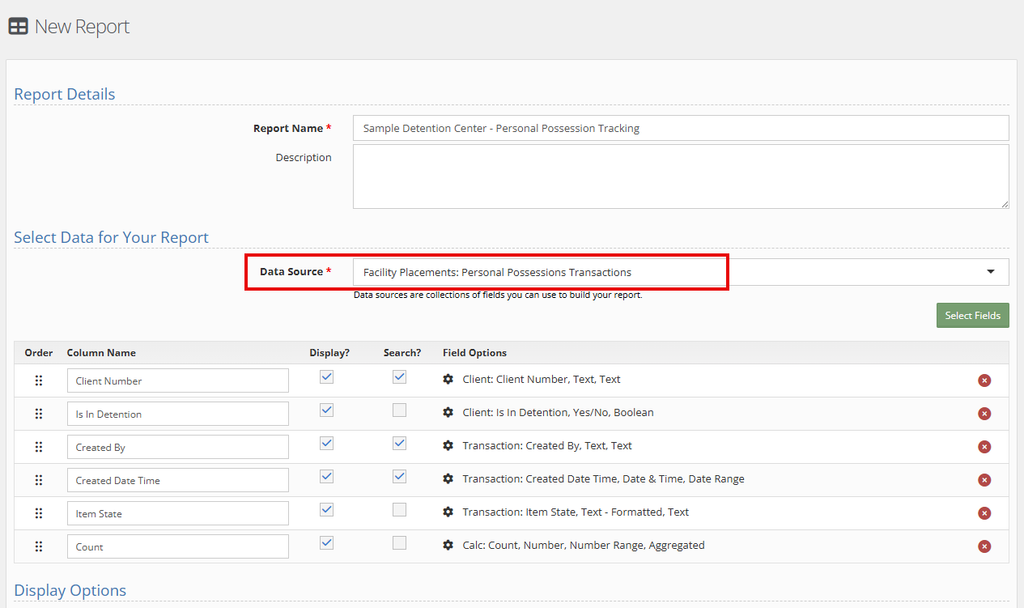
Title your report and choose “Facility Placements: Personal Possessions Transactions” as the Data Source. Choose the Data Fields recommended below and add more as needed. See below for an example of a report based on Personal Possessions:
Click Save & View to see your report display page, then Run Report. Here’s an example of those report results: