YouthCenter provides the tools needed to build and implement a Behavioral Management System (BMS) tailored to your facility’s needs. Whether your program rewards positive behavior, applies point deductions, or automatically adjusts privilege levels, the BMS can be configured to match your team’s specific approach. This guide begins with day-to-day point management for staff, then walks administrators through the initial program setup — so both audiences can reference the sections most relevant to them.
Using the BMS Program #
Below will walk through different ways points can be updated and see on the youth’s case file.
Adding a BMS Program to a Youth #
Programs can be added at different times based on your team’s protocol. In most cases, this program will be added during the facility placement. However, programs can be added to a youth at any time.
Below are examples of adding a BMS Program:
- During a Facility Placement
- Outside of a Facility Placement
During a Facility Placement: #
Select and find the youth. Choose “Facility Placements.”
Click on the green “Start a New Intake” bar
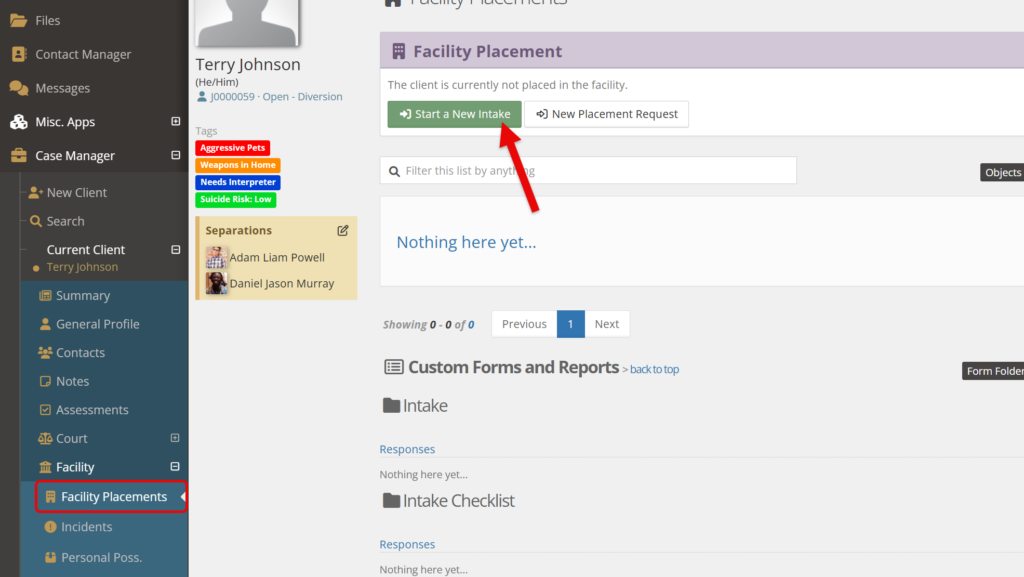
Fill in the necessary information.
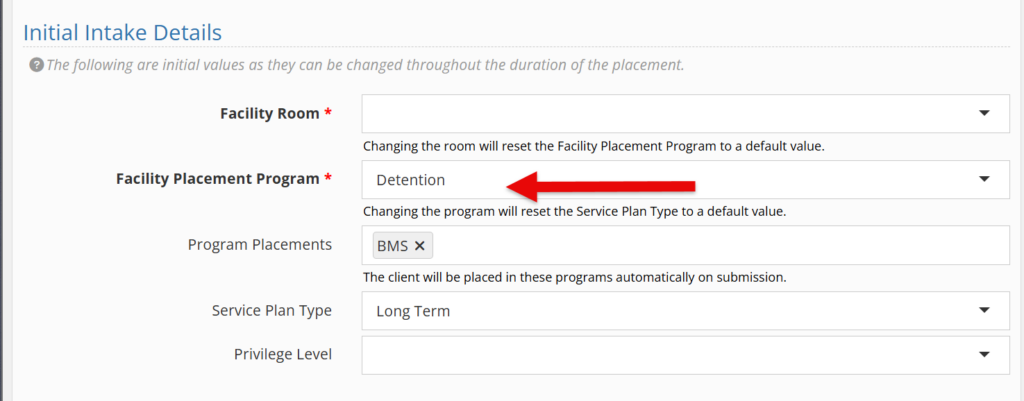
Under Initial Intake details and depending on your system’s setup, your facility placement program may have your BMS as a default program placement. If not, the BMS can be chosen from the “Program Placements” drop-down.

Outside of a Facility placement: #
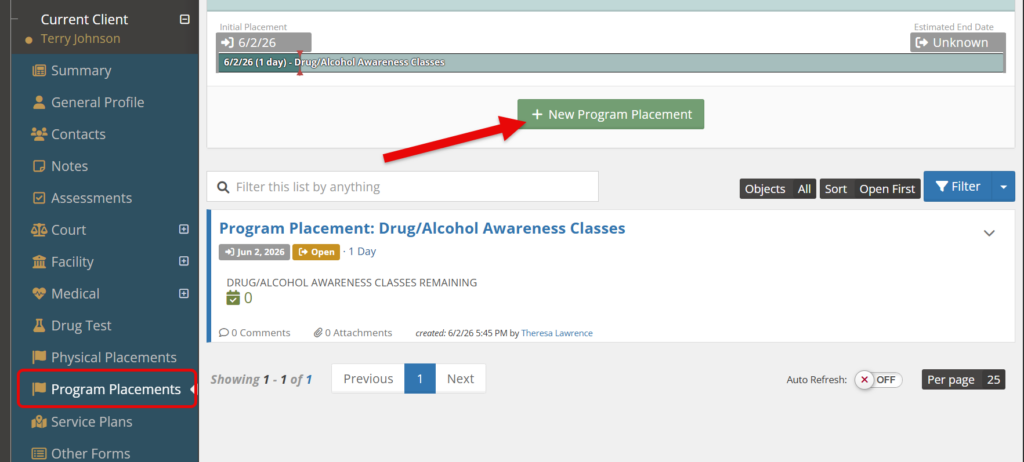
Select and find the youth. Choose the “Program Placements” tab.
Click on the green “New Program Placement” bar and choose the BMS specific to your team.
For more information on program placements, feel free to explore the documentation here.
Adding Points #
Once a BMS program has been added, there are ways to adjust the points both manually and/or automatically.
Manual Adjustment #
Program Transactions
To add or subtract points, select the youth’s “program placements.”
Click anywhere on the BMS program placement (or alternatively select the down caret and select “view this program placement”)

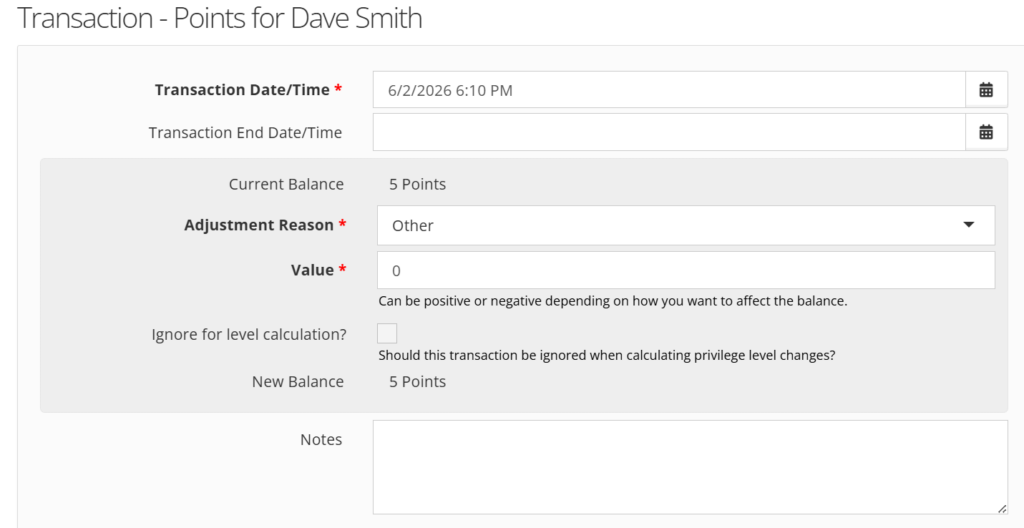
Select “new transaction.”
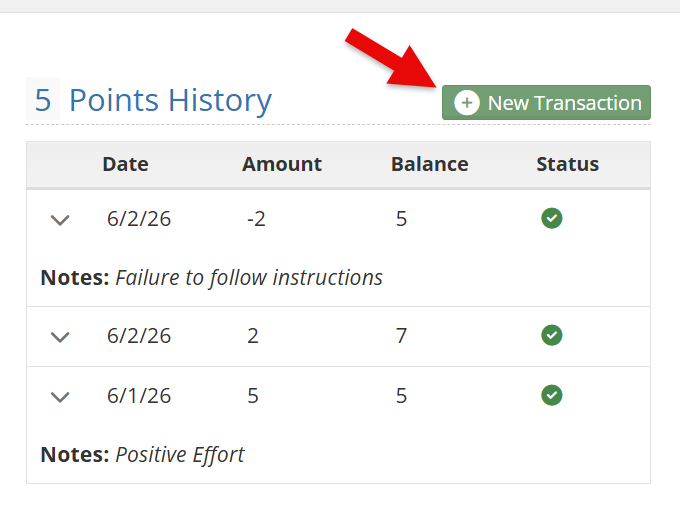
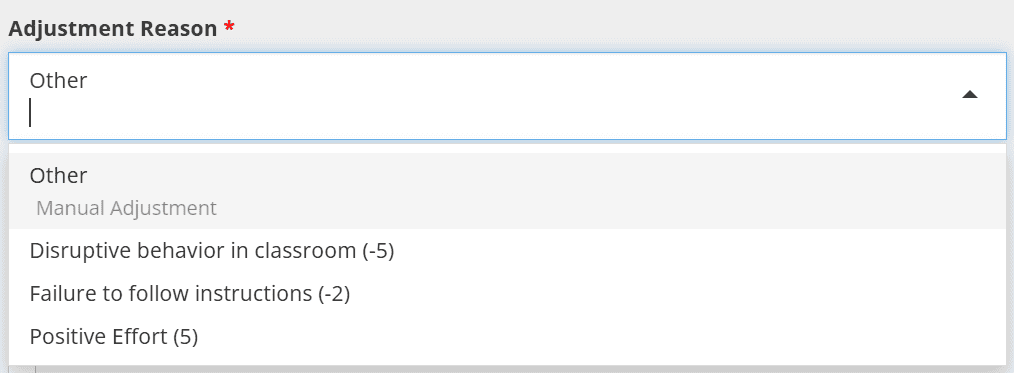
Enter the pertinent information as shown below.
*Note* Your administrators may have default adjustment amounts under the “adjustment reason” drop-down. When selected, this will automatically input a value.
For more information on transactions, see the documentation shared here.
Widget
Adding a “Clients in Programs” widget to your dashboard can help see all youth in the BMS program and also allow points to be quickly added or subtracted as needed.
To allow for point adjustment, be sure to include the “adjust balances” data option as shown below.

For more information, see the documentation about widgets here and the dashboard here.
Automatic Adjustment #
If included in the program setup, points can be added or subtracted daily based on your program’s needs. See “adminstrator setup for BMS program” below for more information.
Administrator Setup for BMS Program #
Depending on your BMS program’s needs, the following will be needed to have your program run smoothly:
- Creating your BMS Program
- Adding the BMS to your facility placement programs (optional)
- Adding Program Transaction Presets (optional)
- Allowing for automatic privilege level changes (optional)
Creating your BMS Program #
Under the “Administration” tab, choose “picklist admin.”
Search and select “Program.”
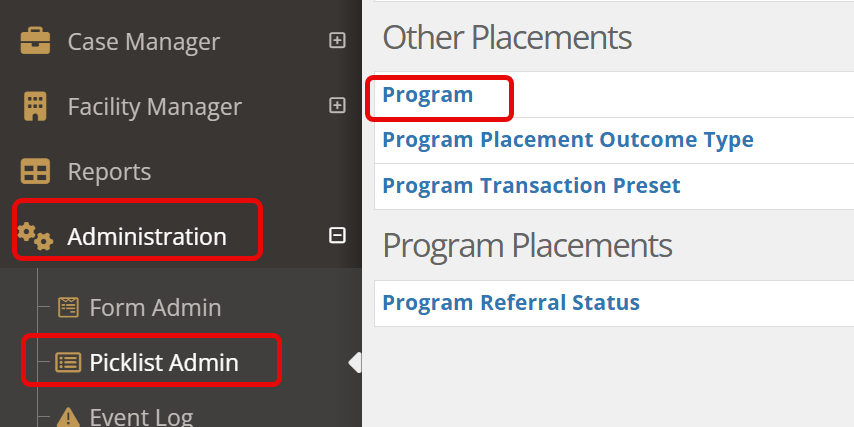
Select “create a new program.”

Fill in the necessary fields such as title, description, etc. For more information on these fields, see the documentation shared here.
Below will be some possible fields to consider to help with BMS directly
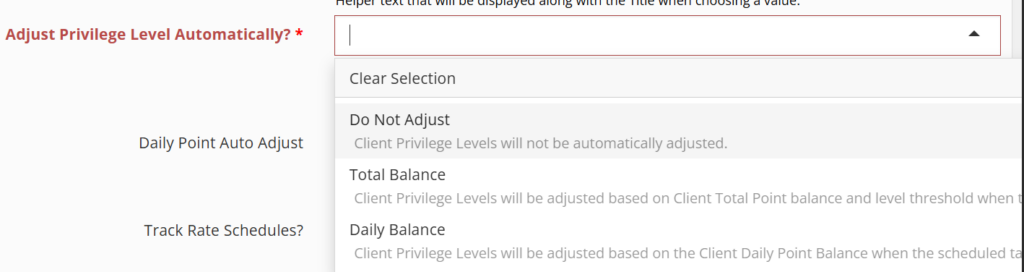
Adjusting Privilege Level Automatically:
This drop-down offers three different options that allow for client privileges to be automatically adjusted or not (if this is not part of your BMS).
- Do Not Adjust will not change client privileges unless manually done.
- Total Balance will change privileges based on the total point balance and level threshold set.
- Daily Balance will change privileges based on the scheduled daily point balance set.
If using the Daily Balance option, points can be automatically added or subtracted each day.
*Note: Privileges do not HAVE to be associated if that is not part of your porgram and you would just like daily points added.)

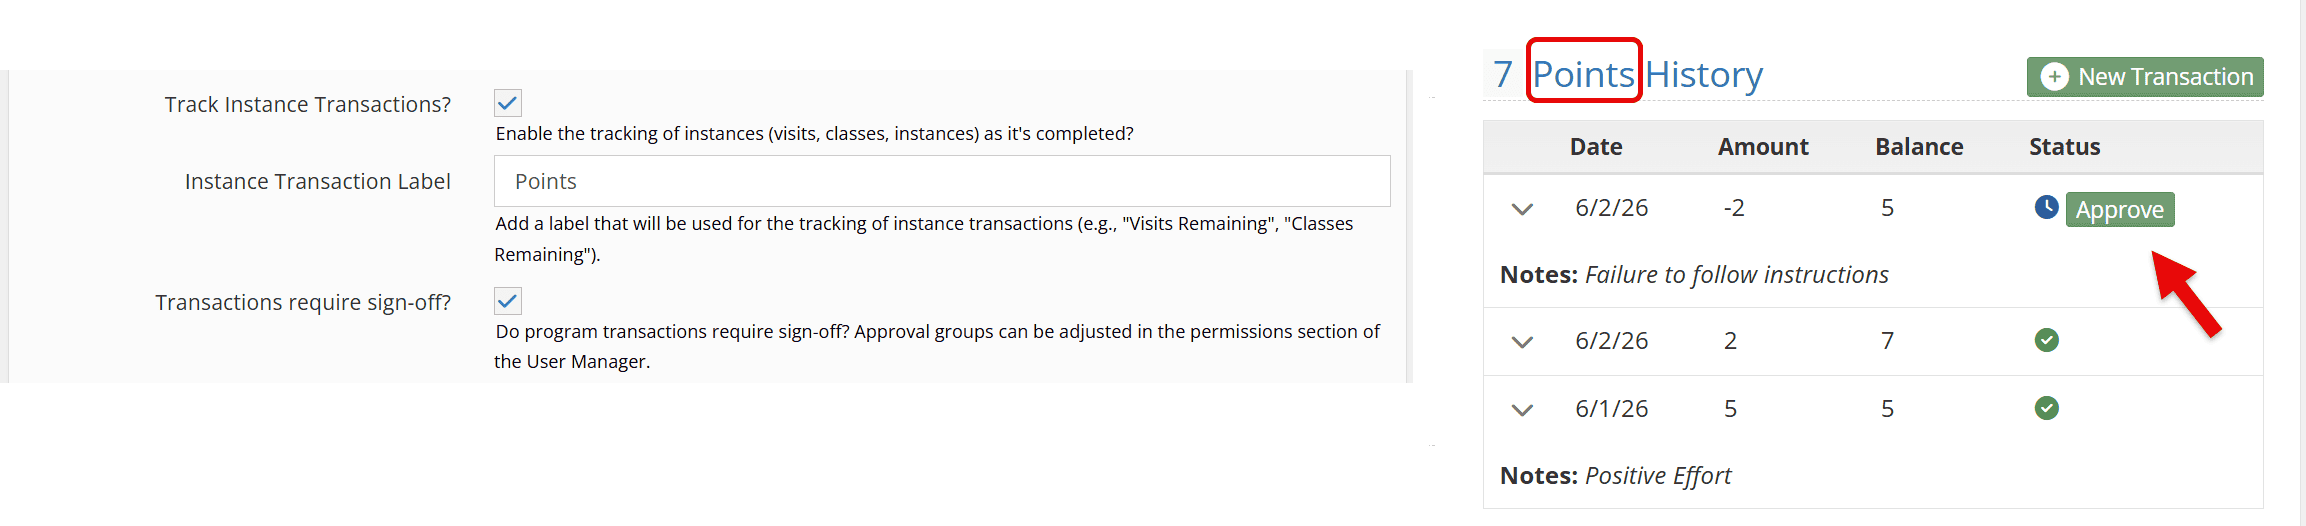
Tracking Instance Transactions
Choosing the check box “track instance transactions” allows for a visual history of your BMS.
The instance transaction, can be labeled anything that would match your BMS (in this example it’s points).
Transactions can require sign offs/approval from specific groups (such as administrators) as needed.
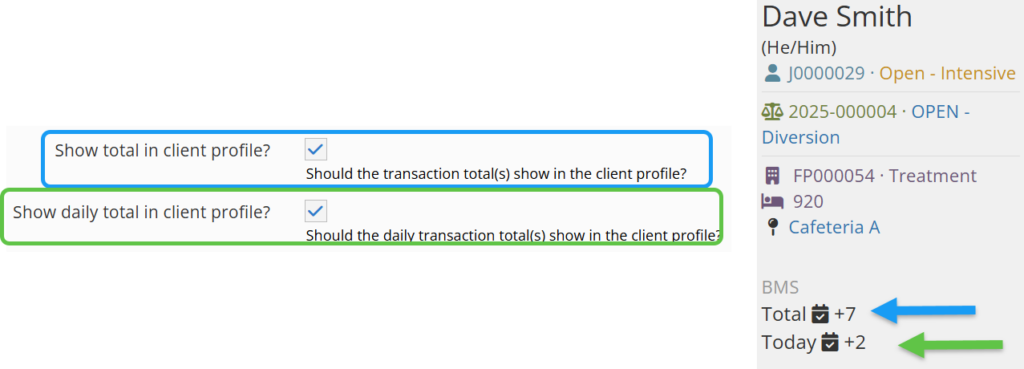
Showing totals
Selecting the check boxes of “show total in client profile” and/or show daily total in client profile, will show under the youth’s profile name and picture and be easily visible in their YouthCenter file.
Facility Placement Program (optional) #
Adding your BMS to a Facility Placement Program is an optional step. However, this can be a powerful tool if you would prefer to have the BMS part of the default program when doing your initial intake. For more information on auto-enrolling at intake, see the information shared here.
To create this, select the “Administration” tab followed by the “Picklist admin.” Find and select “facility placement program.”

Choose “create a new facility placement program” OR select the edit option under a current facility placement program.
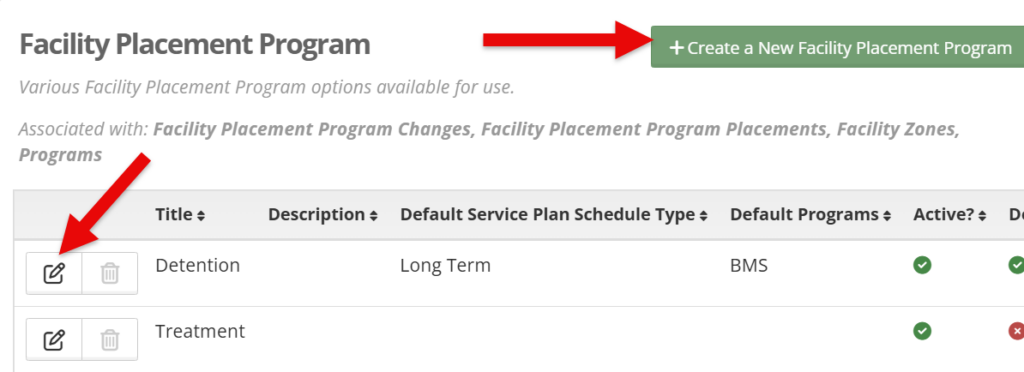
Add any necessary information.
Under “default programs” find and choose your BMS program. Click Save.

Program Transaction Preset (optional) #
Ensuring consistency within your BMS points can be a key to a successful implementation. To help in this process, administrators can have preset program transactions that share the adjustment reason and the associated points.
To create this, select the “Administration” tab followed by the “Picklist admin.” Find and select “Program Transaction Preset.”
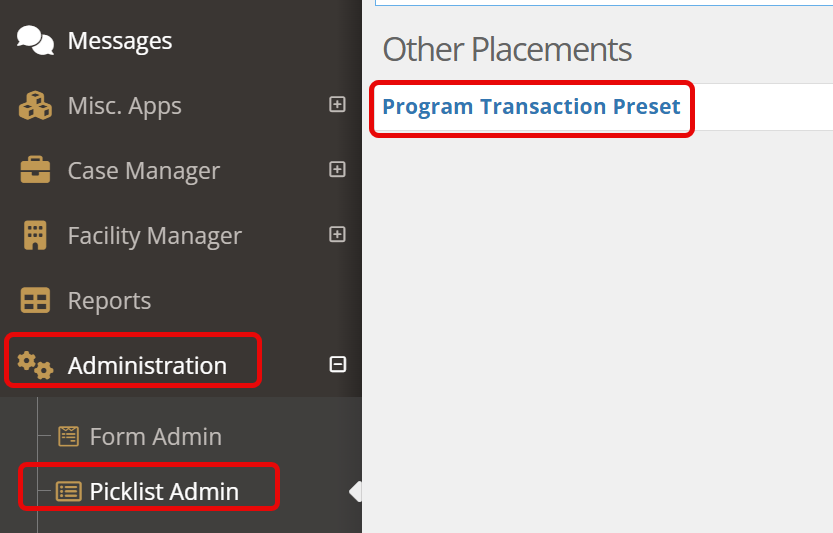
Click the “Create a New Program Transaction Preset” bar.

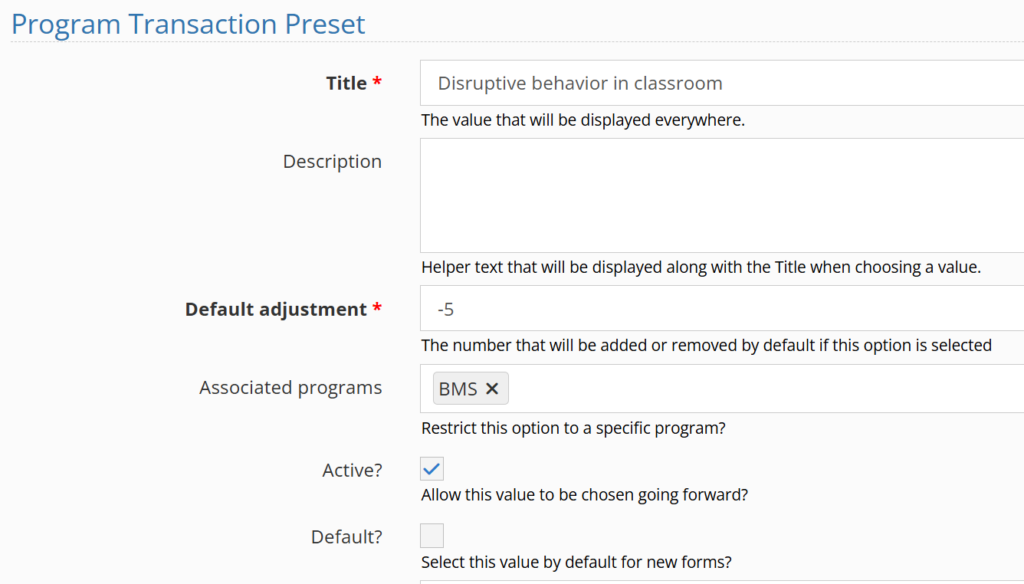
Add the necessary transaction types, default point amount, and be sure to associate the transaction to your BMS program. Click Save.
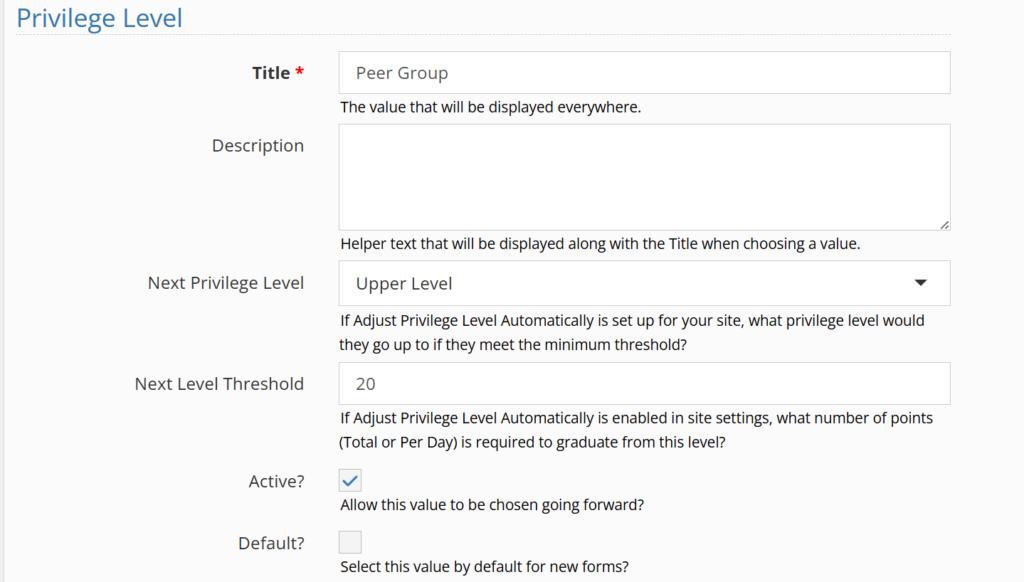
Privilege Levels (optional) #
To create this, select the “Administration” tab followed by the “Picklist admin.” Find and select “Privilege Level.”
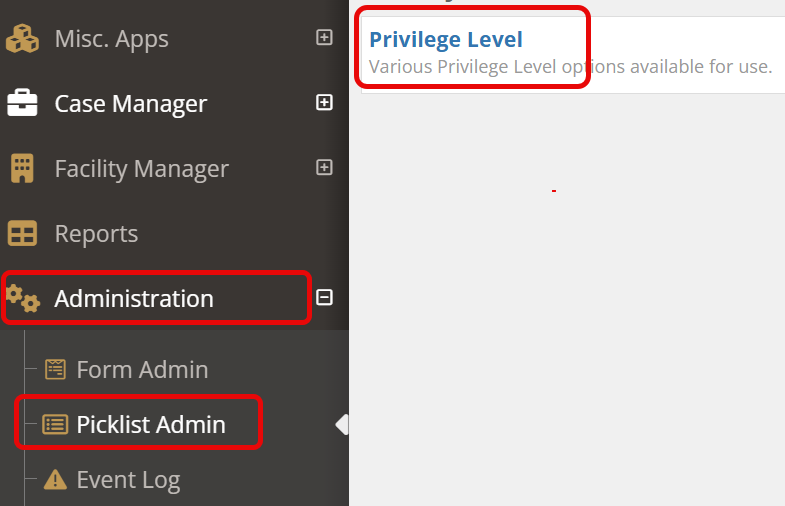
Click the “Create a New Privilege Level” bar.

Add the necessary privilege level title such as “Peer Group”
If using the automatic adjustments (as mentioned when building programs), be sure to assign the next privilege level and point threshold level. Click Save.