
The Files area in YouthCenter allows you to store general files for download. Think of this as a secure network drive for your team. Files can be uploaded here and shared over to specific users on YouthCenter and/or shared on the CaseStream Connect Portal for parents, guardians, and third parties.
Documents stored in Files are agency-wide (not fillable forms that apply to one specific client). If you need to attach a document to a specific client, use the Attachments application.
Creating New Folders and Files #
Find the Files application on the main menu of YouthCenter. When you click into it, you should be able to see any folders and files that your user has access to. If you can’t view the Files application, you may not have the correct permissions – contact your Admin users to confirm.
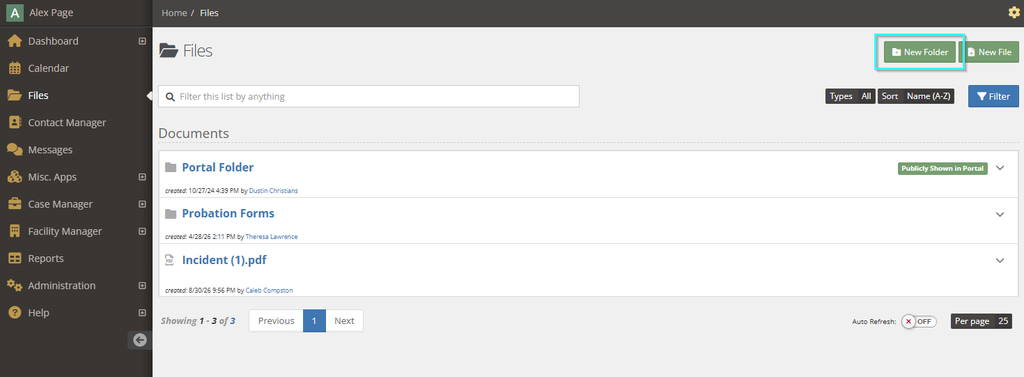
Use the green New Folder button pictured above to create a new folder and control which users have access. In the example below, some staff can view the documents in this folder but only a few can manage them:
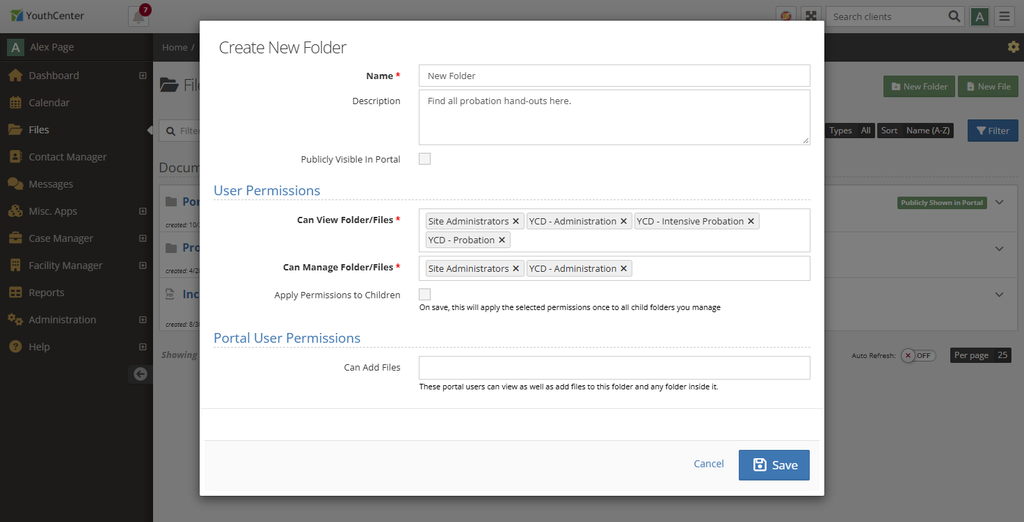
The available fields for Folder settings are:
- Name – required
- Description – optional, anything here will show up as helper text
- Publicly Visible in Portal – check to make the folder available to all CaseStream Connect Portal users
- Can View Folder/Files – choose User Groups who can see and download the files
- Can Manage Folder/Files* – choose User Groups who can add/delete/edit file listings; also add sub-folders
- Apply Permissions to Children – will automatically apply same permissions to any sub-folders
- Can Add Files – allows Portal users to add their own files from their CaseStream Connect Portal
*Note: deleting Files is permanent, grant this right with caution
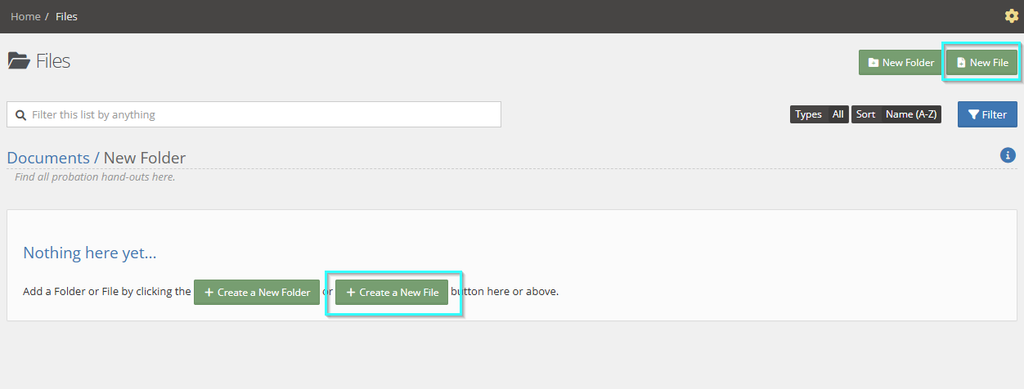
To create a new File, click into the desired folder and then select the green New File button:
Once you’re in the New File screen, you can confirm the folder location and add Notes if needed. Upload a file from your network folders or drag and drop a file (any file type) here. You can add a Tag to make the file stand out within the folder.
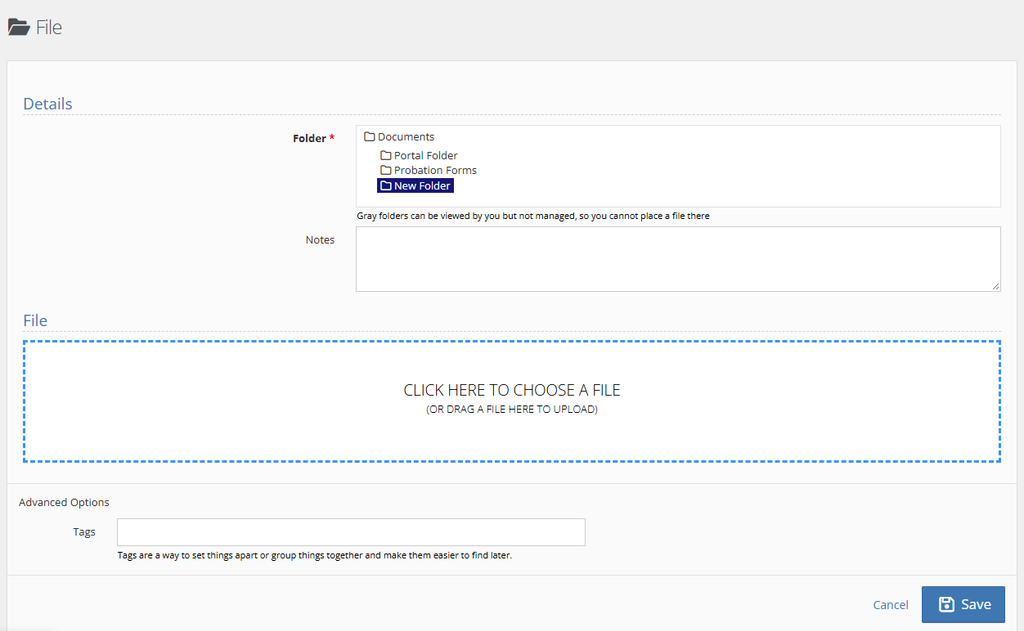
File names are displayed exactly as the file is named in your source plus its type. For example, a PDF file called “Consent Agreement” becomes “Consent Agreement.pdf” in your folder.
Viewing Folder and Files #
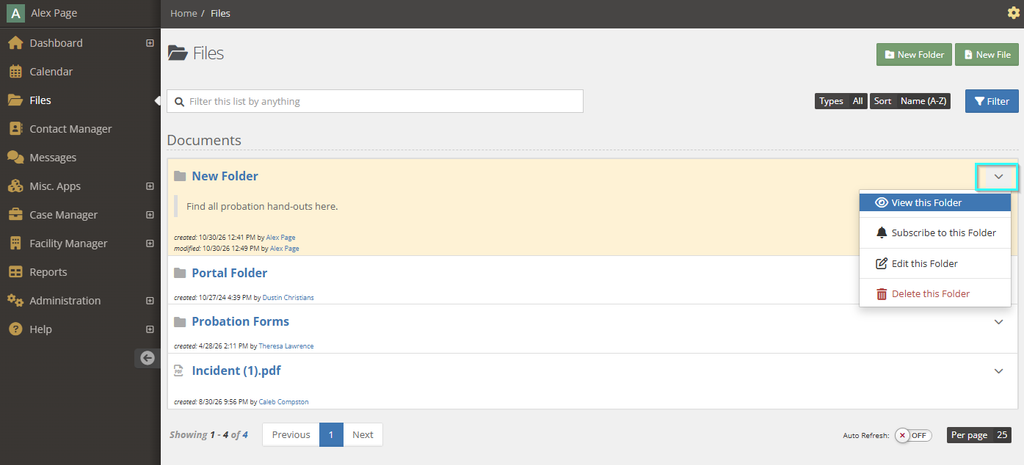
Navigate to Files and click directly on each folder to view its contents. Alternatively, use the down caret on the right to View. The user pictured here has the rights to manage this folder, so they see the Edit and Delete options, too:
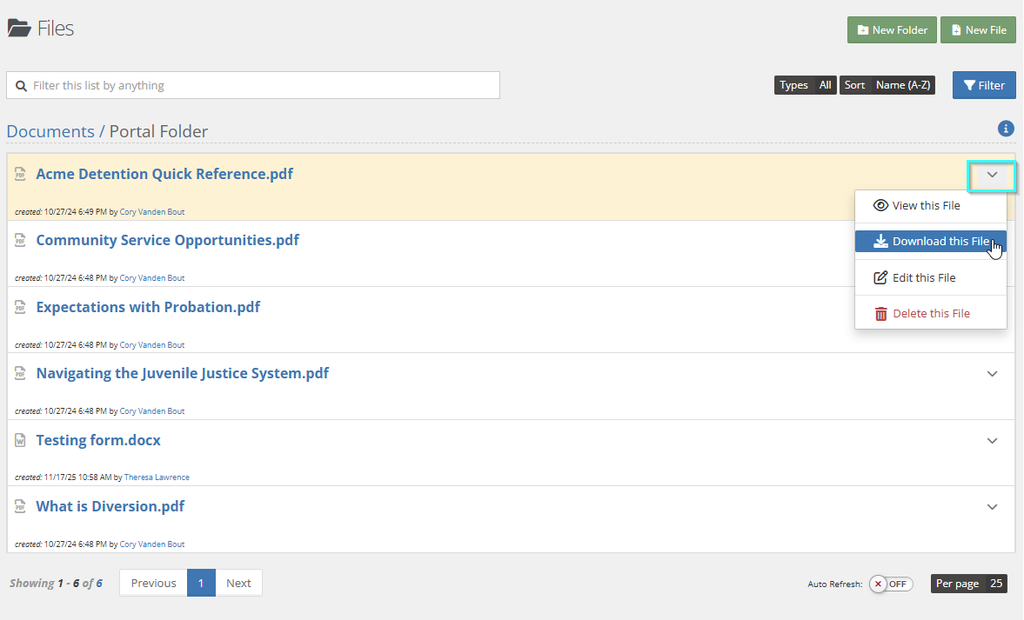
As long as a user can access this folder, they can freely download stored files. Click on the listing to View (then download) the file or download directly by clicking on the down carat on the right to choose Download this File. This user has rights to manage files, so they also have the Edit and Delete options:
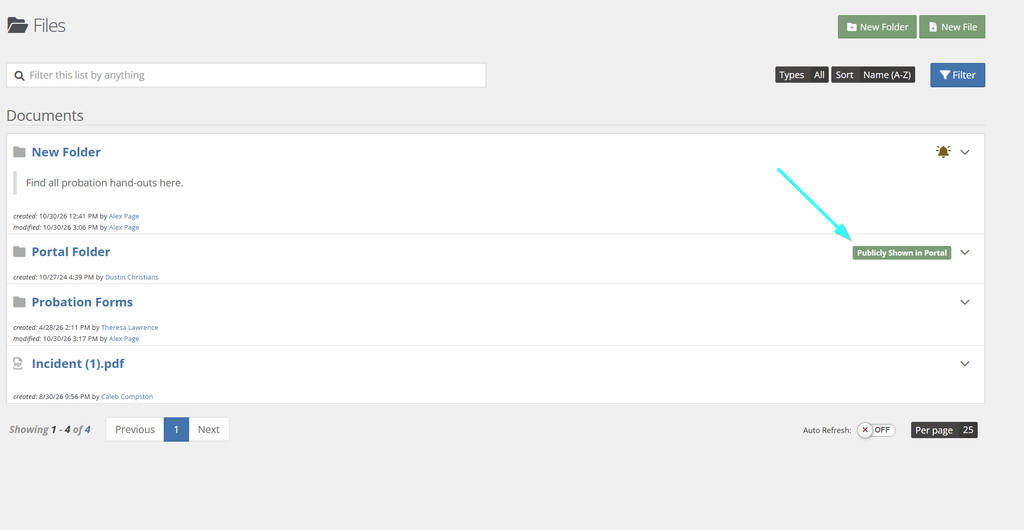
The files shown above are inside the folder called “Portal”. When you view this from the Files application, you can see that it’s shared on the CaseStream Connect Portal:
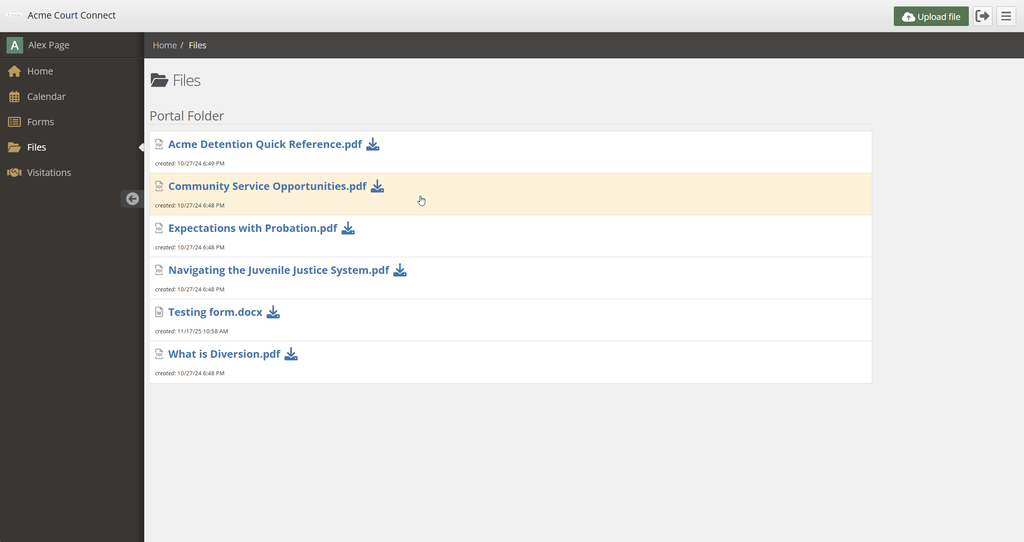
Portal users will be able to see this folder on their CaseStream Connect Portal session:
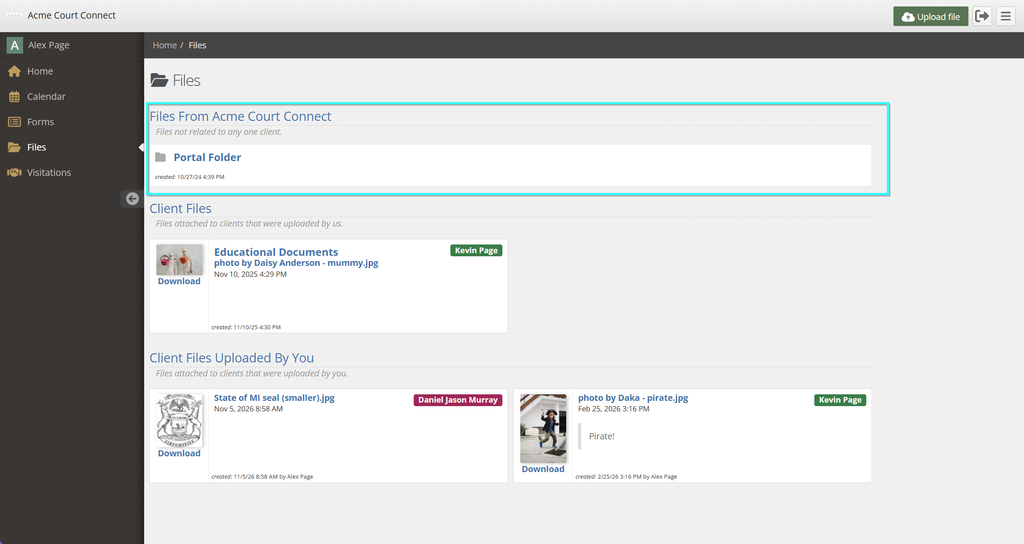
When they click into it, they’ll see the same files you see in YouthCenter. As Portal users, they’re allowed to download these files. They can also add files if that permission has been granted in the folder setup.
Subscribing to a Folder #
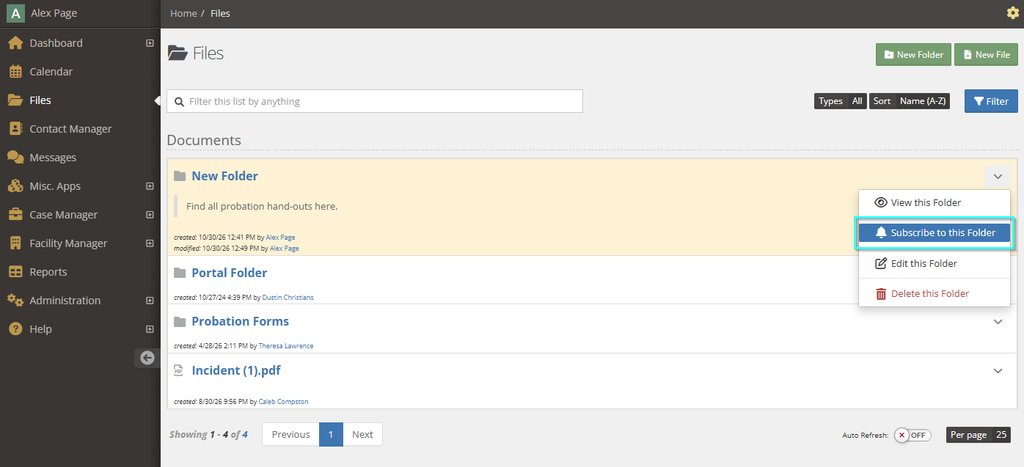
Users can subscribe to a folder in order to get updates when other users delete, add, or edit files. To Subscribe, click the down caret on the right and choose Subscribe to this Folder:
You’ll see an announcement confirming that you subscribed and the folder will now have a bell icon:
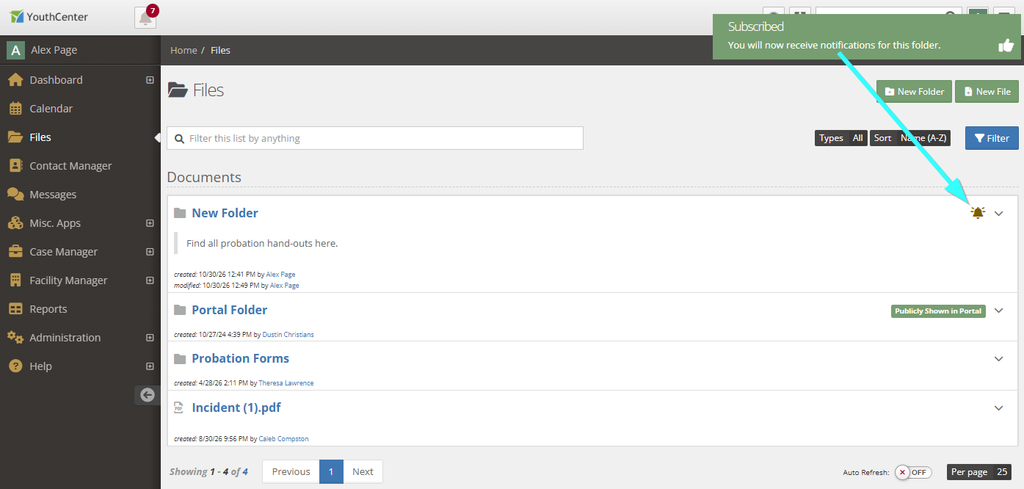
Unsubscribe by clicking the down caret again and clicking “Unsubscribe”.