
- Where to Find the Audit Checklist
- Overview of the Audit Checklist
- Adding Items to Audit Checklist - Built-In Forms
- Adding Items to the Audit Checklist - Picklist Admin
- Adding Items to the Audit Checklist - Manual Checks
- Adding a Manual Check to the Audit Checklist
- Monitoring Audit Checklist Completion
- Adding the Audit Checklist to your Dashboard
- Tracking Client Completion with Reports
- Policies for Client Completion
The Audit Checklist is a powerful tool that can help ensure client information is filled out before they are closed out. It’s a visual check that will allow admins and users alike to ensure all important and reportable data is in the system. “Closing out” means that you are changing the Client Status to something that’s categorized as Closed (such as Transferred, Discharged, AWOL, etc.).
Where to Find the Audit Checklist #
The Audit Checklist is nested under each individual client in the Case Manager application. Choose a client and expand the Case Manager to view the Audit Checklist:
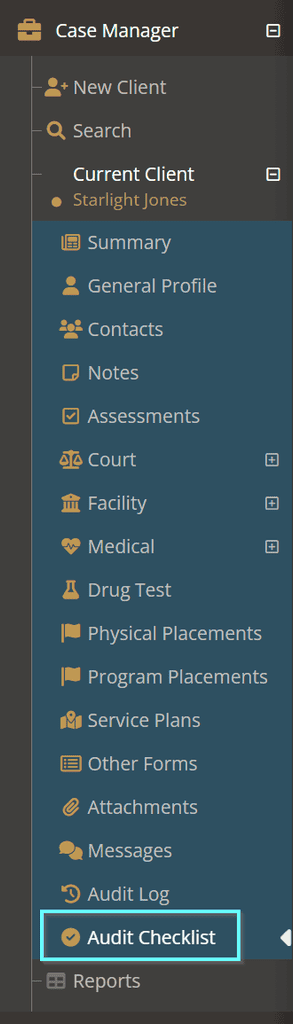
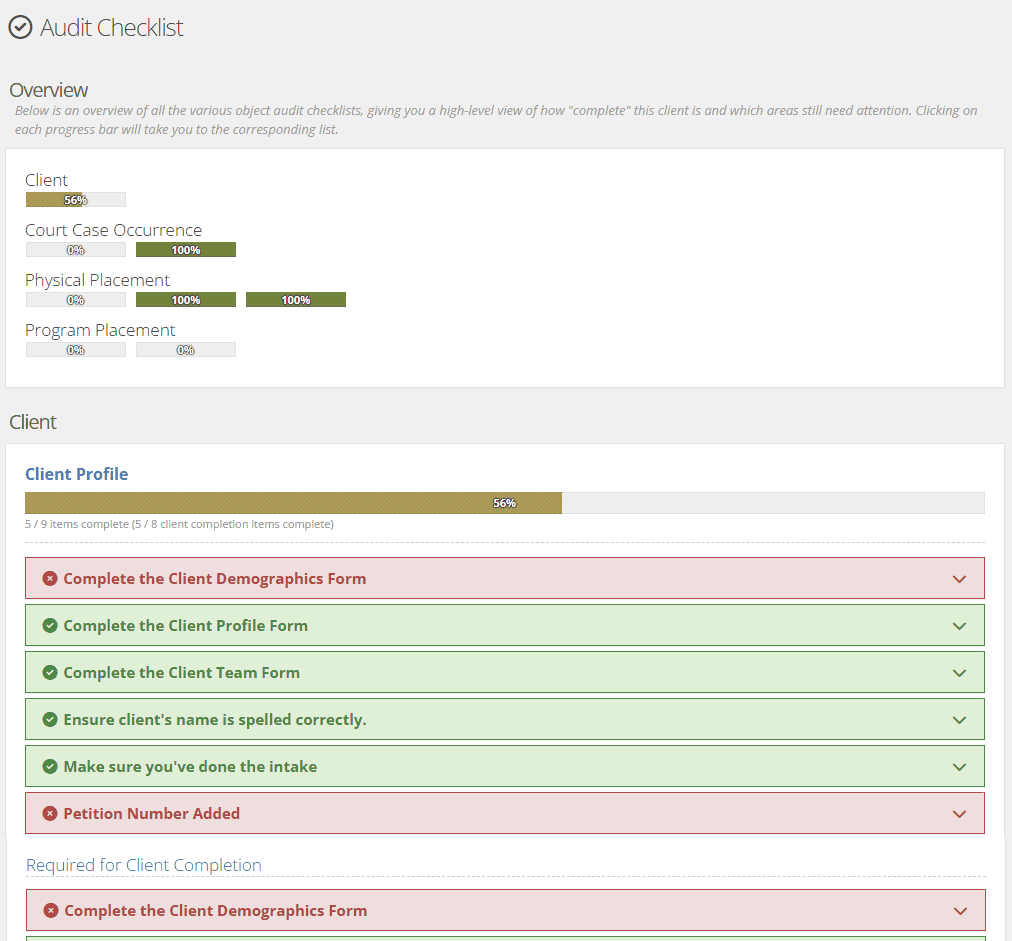
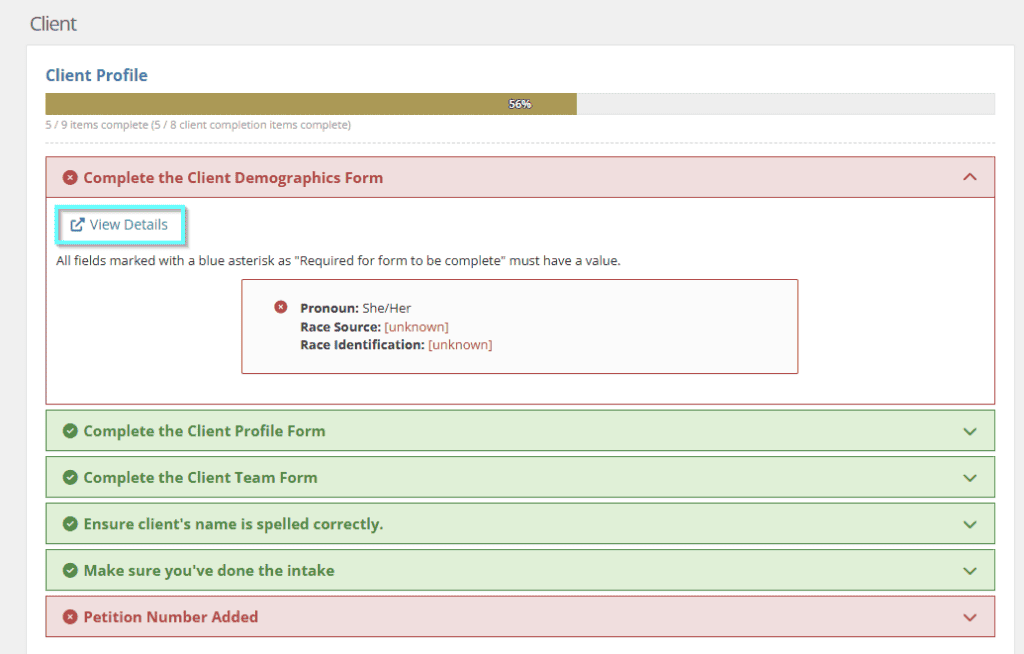
For more information on using an active audit checklist, see documentation linked here.
Overview of the Audit Checklist #
Adding Items to Audit Checklist – Built-In Forms #
Please note: any changes to the Audit Checklist will apply to ALL clients in your YouthCenter.
If your Audit Checklist item is a field in the Case Manager or Facility Placement (such as the Client Profile), add it using the Built-In Forms area.
Go to the Administration application and select Form Admin, then Built-In Forms:
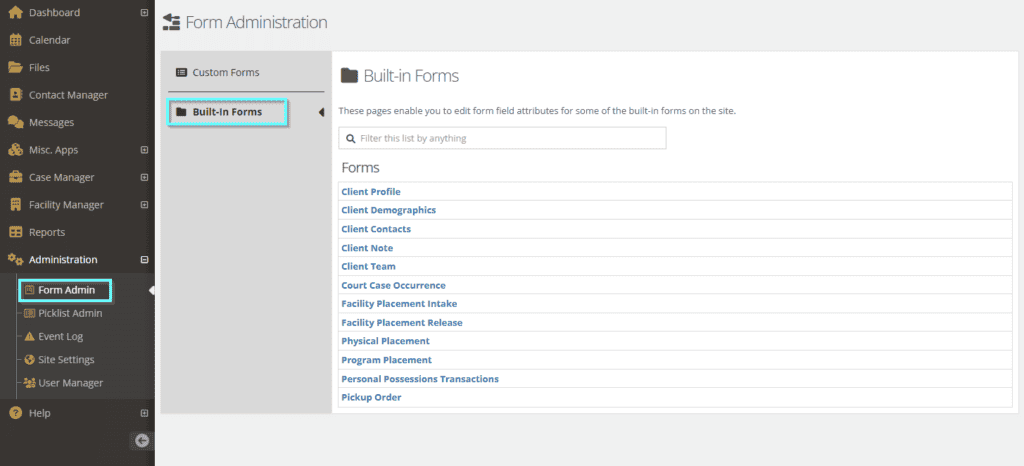
Select the “form” you wish to modify (Client Profile, for example).
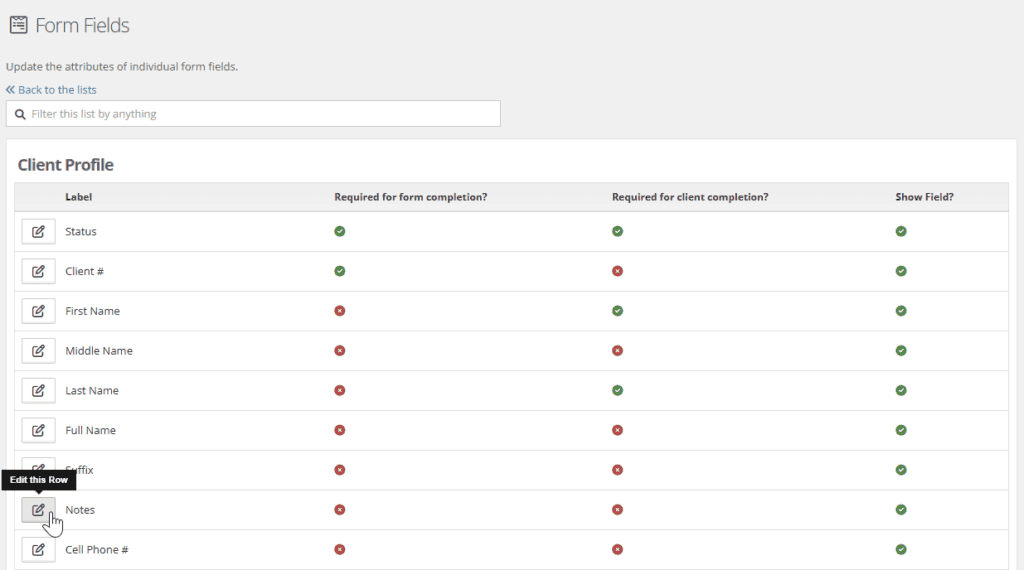
Choose your desired field (Notes, for example) and select the Edit/pencil and paper icon:
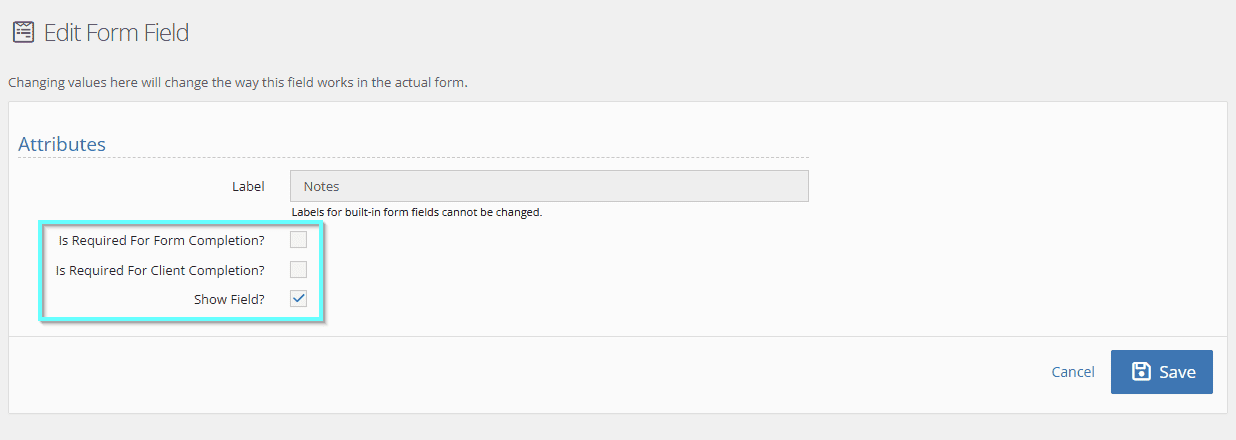
Choose from the available options and click Save to update the item:
- Is Required for Form Completion: do the Notes on Client Profile need to be filled out to save the Profile itself?
- Is Required for Client Completion: do the Notes on Client Profile need to be filled out to close the client?
- Show Field: does the Notes field appear in the Client Profile?
For more information on hiding fields in other “Built-In Forms,” see Fields in Built-In Forms.
Remember: changes to the Audit Checklist that are required for completion or included in completion percentage will appear for all clients, past and present.
Adding Items to the Audit Checklist – Picklist Admin #
If your Audit Checklist item is an object that can be created and saved for the Case Manager or Facility Placement (such as the Residency), add it using the Picklist Admin area.
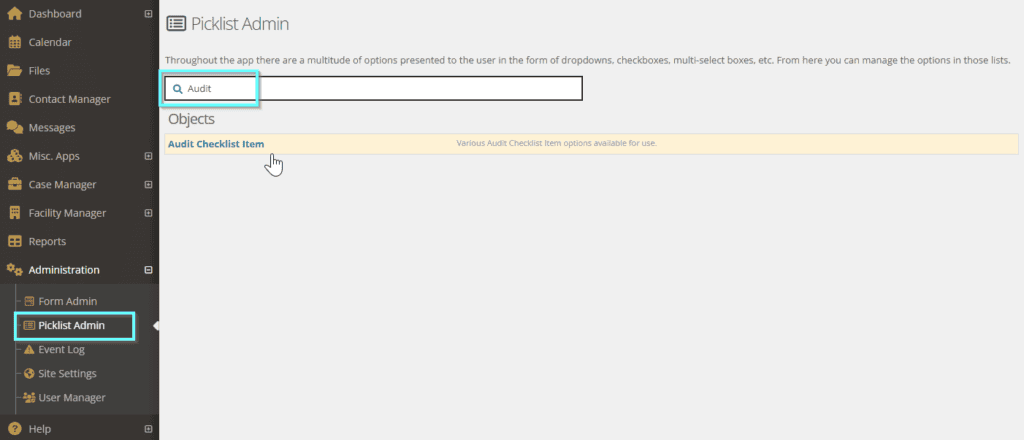
Go to Administration and select Picklist Admin.
In Picklist Admin, find or search for “Audit Checklist Item”:
Once you click into Audit Checklist Item, you’ll see any existing items and the ability to add more. Click Create a New Audit Checklist Item to begin:
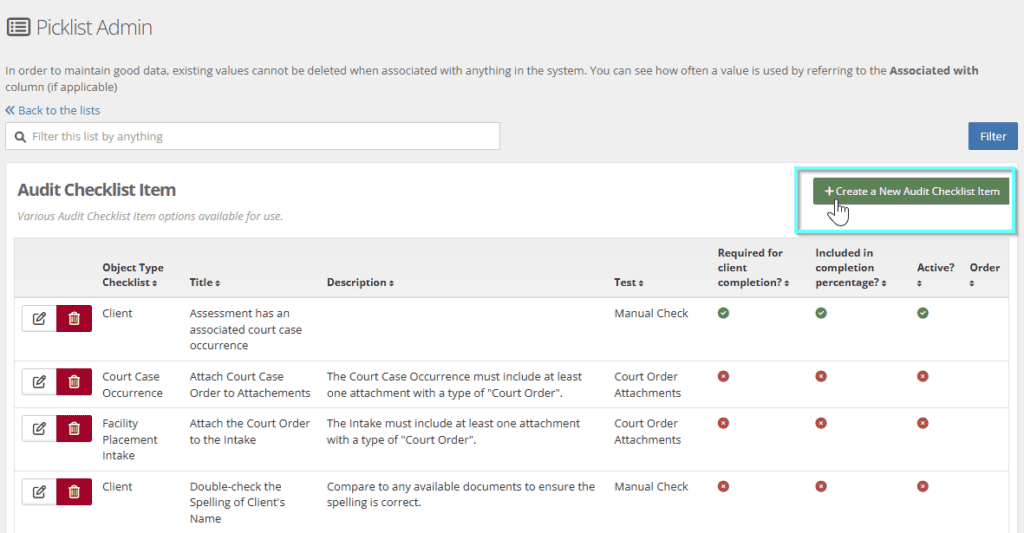
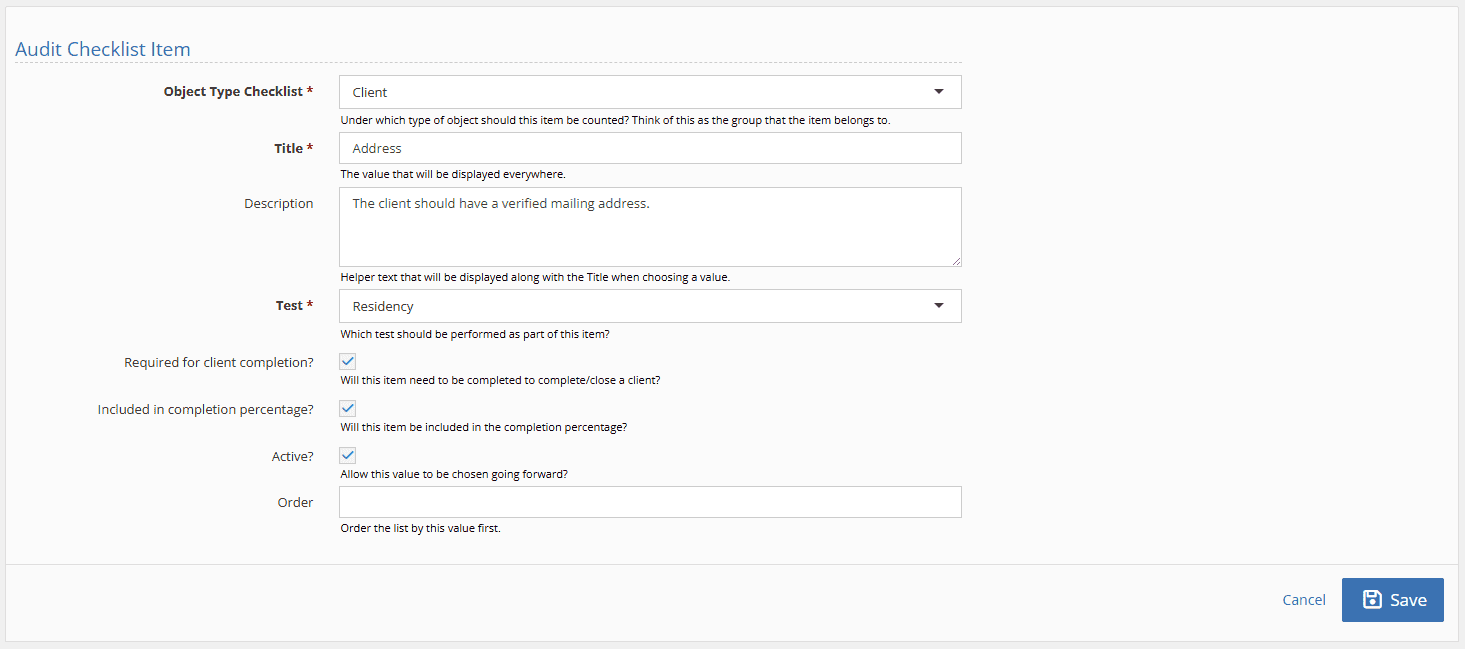
Add details for the item:
- Object Type Checklist: pick the area/category that will show on the Audit Checklist, such as “Client”
- Title: the value that will be displayed everywhere that your users will see
- Description: helper text that appears when the item is expanded in the Audit Checklist
- Test: how YouthCenter knows that the item is complete, such as “Residency”
- Required for client completion: does the item need to be completed to close out the client?
- Included in completion percentage: does this item need to count towards the % of client completion?
- Active: check this to make sure the item is active and visible for past and current clients
- Order: add a number here to control where this item falls in the list (optional)
Adding Items to the Audit Checklist – Manual Checks #
If your new Audit Checklist item does not fit either of the two categories above, you can add a Manual Check. Use this for things that aren’t tied to a verifiable data entry, such as double-checking the spelling of the client’s name.
Use the steps above to find Audit Checklist Item in the Picklist Admin.
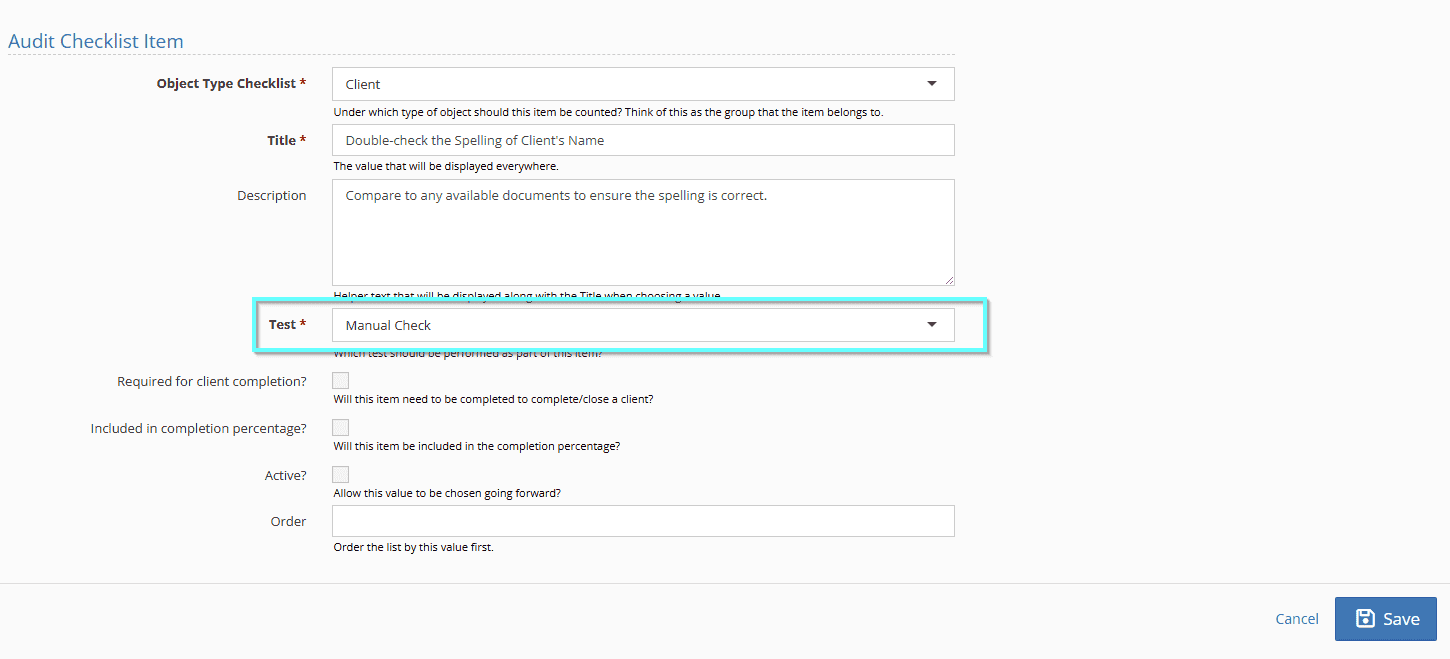
Click Create a New Audit Checklist Item to see the details. Note that the Test drop-down menu is set to “Manual Check” since this is not something YouthCenter can verify on its own:
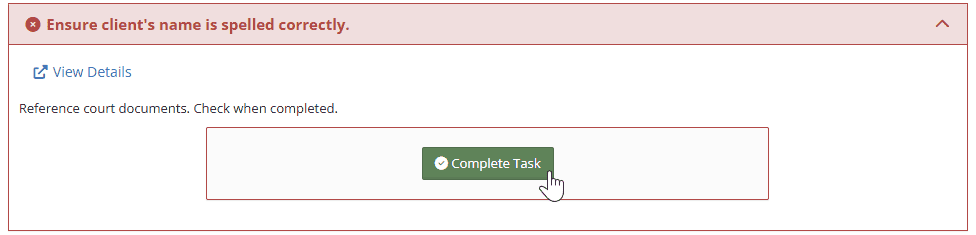
Manual Checks will display a checkbox in the Audit Checklist that users will click to indicate that they’ve completed the task:
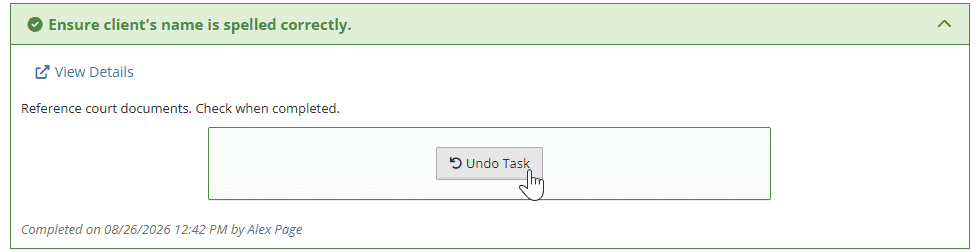
Manual Checks can also be marked as incomplete:
Adding a Manual Check to the Audit Checklist #
Monitoring Audit Checklist Completion #
You can use a Dashboard widget to keep track of how complete your clients (or your team’s clients) are in their Audit Checklist.
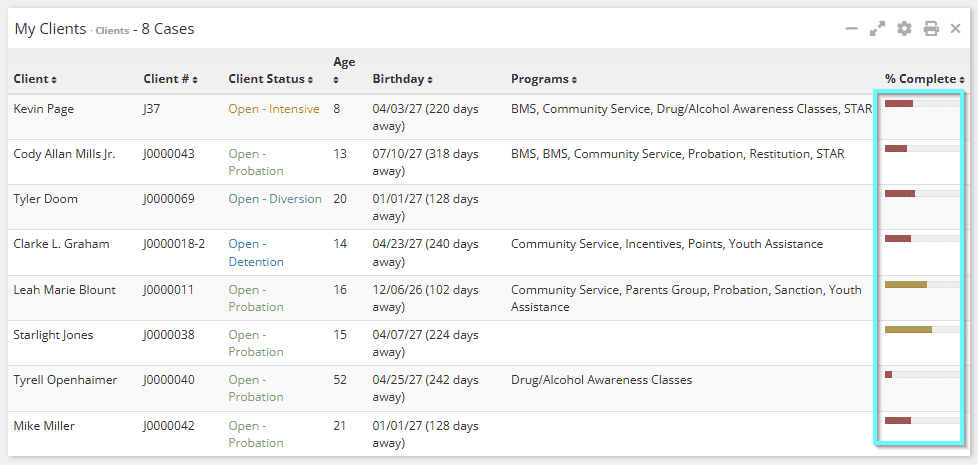
Use the gear icon to get into your widget’s settings and add % Complete to “What data should be shown?”:
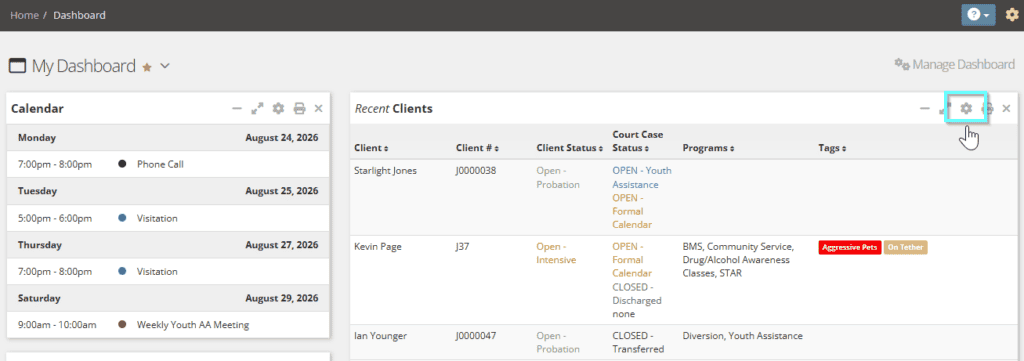
To add the % Complete column to a Client’s widget, select the gear icon on the client widget, then scroll to the bottom of the list and check the % Complete checkbox:
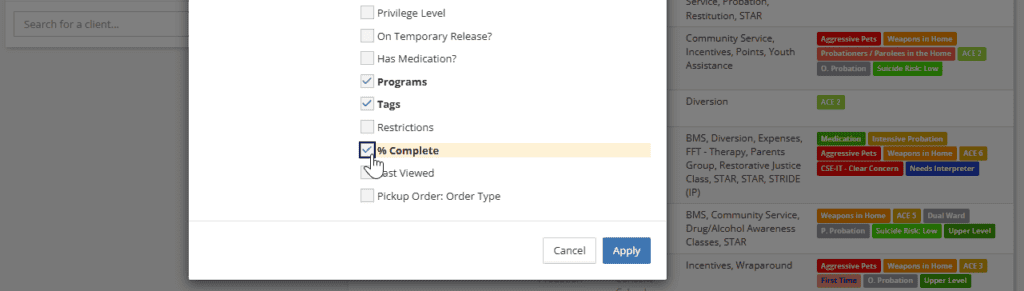
Click on Apply to save changes. The % Complete data point is available on several widget types – click the video below to see it in action.
Adding the Audit Checklist to your Dashboard #
Tracking Client Completion with Reports #
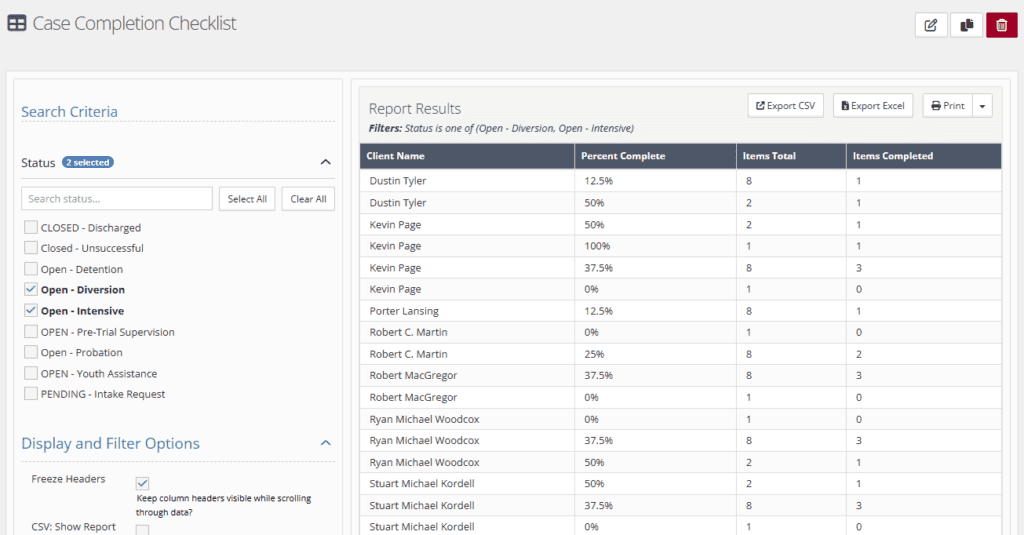
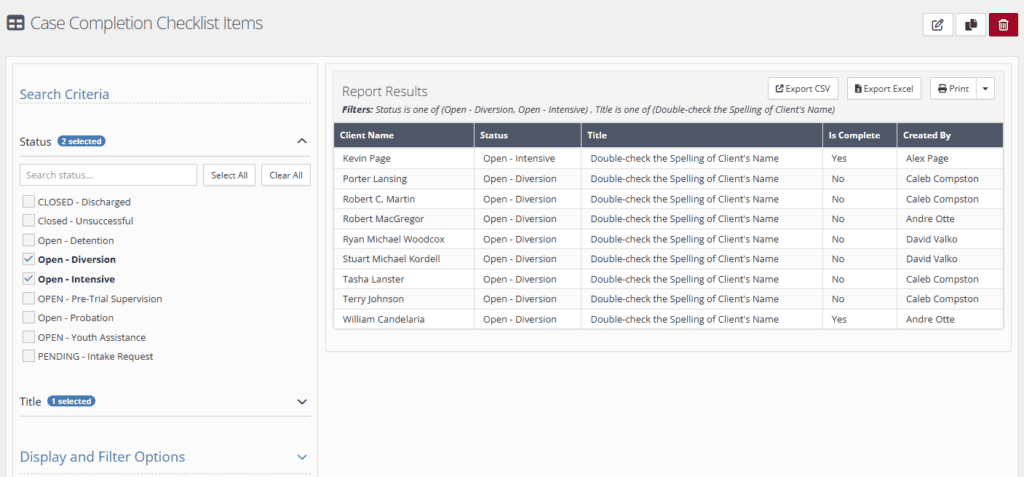
Use Reports to track percentage completion over time. There are a few different Data Sources that apply to the Audit Checklist:
- Use Client: Case Completion Checklist or Court Case: Case Completion Checklist for general information
- Use Client: Case Completion Checklist Items or Court Case: Case Completion Checklist Items to track a specific item
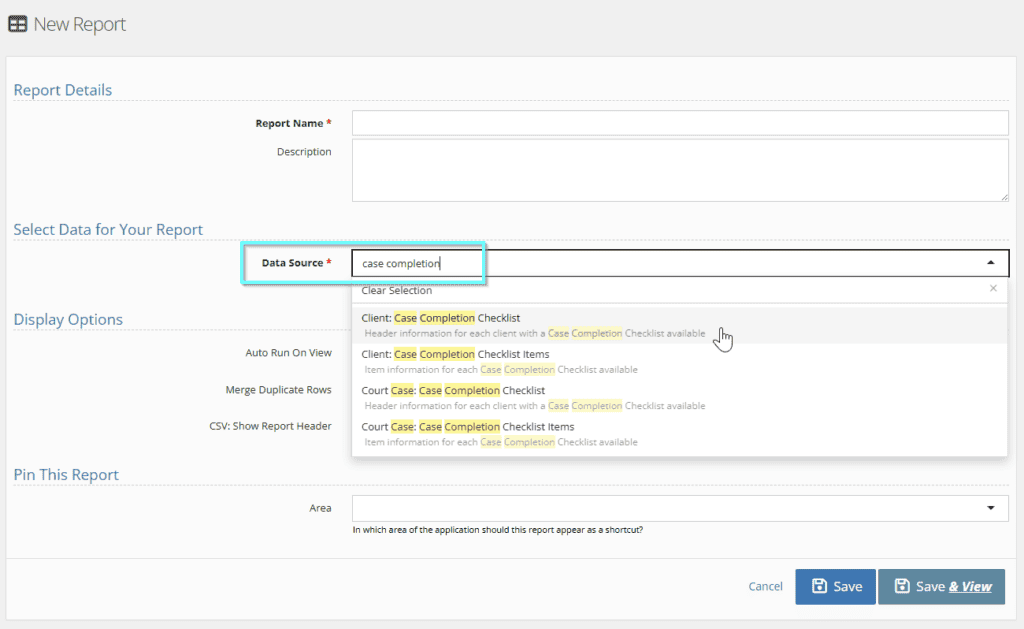
Here’s an example of using Client: Case Completion Checklist to view the completion of items from different areas. Make data fields searchable so you can narrow down results to the groups that you need:
Here’s an example of focusing on a specific item using Client: Case Completion Checklist Items as the data source:
Policies for Client Completion #
The audit checklist has a few items included by default. We highly recommend customizing the checklist with items that your organization frequently has to report on. Create a strategy that works for your team to capture the data you need.
For more information, see our article on Using the Audit Checklist.