Court cases can be excellent ways to track the court side of a juvenile’s journey. Court cases often will follow the youth, while court case occurrences act as “chapters” within their court cases, and can allow for petitions to be attached easily to each occurrence.
Note: If you have the JIS integration, you may be able to import the majority of the information explained below by following the directions shared here.
Location & Description of Court Cases #
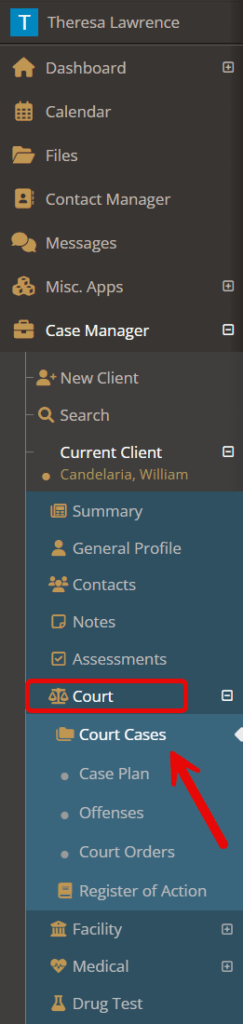
Once a youth has been selected, choose “court” followed by “court cases.”
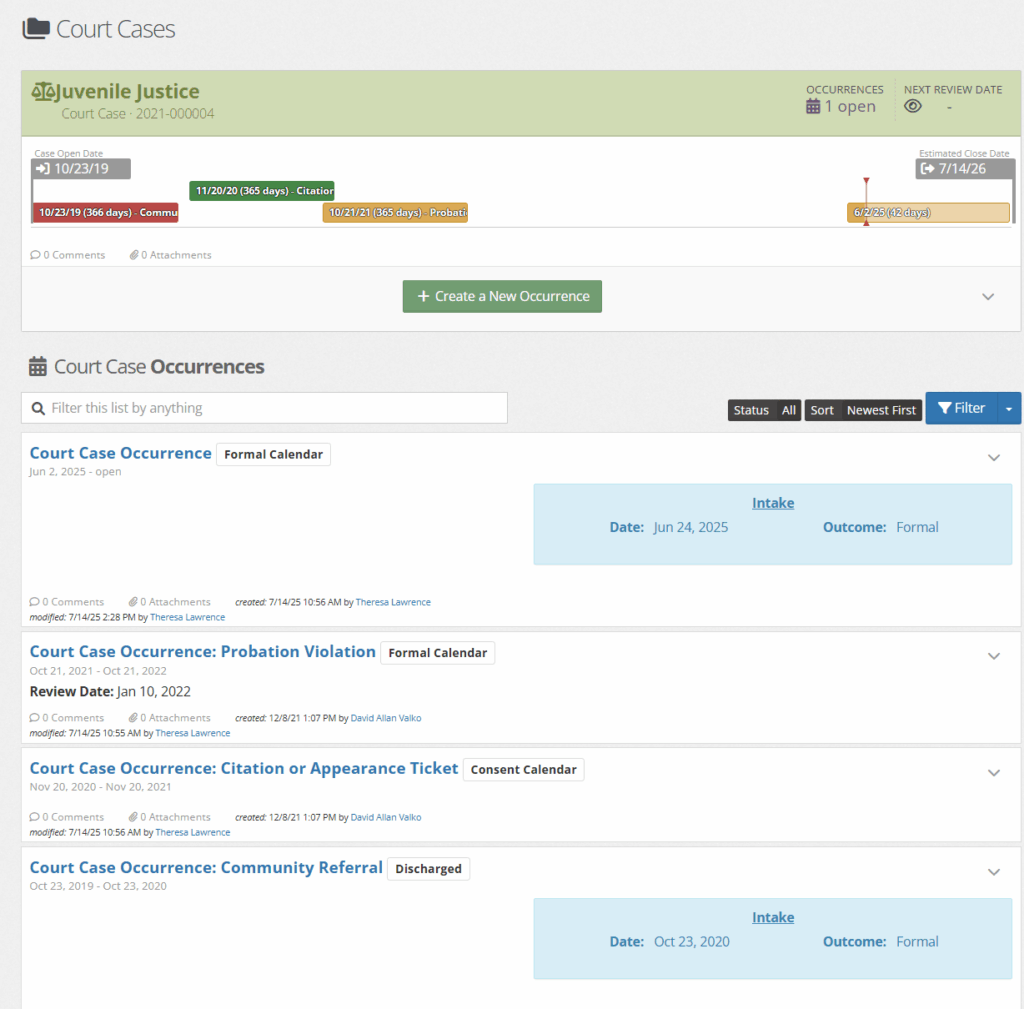
This will bring you to the court case summary panel and court case occurences.
The court case summary panel will list any occurrences that have happened in the past or are currently in progress.
When the bars are clicked on, or if a user goes under “court case occurrences,” there can be more details found as well as the ability to edit or close a court case occurrence.
As with many of the summary panels, the light colored bars will show the length of the current court case occurrence and, if the estimated date is added, share an estimated end date.
Adding a new Court Case #
In most situations, youth are given one court case under which court case occurrences are added. However, if a youth has different case types, multiple court cases and associated court case occurrences can be open at the same time.
To add the first court case, select the green”open a court case.”
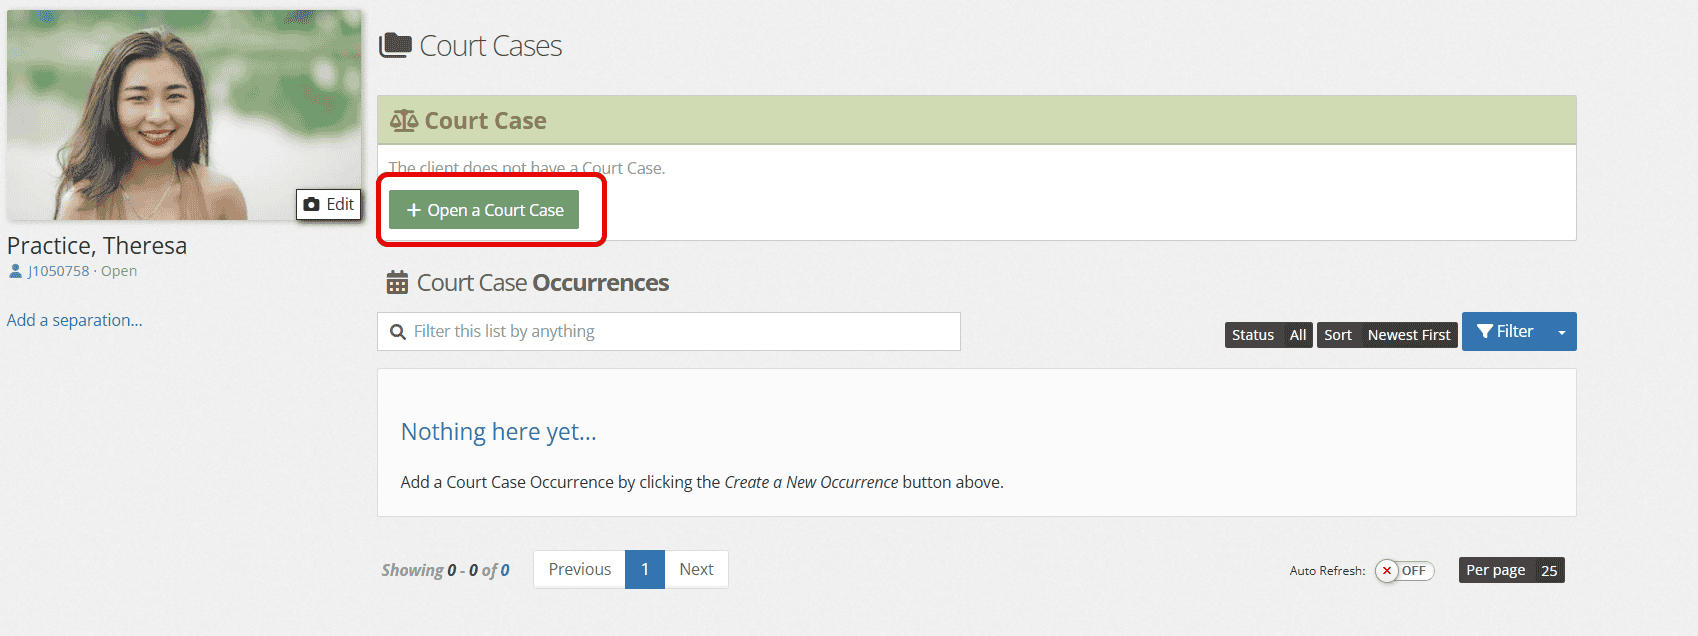
By default, the court case number will be auto-generated. If your team uses a specific numbering system, however, click the checkbox and manually enter the number.
Next, choose the court case type and an associated open date.
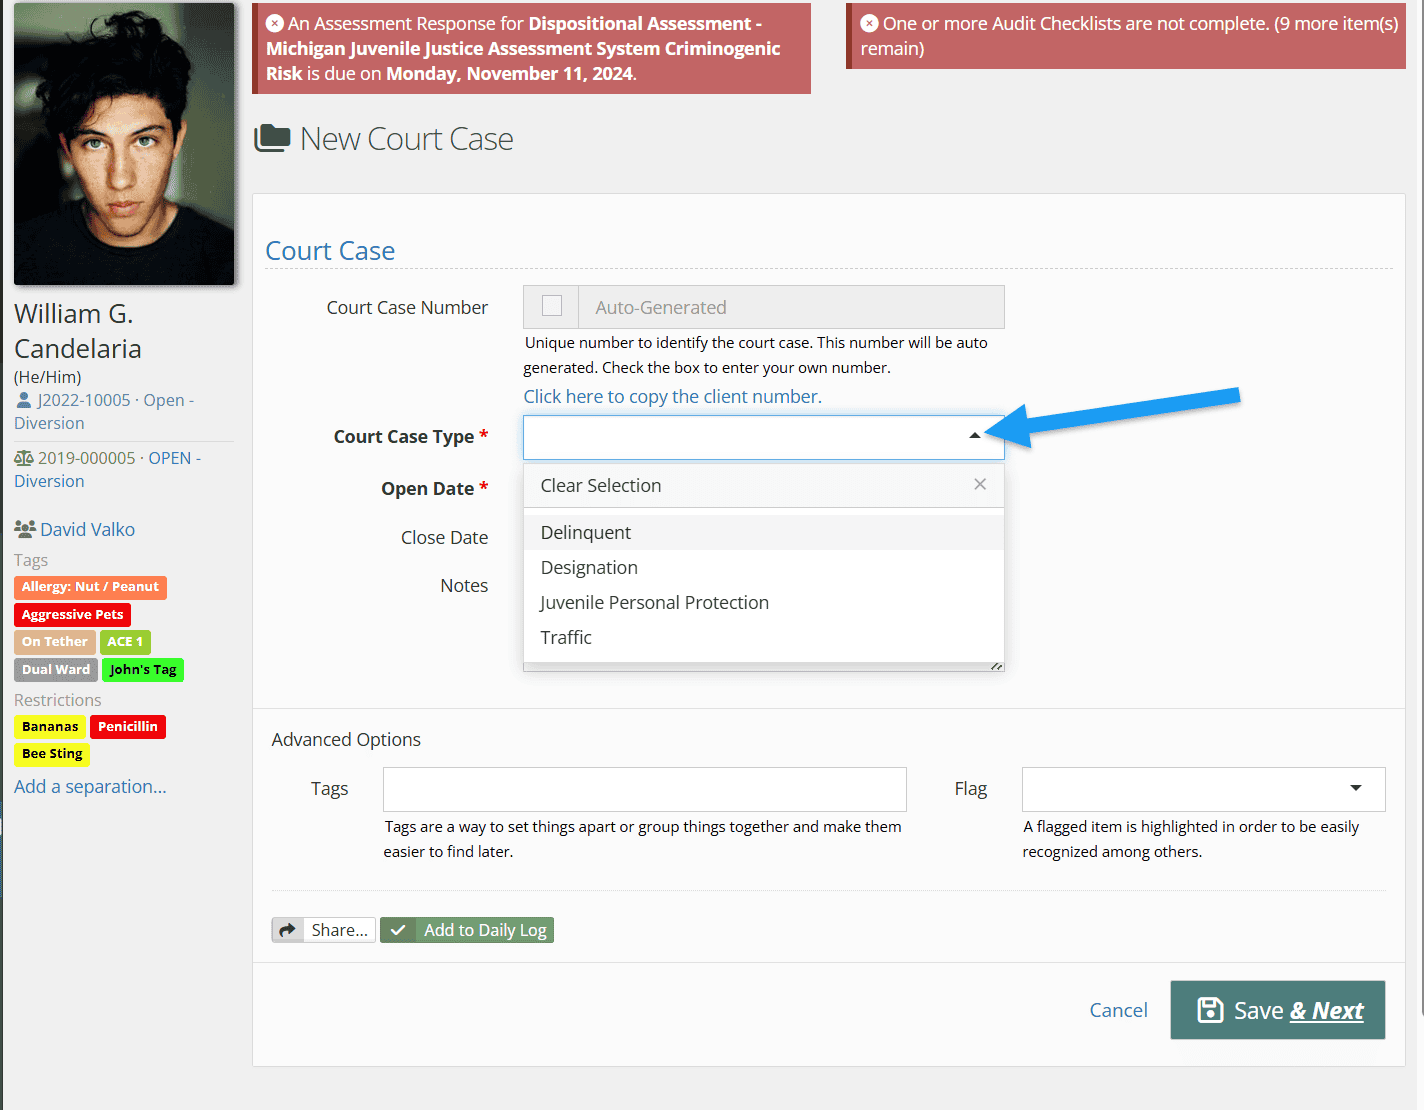
Select “Save & Next”
Next, fill in the court case occurrence fields below. Once completed, click Save.
(Note: Your assessment types and recommended actions may differ. These can be updated via the picklist admin.)
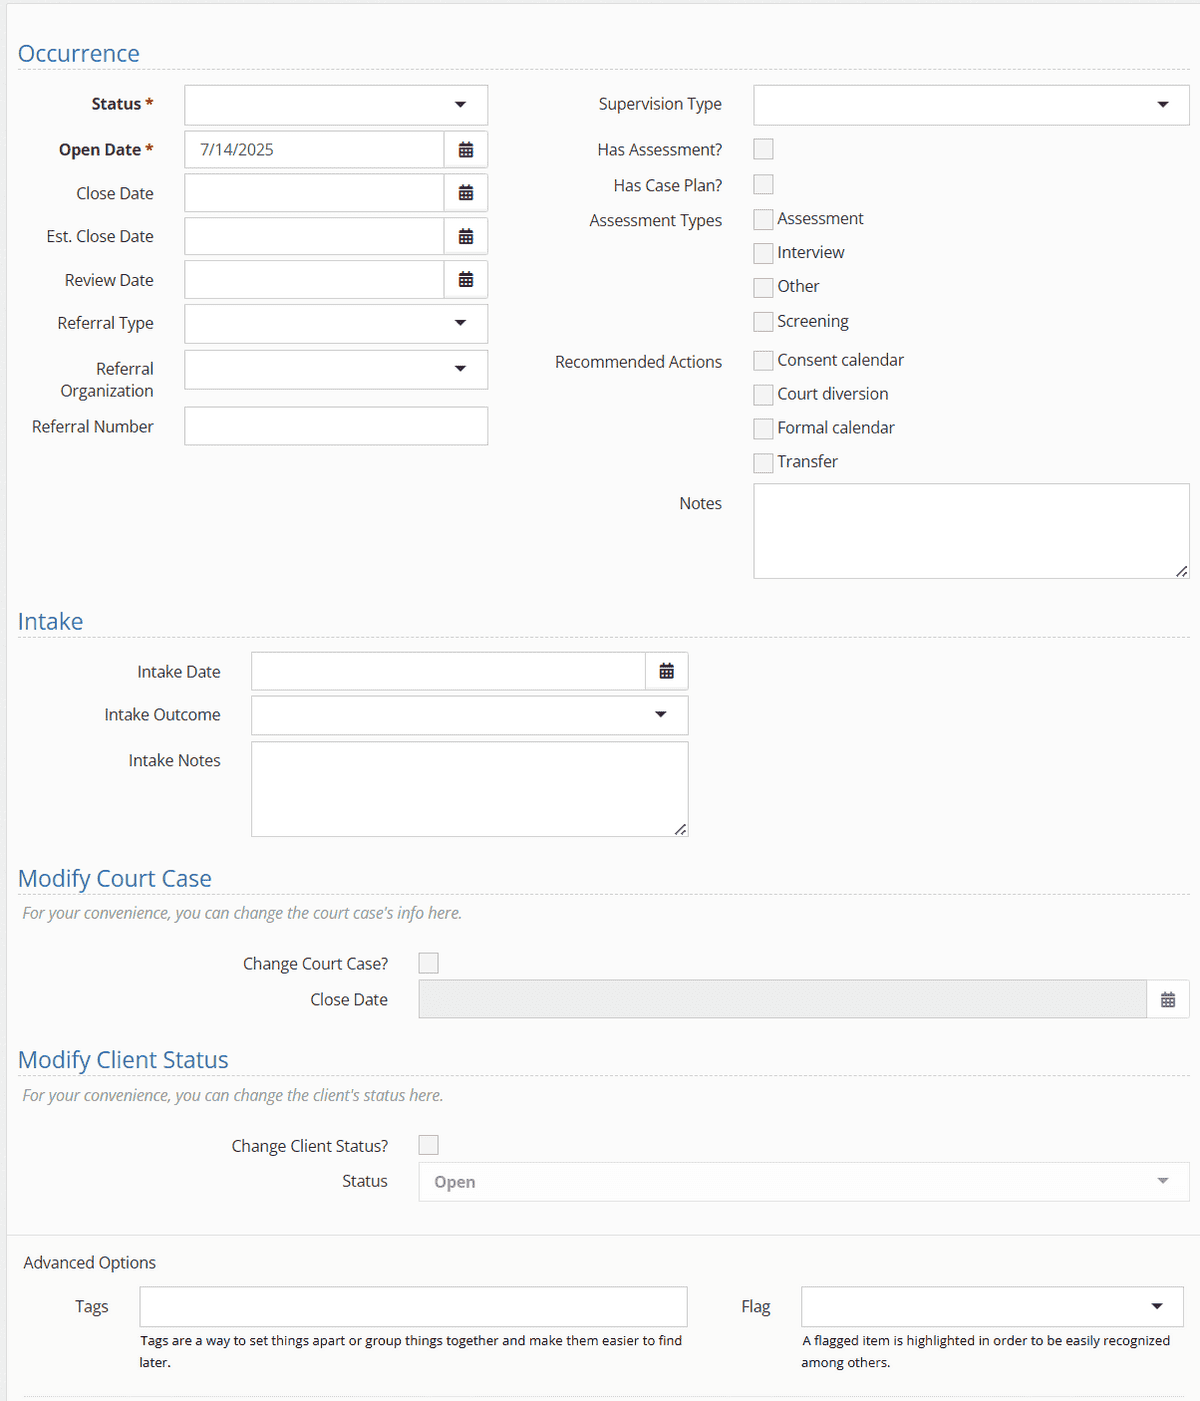
A frequently asked question is: what’s the difference between Open date and Intake date?
- Open date is when the youth is referred
- Intake date is when adjudication has occurred
Select “Save” when the details are completed.
If there are any attachments available, you can add them by selecting the green “Add an attachment.”
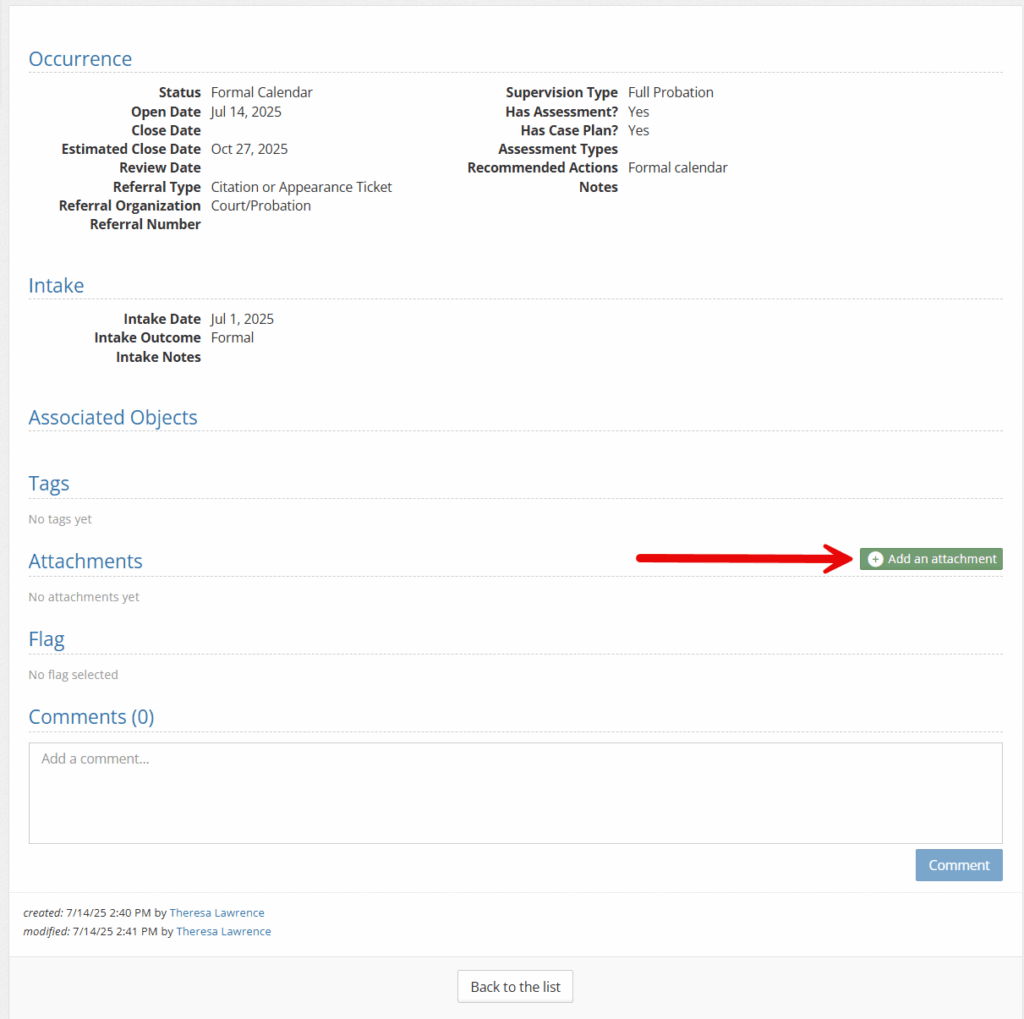
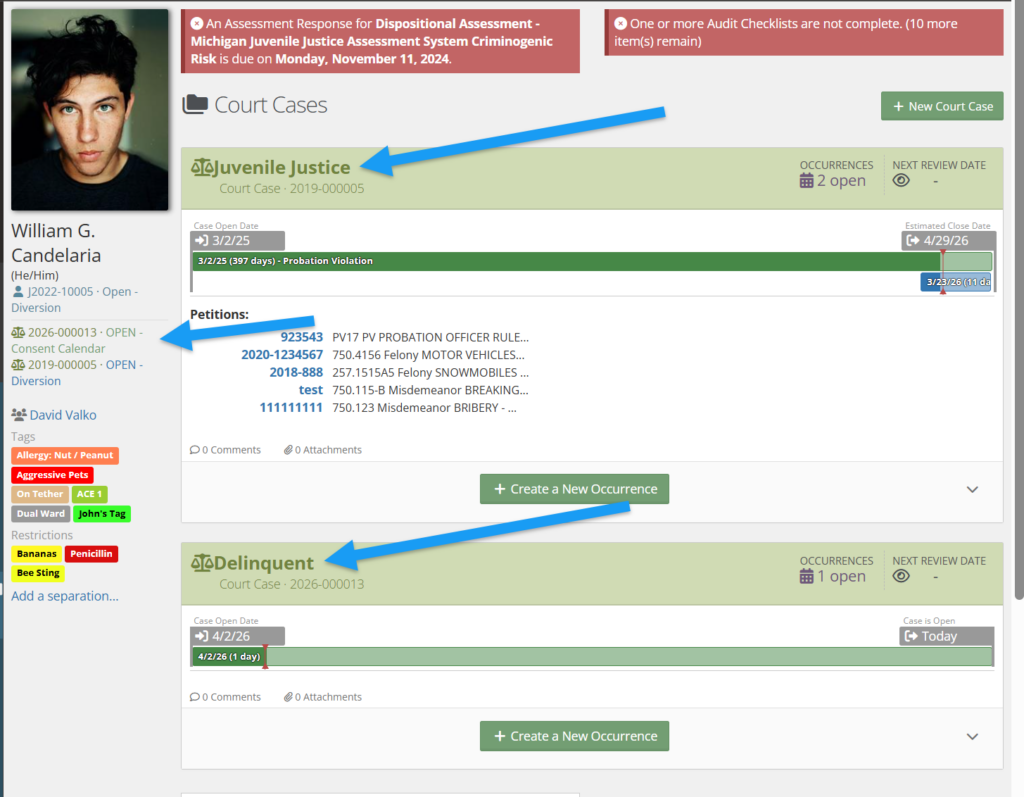
If there are different court case types, they will be shown under the youth’s picture as well as in separate sections as shown below:
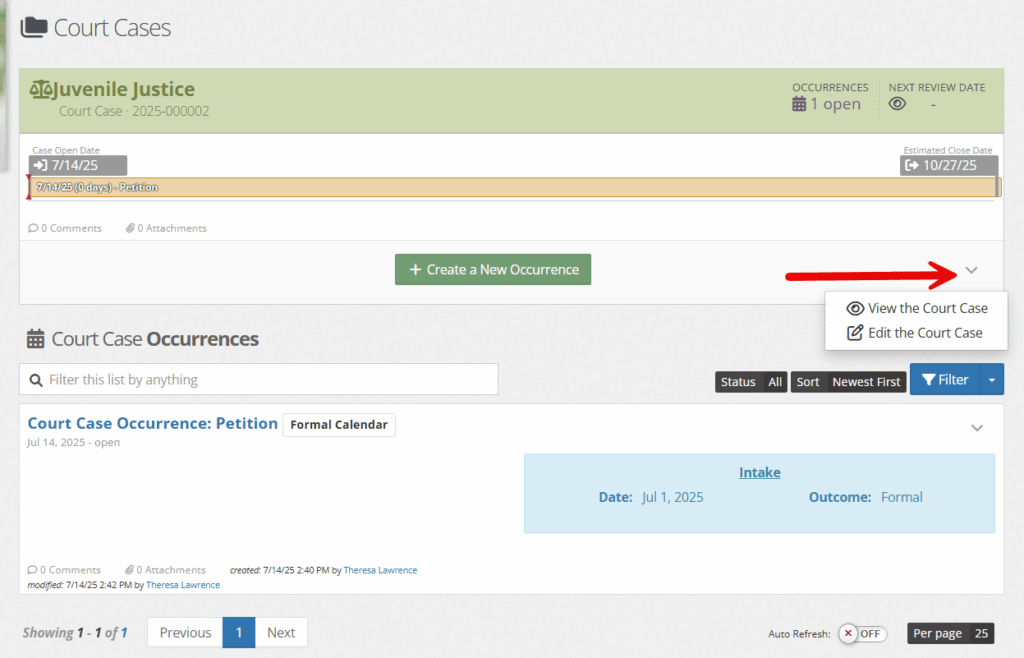
To edit the court case, select the down caret as shown below.
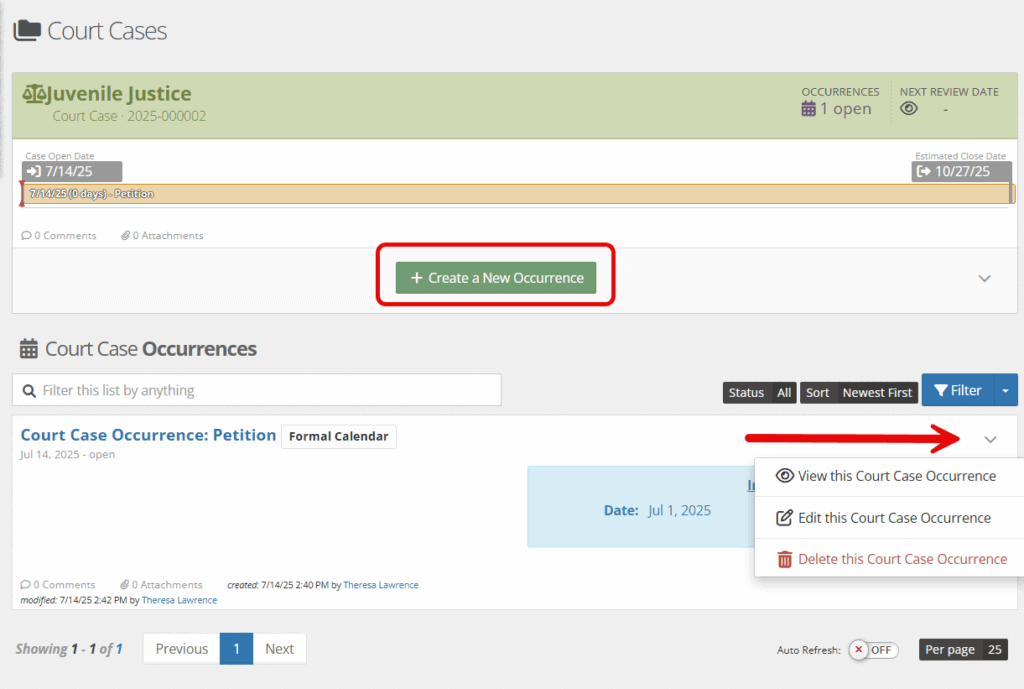
To add an additional court case occurrence.
Select the green “Create a new occurrence.”
Editing a Court Case #
To edit the court case occurrence, select the down caret and choose “Edit this court case occurrence.”
Adding Offenses to Court Cases/Occurrences #
While under the court tab of a youth, choose “court cases” followed by “offenses.”
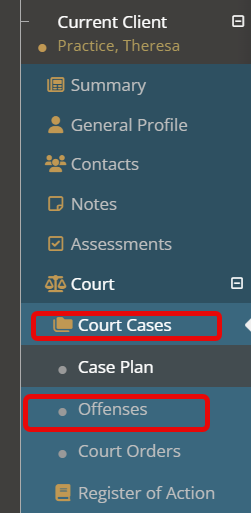
This will take you to the “legacy” side of YouthCenter.
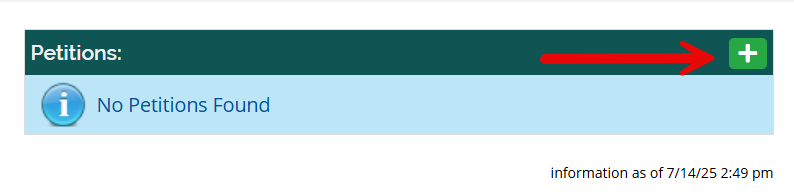
To add a petition, select the green “plus” button.
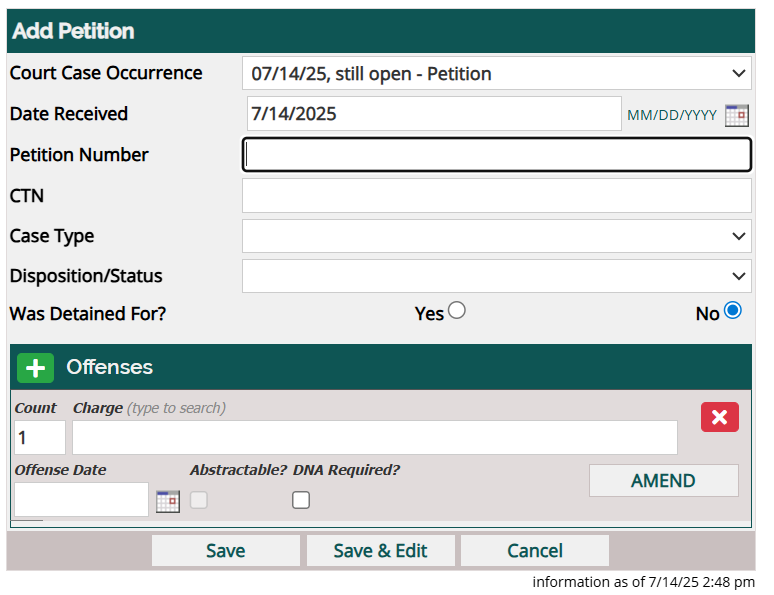
Fill in the fields below. Please note that if you know the charge number or description of the offense,you can begin typing and a list to choose from will appear.
Multiple offenses can be added under the same petition by selecting the green plus button.
Click Save upon completion.
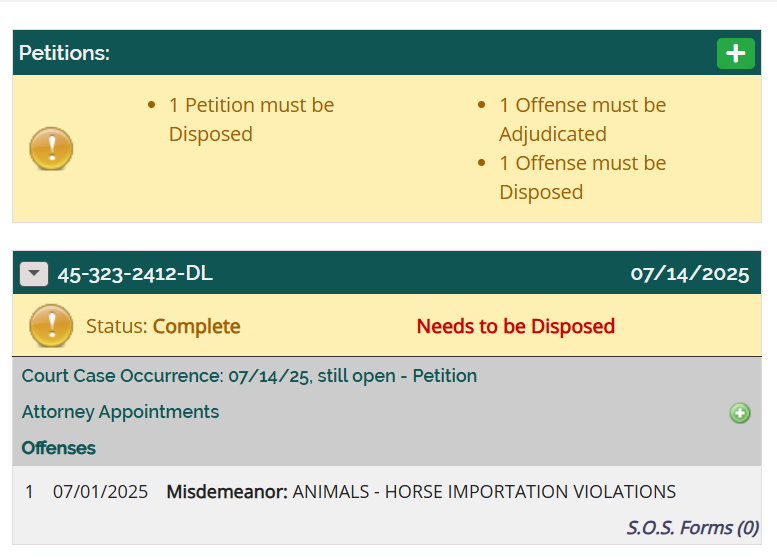
Once saved, a petition will look like below.
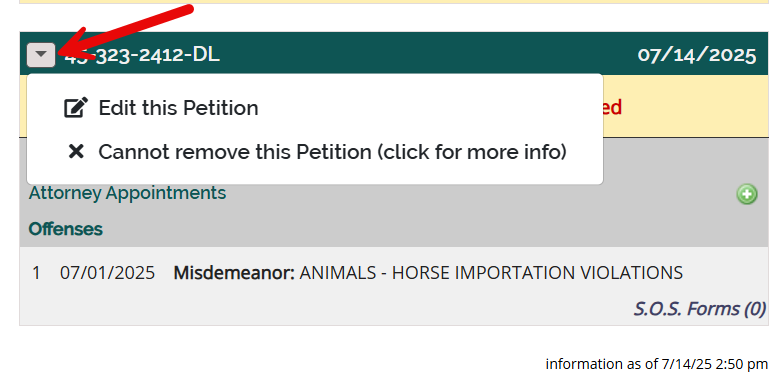
To dispose and add additional information to the petition, select the down caret and choose “edit this petition.”
While editing, additional information can be added, such as adjudication date, disposition date, and sanction date.
Amendments are also possible using the “amend” button.
Click Save upon completion.
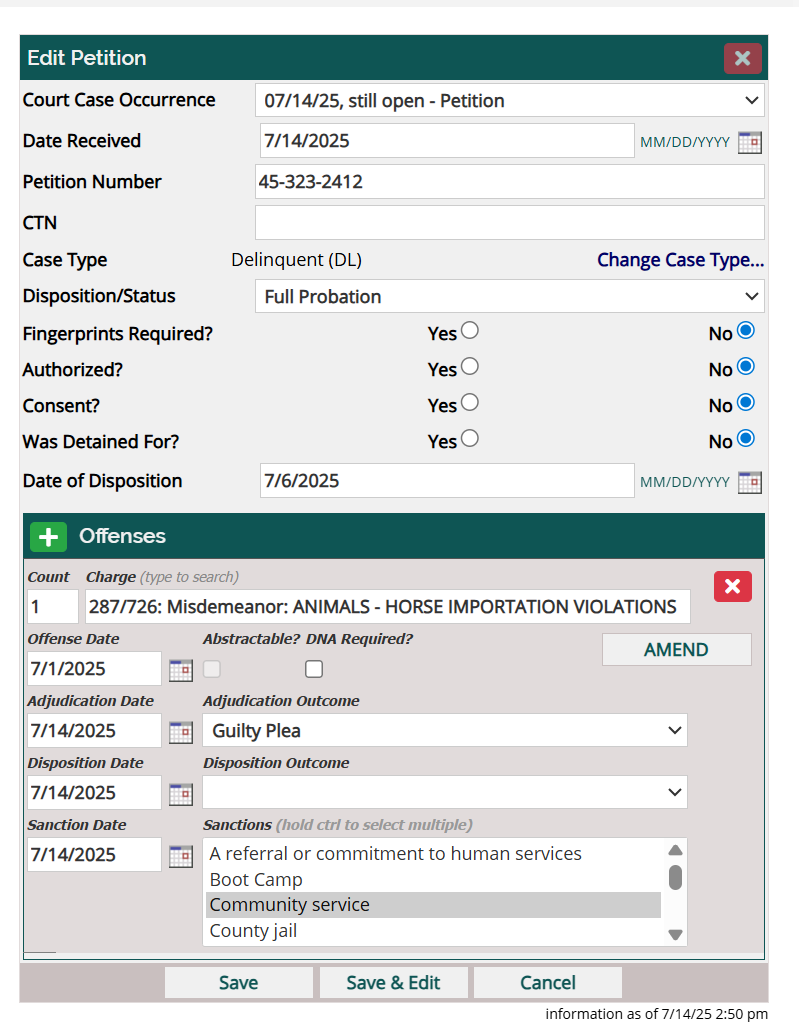
A completed petition will be shown as below:
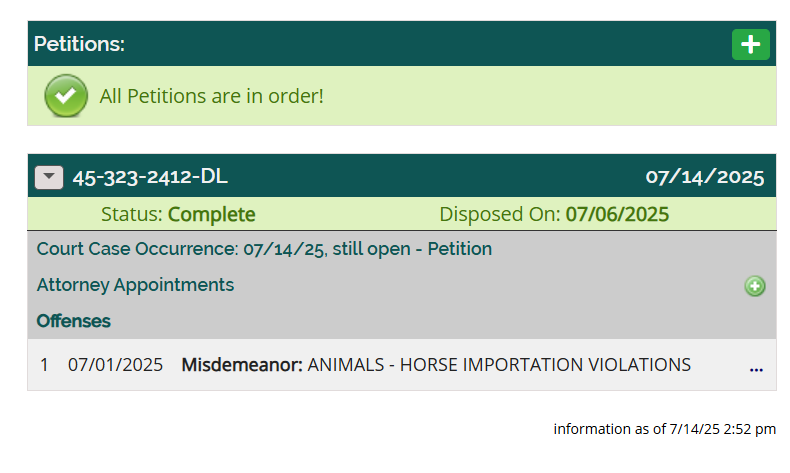
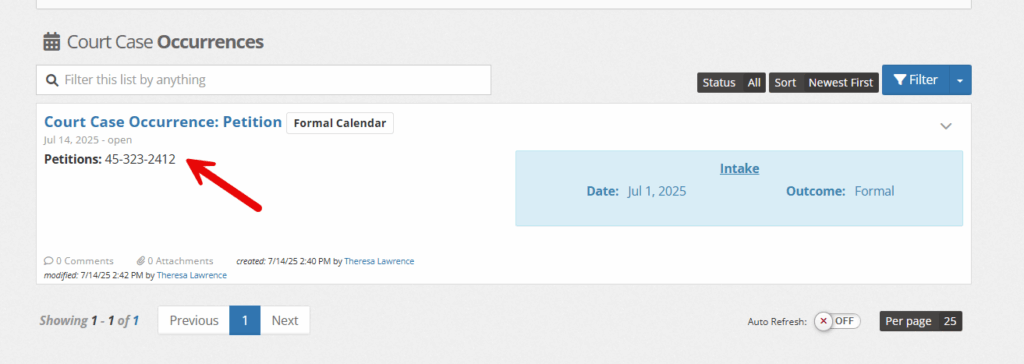
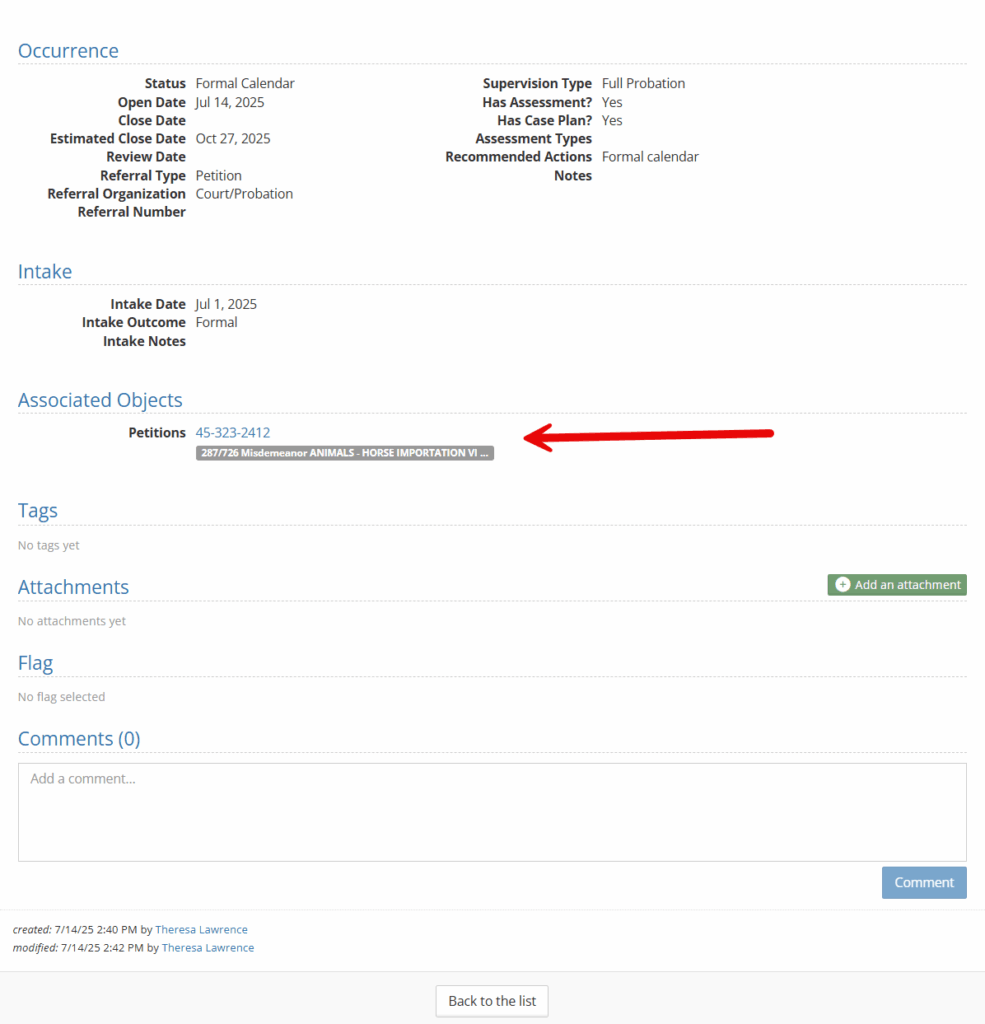
Under a court case occurrence, the petition number will appear as below.