
Designed around your formatting, Smart Word templates generates fully customized Word documents pre-filled with client data. Create your template once, and allow the system to handle the rest.
Overview: How It Works #
There are two main pieces to using Smart Word Docs:
- Build your Word template — create a Word document with tokens that tell the system where to insert client data.
- Upload and use it in YouthCenter — connect your template to a form in YouthCenter, select a client, and generate a filled-out document automatically.
What is a token? #
A token is a special placeholder you add to your Word document — something like {{ClientFirstName}} or {{AssignedJudge}}.
When you generate a document, each token is automatically replaced with real client data from YouthCenter.
You only need to set up a template once. After that, generating documents takes just a few clicks.
Step 1: Create Your Form in YouthCenter #
Before uploading your Word template, you need to create a form in YouthCenter to link it to.
How to Create a New Form #
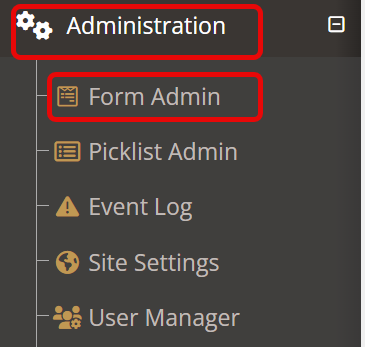
From the “administration” tab, choose “form admin.”
Navigate to the folder where you want to store this form and choose the green “new form” button under the associated folder of your choosing.

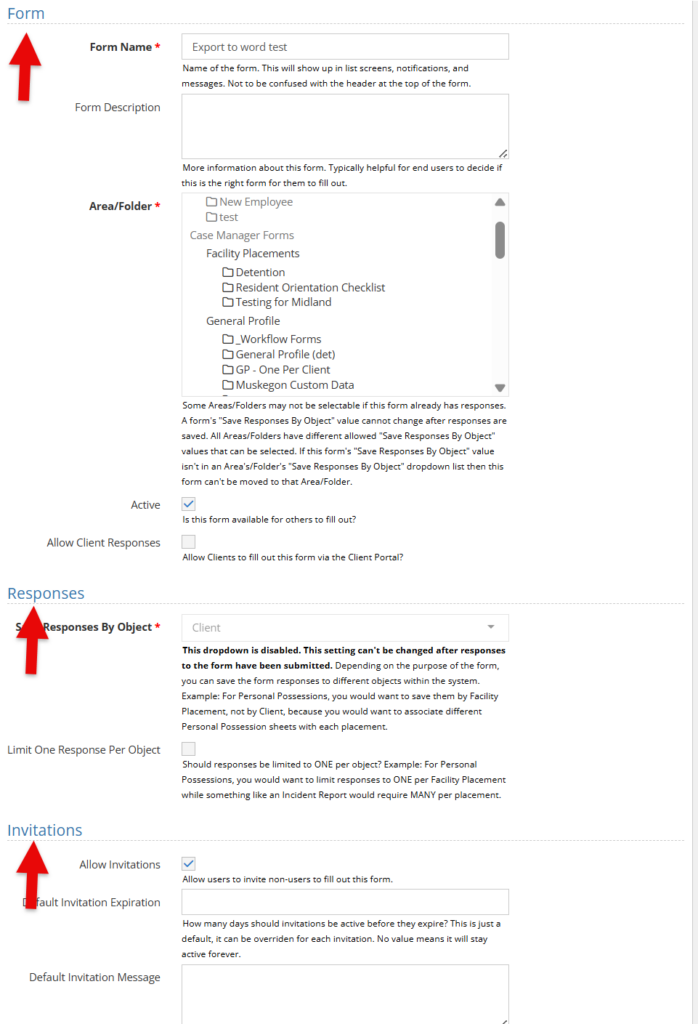
Fill in the “Form,” “Responses,” and “Invitations” sections as you normally would.
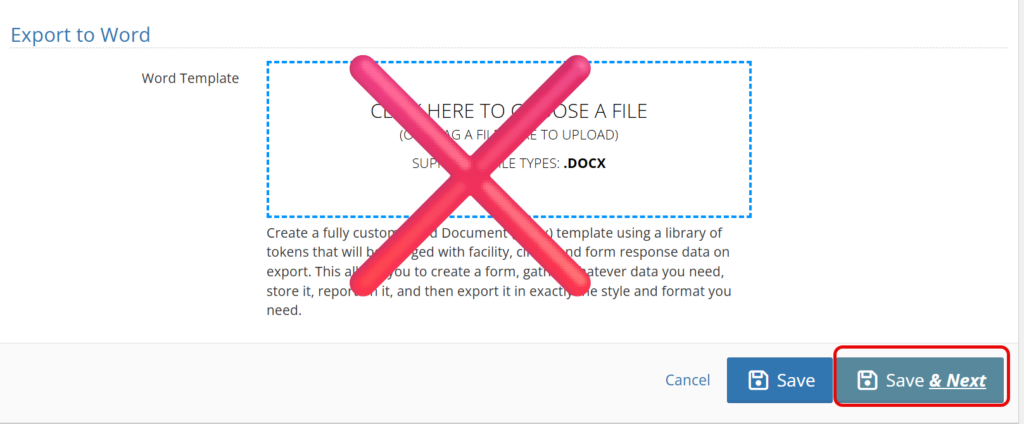
Skip the Export area for now — you will return to this after setting up your Word template.
Click “Save and Next.”
Step 2: Build Your Smart Word Doc Template #
Your Word template is a standard .docx file that you format however you like — with one key difference: instead of typing in client data manually, you insert tokens that the system will fill in automatically.
Before You Start Building Your Template #
We recommend keeping your YouthCenter form and your Word document open side by side while you work. This way, you can browse the Token Library and copy tokens directly into your template without switching back and forth between windows.
Best Practice: Use Split Screen. On most computers, you can snap two windows side by side by dragging each to opposite edges of your screen (Windows) or using Mission Control (Mac). Put YouthCenter on one side and your Word document on the other. This makes the token-building process much smoother.
Choosing the Right Type of Token #
There are three types of tokens available, depending on what kind of information you need:
| If you need… | Use this token type | How it works |
| Data already stored in YouthCenter | Base Token | Copy a ready-made token from the Token Library and paste it into your Word template. |
| Data that someone needs to type in manually. Two steps are required to add. | Fillable Token | Build a custom field in your form. This creates a token automatically that someone fills in when completing the form. |
| Data from another client, court case, petition, or facility placement. Two steps required to add. | Reference Widget | Add a reference widget to your form so users can select the related record. A token is generated that pulls data from that record. |
Adding tokens #
All tokens available under the form builder tab titled “token library.”

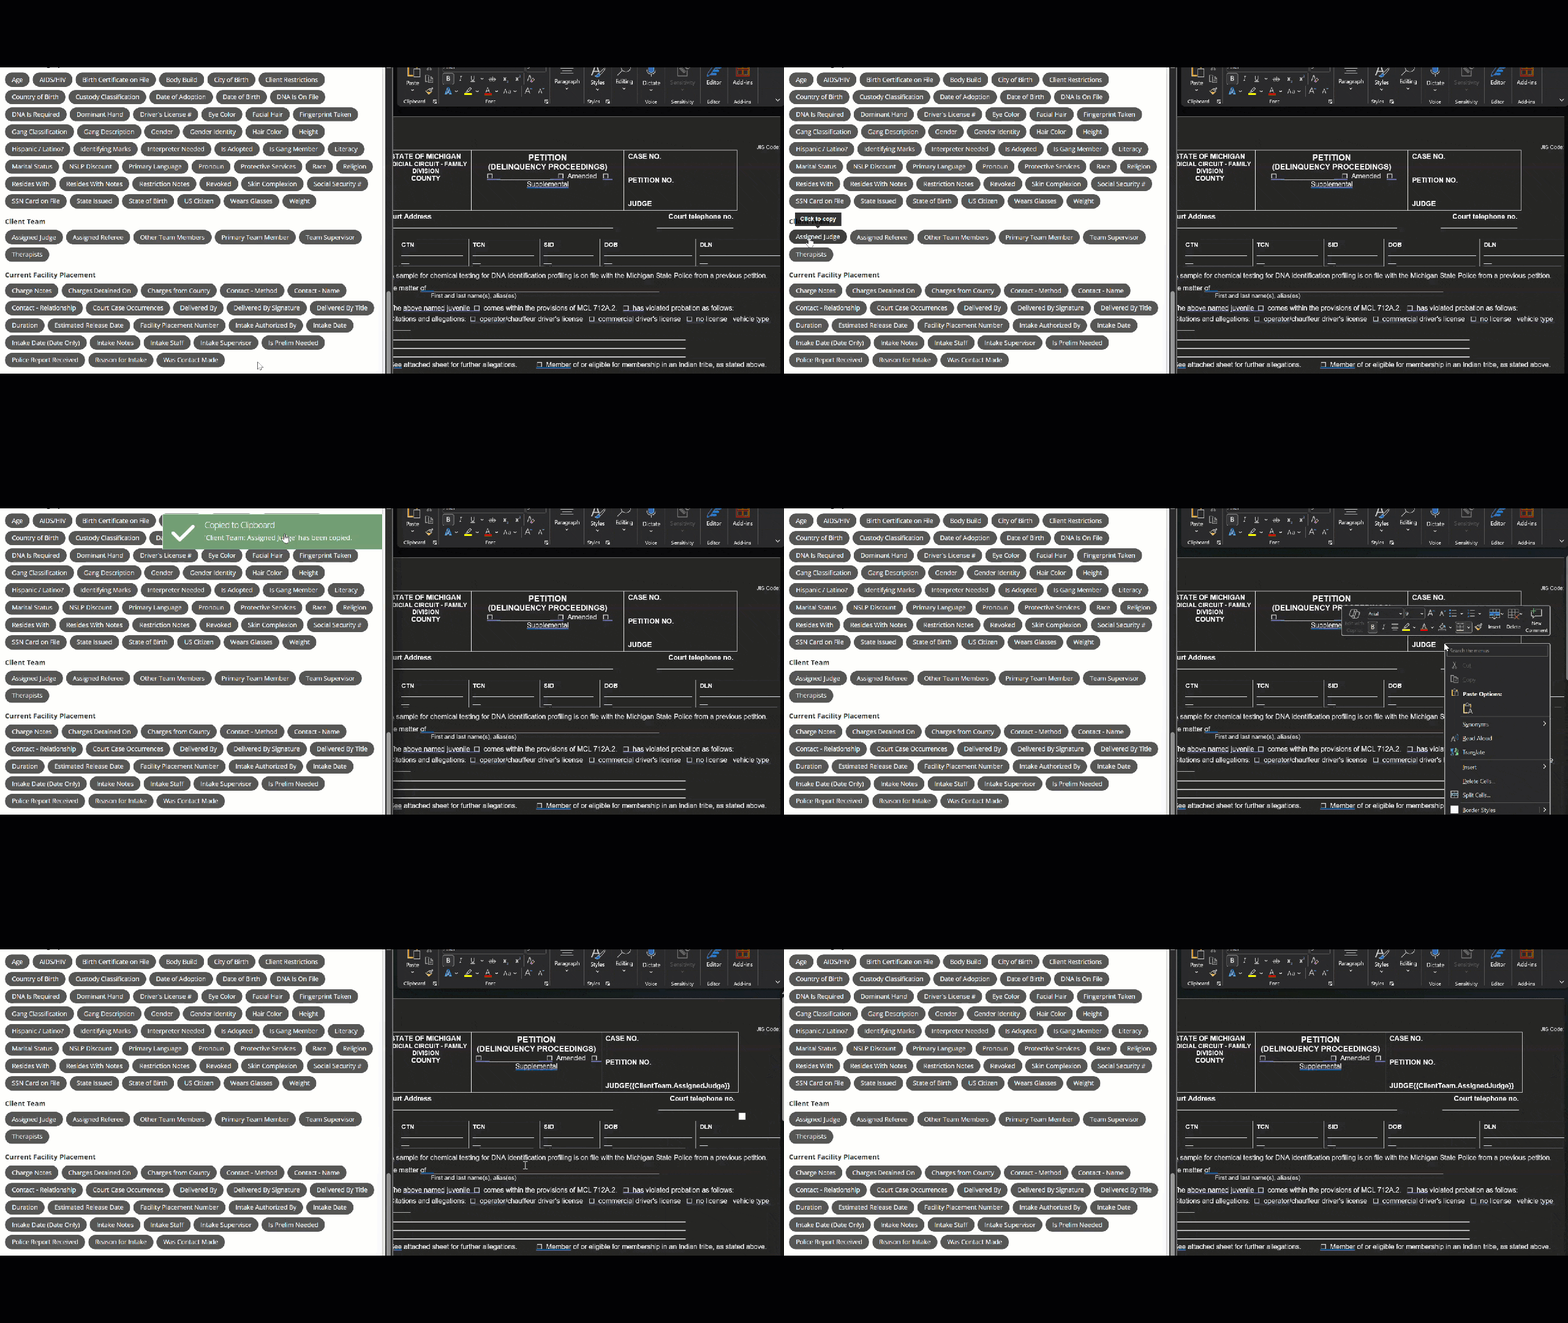
Within the library, find the token you want — for example, Assigned Judge.
Click on the token to copy it to your clipboard.
In your Word document, click where that information should appear and paste the token.
When a document is generated, the token will be replaced with the actual client data.
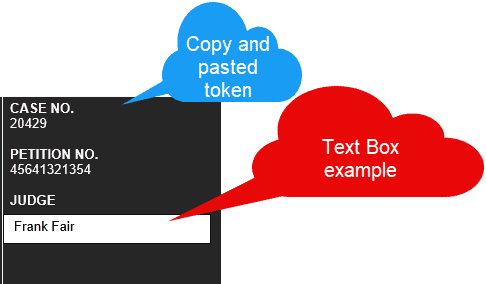
In the example below, the “assigned judge” token is being added to my template form. The generated document will automatically display the judge’s name as entered under that client’s team in YouthCenter.
*Note* Text boxes in Word can help with making formatting and sizing easier.
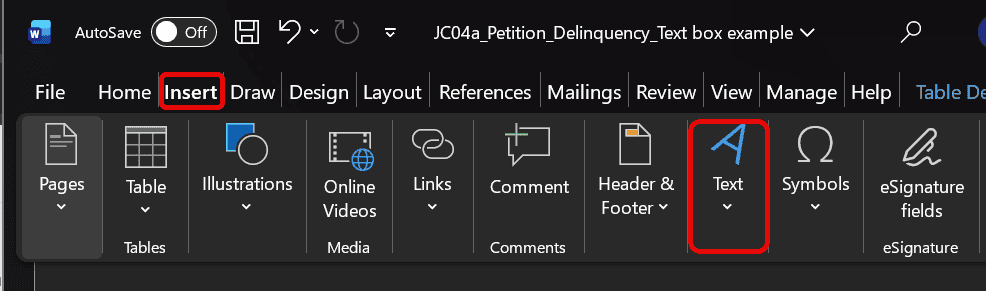
Using text boxes would look like this:
Base Tokens #
Base tokens are pre-built placeholders that pull existing client information directly from YouthCenter. You do not need to configure anything — just copy and paste from the token library.
Available Data Sources #
The following types of client information are available as base tokens:
- Current Residence
- Client Profile
- Client Demographics
- Client Team
- Current Facility Placement
If utilizing AI to prefill some base tokens, use the listing below.
Fillable Tokens #
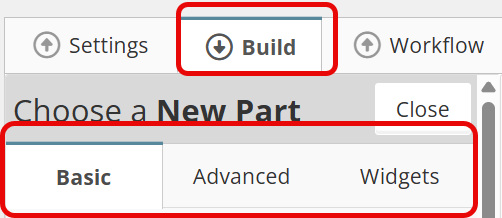
If the data you need is not readily available in the base tokens, any of the traditional “build” tab features can be used to generate a unique token.
How to Create a Fillable Token #
In the “Build” tab of your YouthCenter form, add the type of field you need (e.g., a short text field).
Give the field a “Part Name” — this is required for a token to be created.
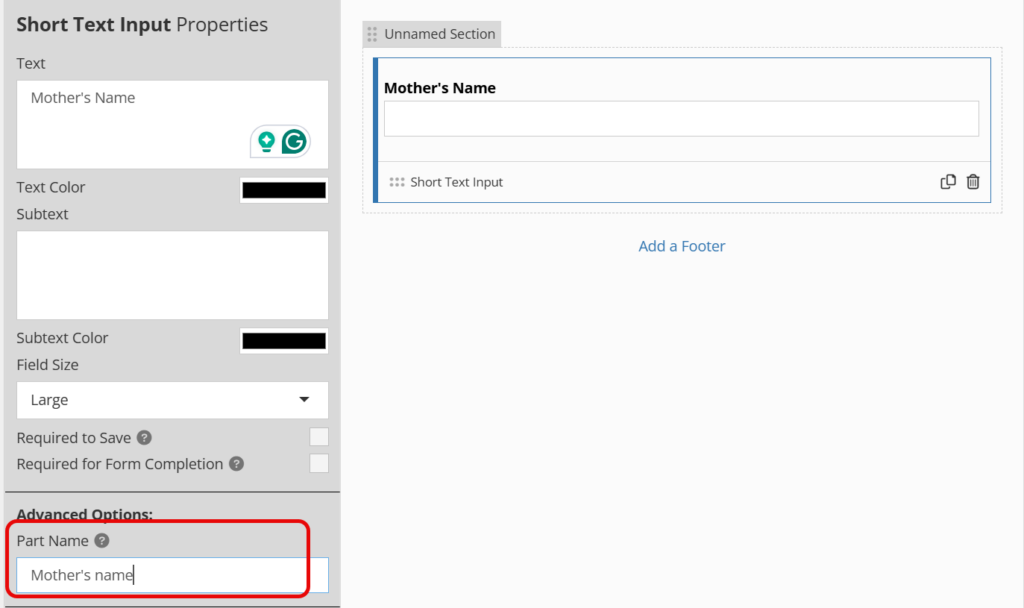
Once saved, a token for that field will appear on your form and can be copied into your Word template just like a base token.
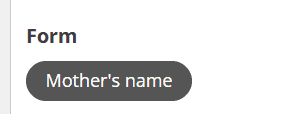
When someone fills out the form, their input automatically fills in that token in the generated Word document.
Note: The Part Name you give a field is how the system identifies its token. Be descriptive — for example, “MotherName” is clearer than “Field1” and will make your token library easier to manage over time.
Reference Token Widgets #
Reference widgets let you pull data from records connected to a client — such as a related court case, petition, co-defendant, or facility placement. When someone fills out a form, they select the specific record to reference, and the token pulls data from that record.
Available Reference Widgets #
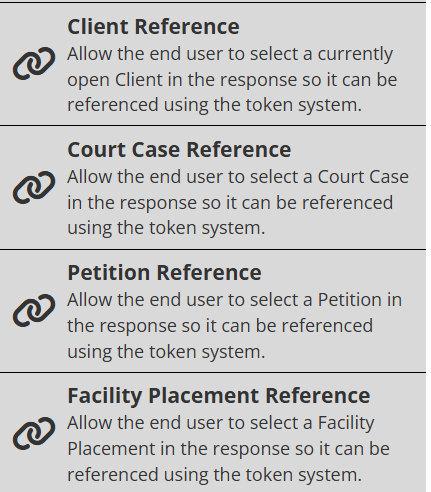
- Client Reference: Use this to reference a second client, such as a co-defendant or sibling. When filling out the form, the user searches for and selects the related client. Tokens from this widget will pull that client’s information into the document.
- Court Case Reference: Use this to include details from a specific court case tied to the client. The user selects the relevant case when filling out the form. If referencing more than one court case, add this widget multiple times with a unique Part Name for each.
- Petition Reference: Use this to include details from a specific petition. The user selects the relevant petition when filling out the form. If referencing multiple petitions, add this widget once per petition with a unique Part Name for each.
- Facility Placement Reference: Use this to include details about a client’s placement. The user selects the specific placement record when filling out the form. If referencing multiple placements, add this widget for each one with a unique Part Name for each.
How to Add a Reference Widget #
In your YouthCenter form, go to the “Widgets” tab.
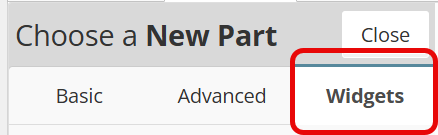
Select the type of reference you need.
Give it a unique Part Name.
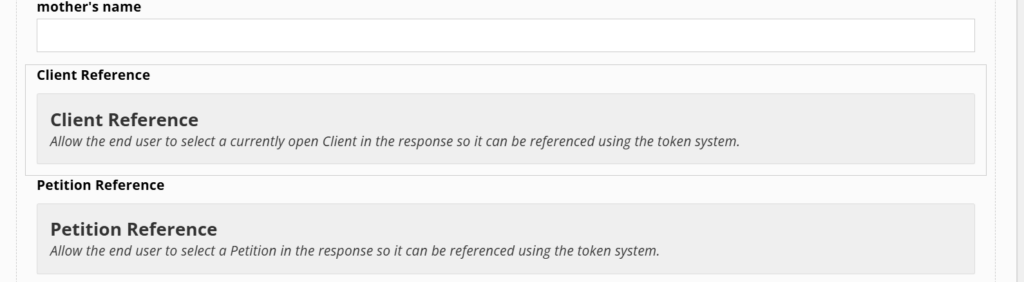
Once added, new tokens will appear that you can copy into your Word template.
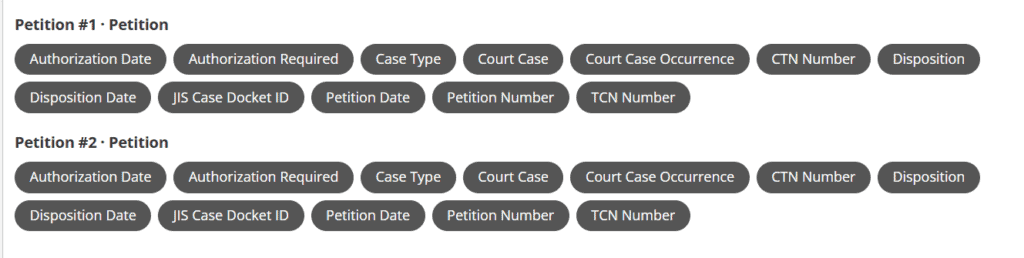
When completing the form, the user selects the specific record to reference — and the generated document fills in accordingly.
If utilizing AI to prefill some widgets tokens, use the listing below. (Note: if the reference token is named differently, these tokens will not apply)
Step 3: Upload and Use Your Smart Word Doc Template #
Once your Word template is ready with all of your tokens in place, you are ready to connect it to your YouthCenter form and start generating documents.
Your template may look something like this.
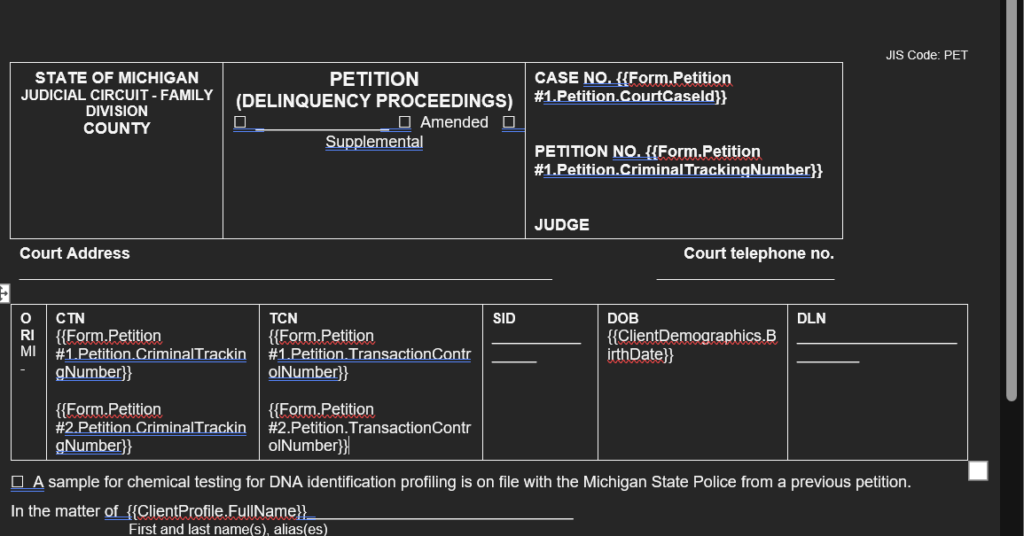
Uploading Your Template #
Return to your YouthCenter form and select the “settings” tab.

Go to the Export to Word section (the one you skipped earlier).
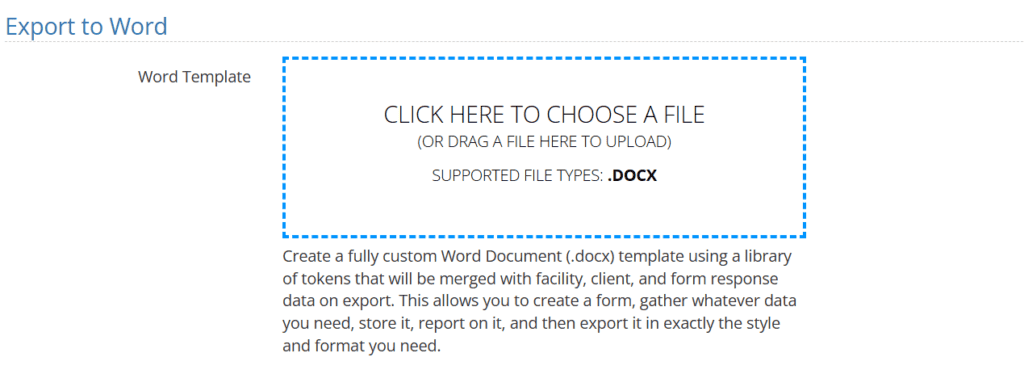
Upload your completed Word template file. If there are any errors, you will see them highlighted in red (like below)
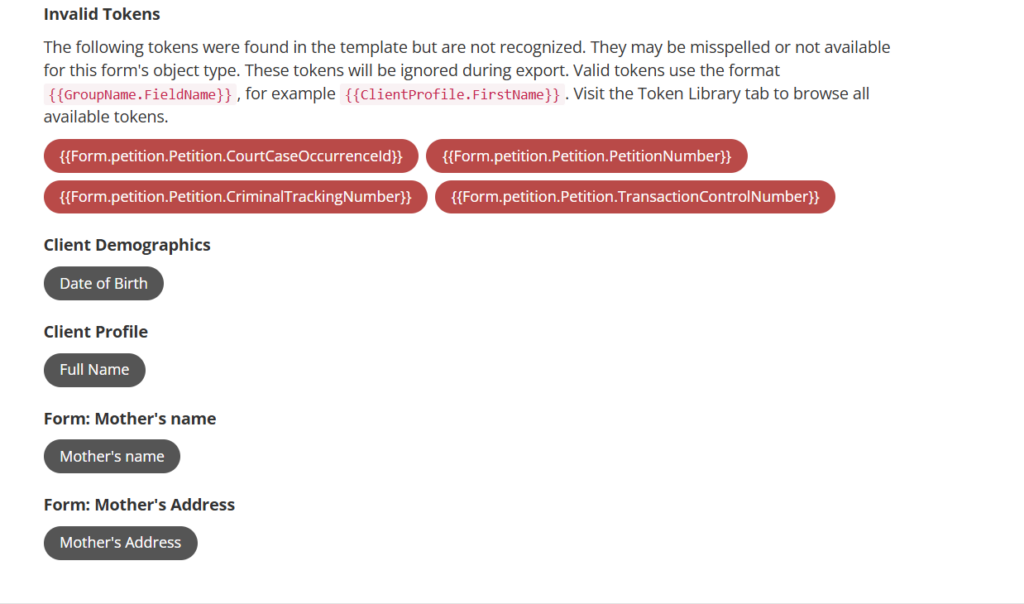
Save your form once all tokens are found or build fields are added.
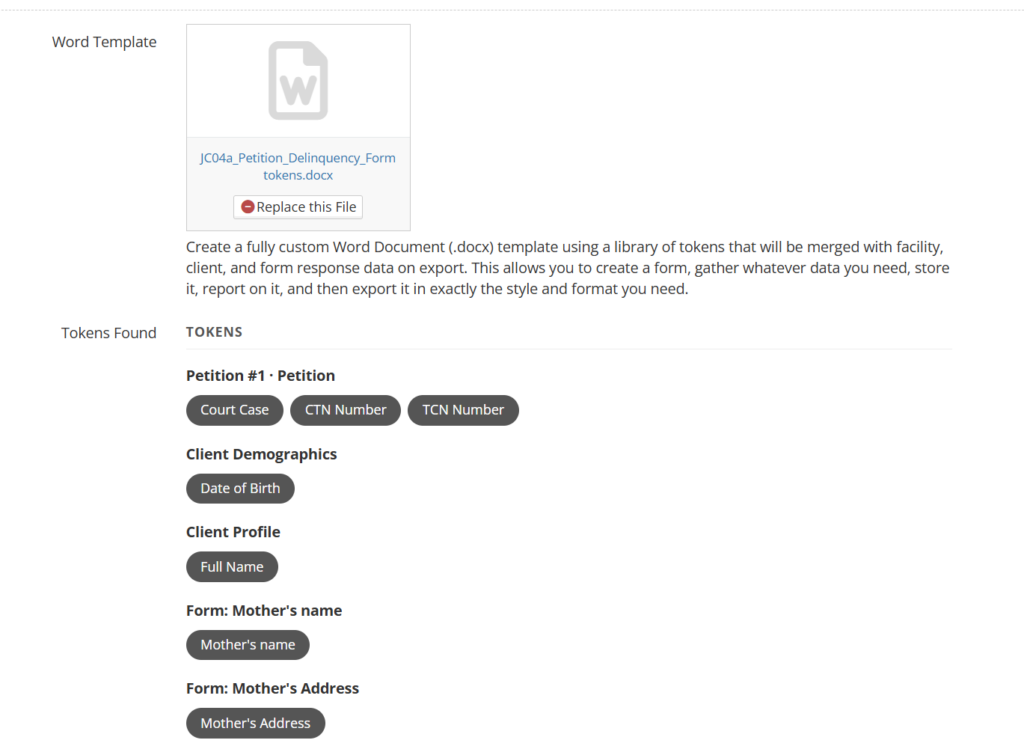
Click save.
Generating a document #
Choose the client and locate the form’s location.
Select “new response.”

Fill any fields and/or dropdowns as necessary. Click Save.
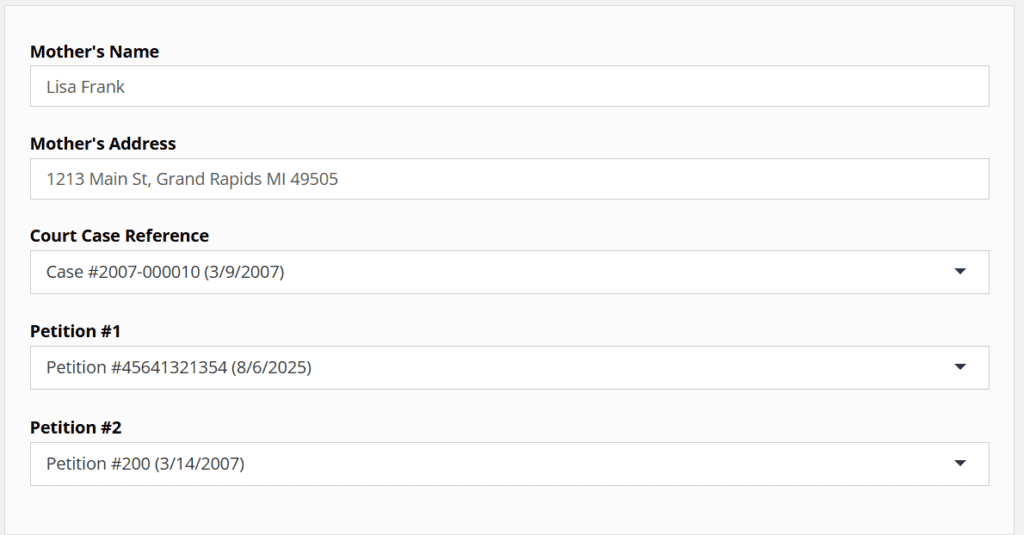
Click “Export to Word.”
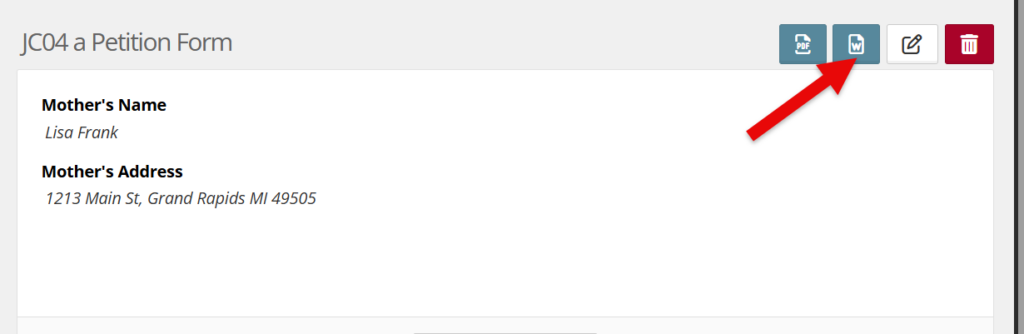
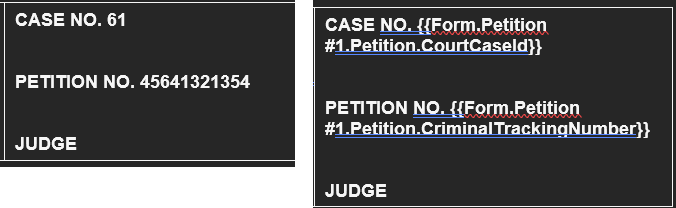
The system will generate a completed Word document with all tokens replaced by real client data.
Some examples below:

Note: The PDF functionality does not work in YouthCenter for these types of forms.
Tokens and instructions to share with AI #
If you would like to try using AI to prefill some of your documents, download the instructions to share and the necessary tokens below.
If utilizing AI to prefill tokens, use the listing below. (Note: if using a reference token and you name it differently, the reference token listed here will not apply)