
Ensuring that your team fills out all necessary data on forms you created or are in the system can ensure all necessary data is completed.
Below walks you through how to make required fields on forms throughout YouthCenter.
Adding Form Items that are required to complete or close #
Whether you are building new forms or editing “built-in forms”, there are two types of completion steps:
- “Required-for-form-completion”
- “Required-for-client completion”
“Required-for-form-completion” description: #
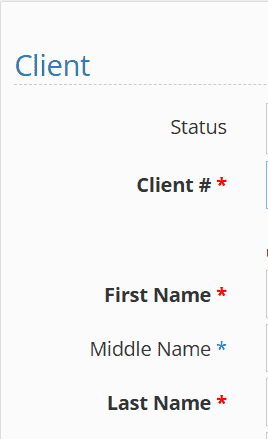
When filling out a form, these items are marked with a blue asterisk.
Although you can save forms without filling out the Required-for-form-completion fields, they won’t be marked as a completed form in the audit checklist until you add the information. The form, however, can be saved without this information.
*Note: In case the information cannot be obtained, a supervisor can override the close check.
“Required-for-client completion” description: #
Any field marked as Required-for-client completion will prevent a standard user from closing a youth without completing the fields.
Creating Required Fields in Built-in Forms #
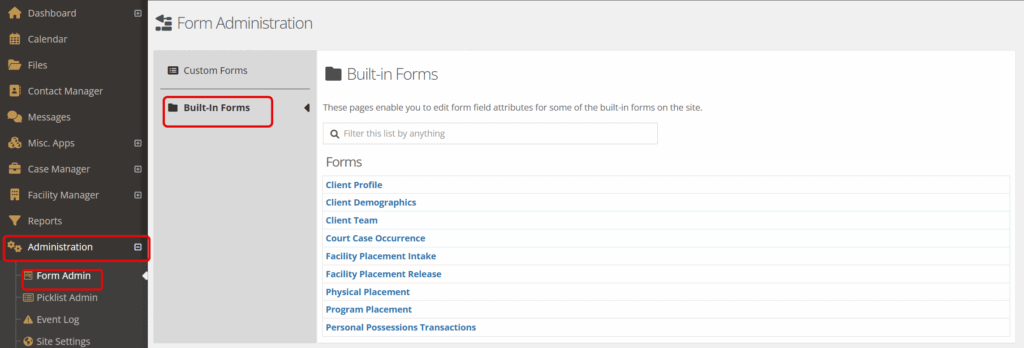
To require a field to be filled before a form is closed or before a client is closed, open the Administration Menu
Select the Form Admin menu item, followed by Built-in Forms.
Select the form you wish to modify.
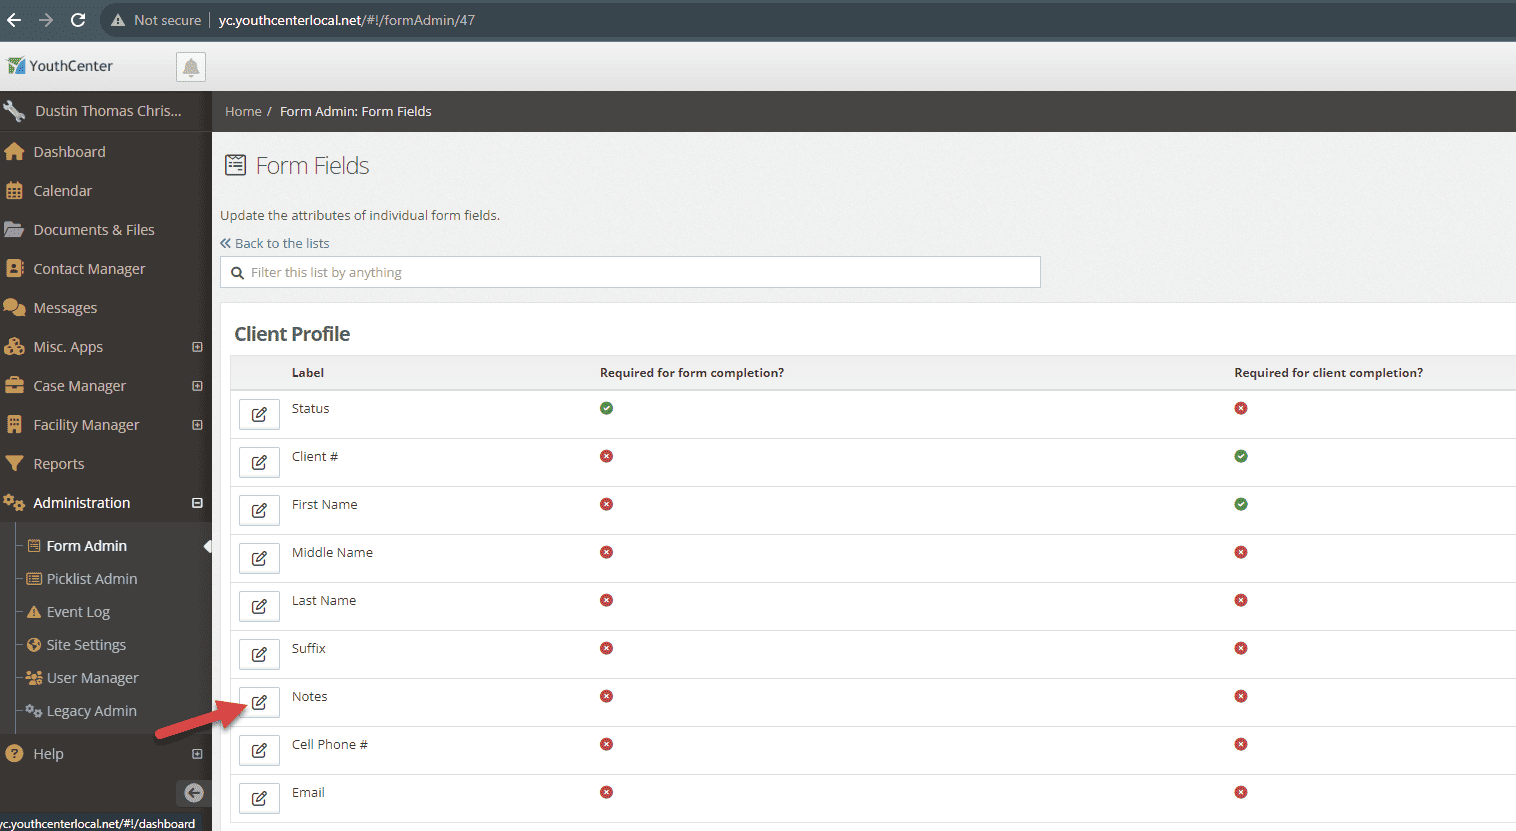
Next, select the field you wish to require and select the edit pencil and paper icon.
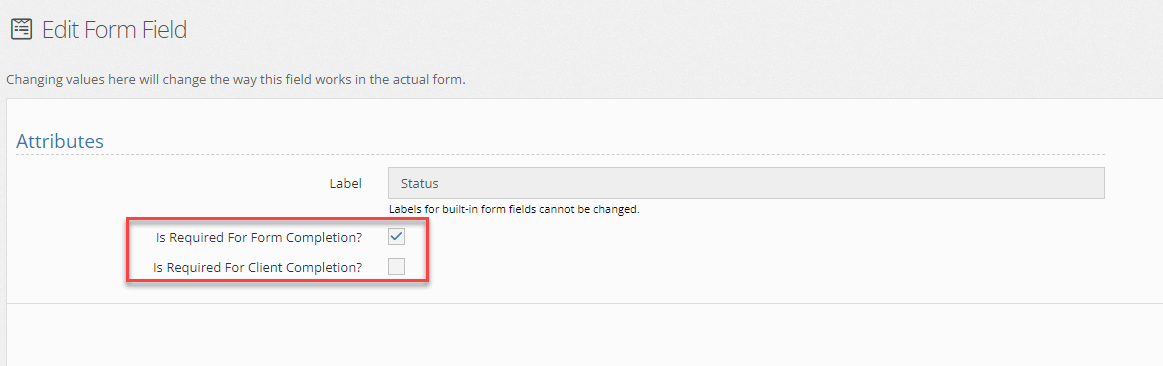
Finally, select the “required-for-form-completion” and/or “required-for-client-completion” options you want for your organization and press”Save.”
For information on hiding fields in “built-in forms,” see the documentation linked here.
*Note these areas in “built-in forms” will show up on the audit checklist. For more information, see the details shared here.
Best case use is to mark both, so your users can be warned on multiple fronts of important data.
Creating Required Fields in Custom Forms #
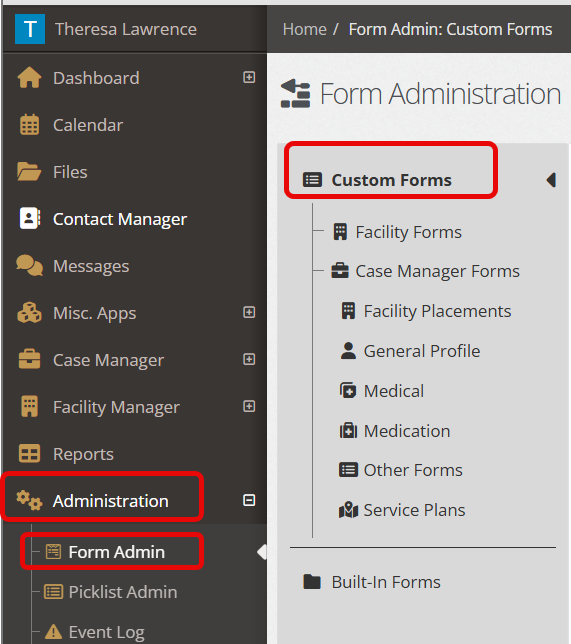
To require a field to be filled before a form is closed or a client is closed, open the Administration Menu
Select the Form Admin menu item, followed by Custom Forms.
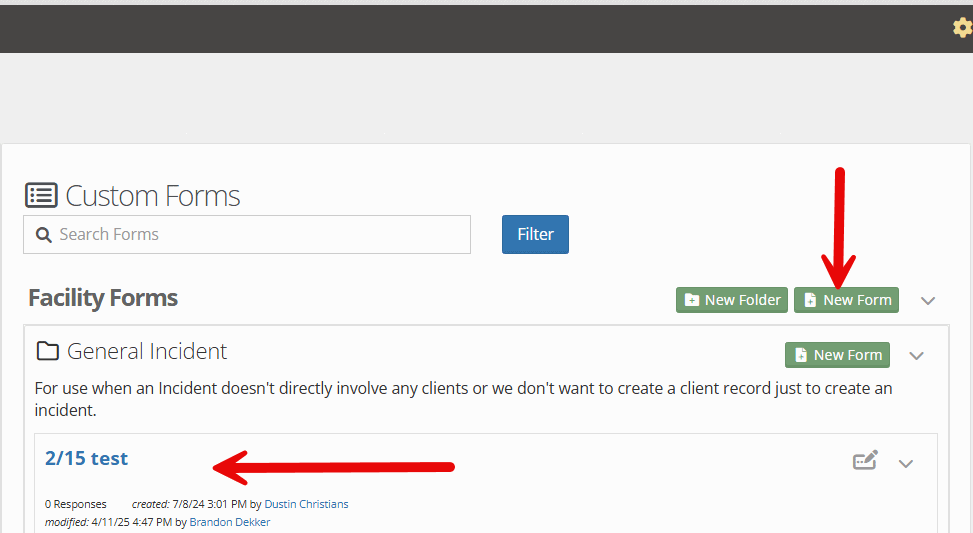
Select the form you wish to modify from the list OR create a new form.
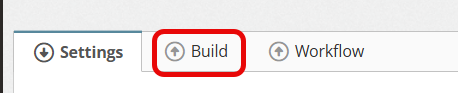
Choose the “Build” tab
Select the “part” you would like to make required (will highlight blue) and choose the corresponding checkbox on the left-hand “property” section that matches your needs.
In the example below, “required for form completion” has been selected, creating the blue asterisk.

In the example below, “required to save” has been selected, creating the red asterisk.

Click save when finished updating all required fields.
Note: At this time, there are no reporting capabilities for Custom forms that have NOT completed the requirements.