If a client is not already selected, use the Case Management search or client search. Once a client is selected, select the Note application.
In the top right of the application, select the green “+ Create a New Note” button

Below are all of the features available for a client note.

The Note Section #
The note section of the Notes Application contains the basic information that is required to fill out a note as well as optional information to further classify the note. Notes are often used in conjunction with meetings with clients so allow for additional information like duration, services provided, and staff present.
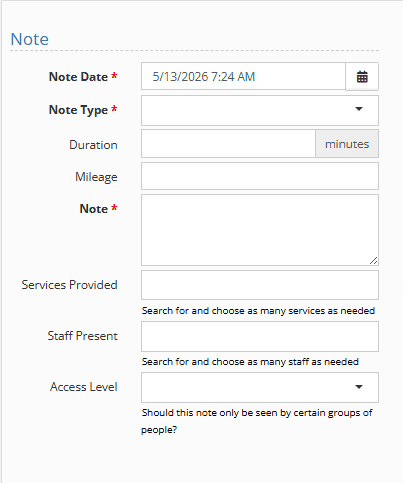
The Note Date indicates when the note was entered.
The Note Type indicates the type of note. This list can be customized by your administrators in picklist admin.
The Duration is an optional field that can indicate in minutes how long an interaction took place.
The Mileage is an optional field that can allow you to track the distance traveled.
The Note field itself is a freeform box that can grow to hold paragraphs of information. Voice to text can be used in this field.
The Service Provided optionally further classifies the note. The list of services provided can be customized by your administrators.
The Staff Present optionally allows you to indicate which staff (Users in YouthCenter) were present.
The Access Level optionally restricts who can view this note by group. Multiple groups may be selected.
Contact Log Section #
The contact log section details how and where the client met.
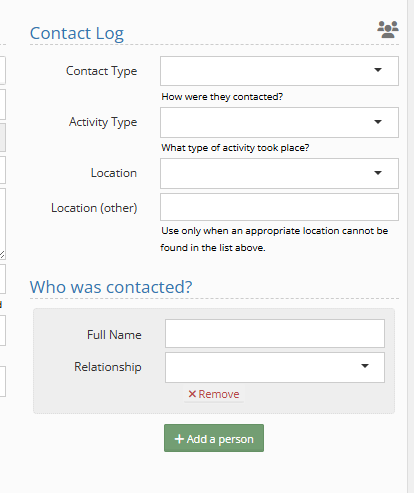
The Contact Type indicates how the contact was initiated and often includes options like face-to-face, phone, and text. Administrators can customize these options.
The Activity Type can further classify the contact type. Common options often include options like Therapy, Court Hearings, and Miscellaneous. Administrators can also customize these options.
The Location indicates where the interaction took place. Administrators can customize these options.
The Location (other) is used if there is a unique location not listed in the location drop-down.
The Who was contacted? field allows for tracking any necessary communication that occurred with a contact outside of the youth.
Cloning & Advanced options #
The Cloning and & Advanced options are ways to help with collaboration, easy viewing, and time-saving components.
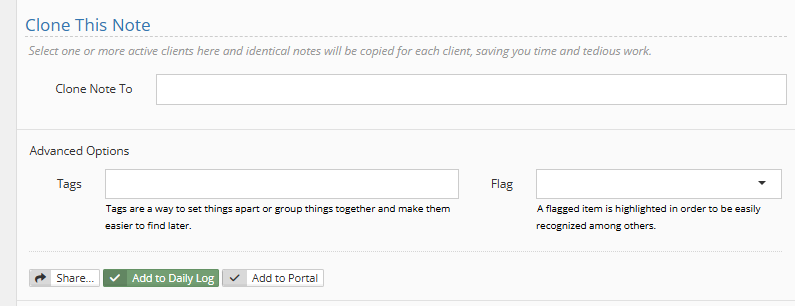
The clone note to feature allows the note fields to be duplicated to an additional youth’s notes. This can be used when meeting with multiple youth and only minor edits are needed between the two accounts.
For more information on tags, flags, sharing, and portal information, see the following resources:
