One of the main menu components of YouthCenter is the “Contact Manager.” This tab not only allows users to access any contacts or companies that have been added to the system, but it is also the location where a new company or contact can be added.
Searching for previously added Companies or People #
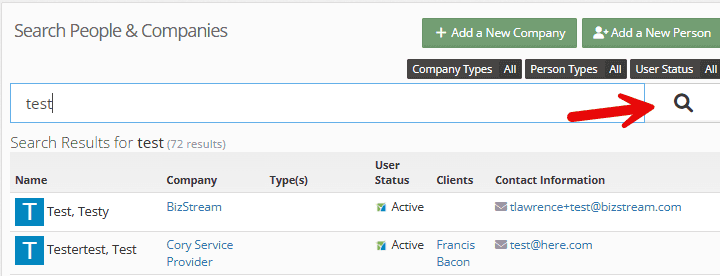
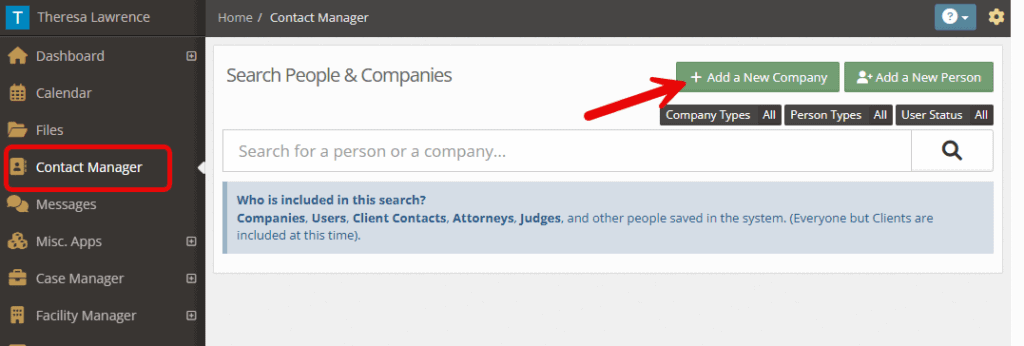
To use the search, select “Contact Manager” and begin typing the name of the company or person within the search bar.
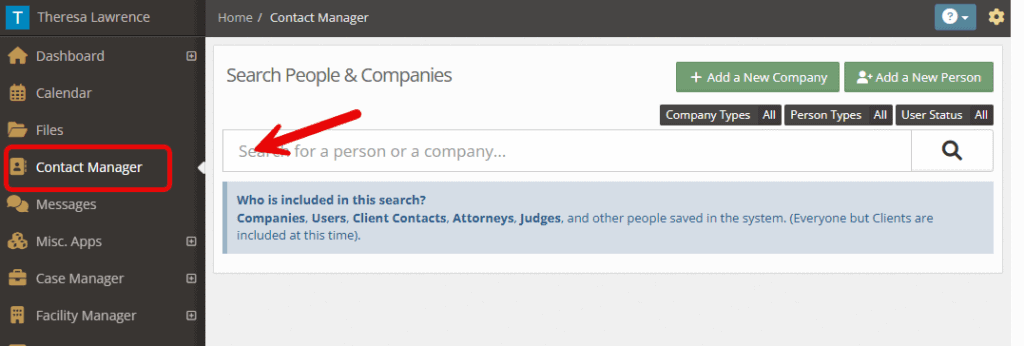
Select the magnifying glass to search.
The following are included in this search:
- Companies
- Users
- Client Contacts
- Attorneys
- Judges
- Other people saved in the system. (Everyone but Clients are included at this time).
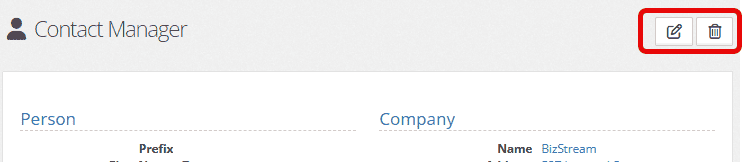
When the name is clicked, you are able to see all of the information available, as well as allows you edit the contact or delete them (if the contact is not a user in YouthCenter).
*Note* you are able to inactivate client relationships as needed. Be sure to delete carefully.
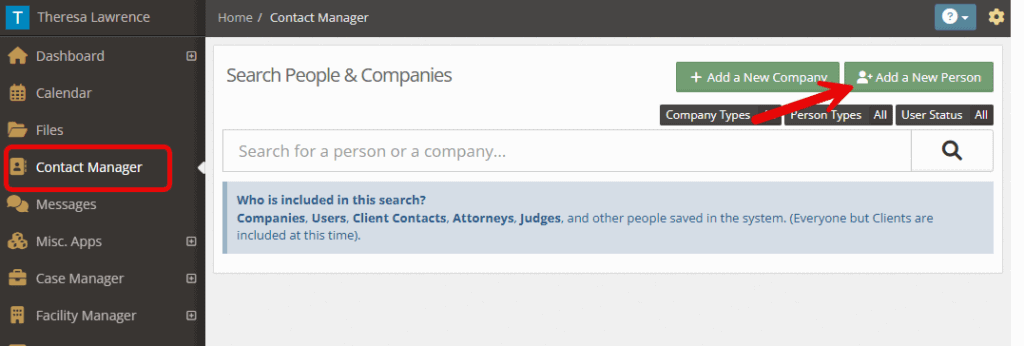
Adding a New Person #
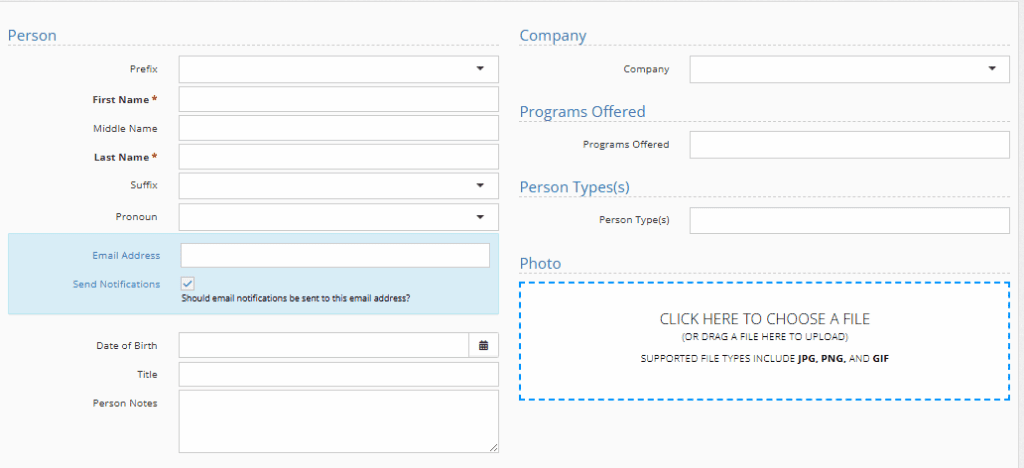
Click on the “Contact Manager” menu followed by “Add a New Person.”
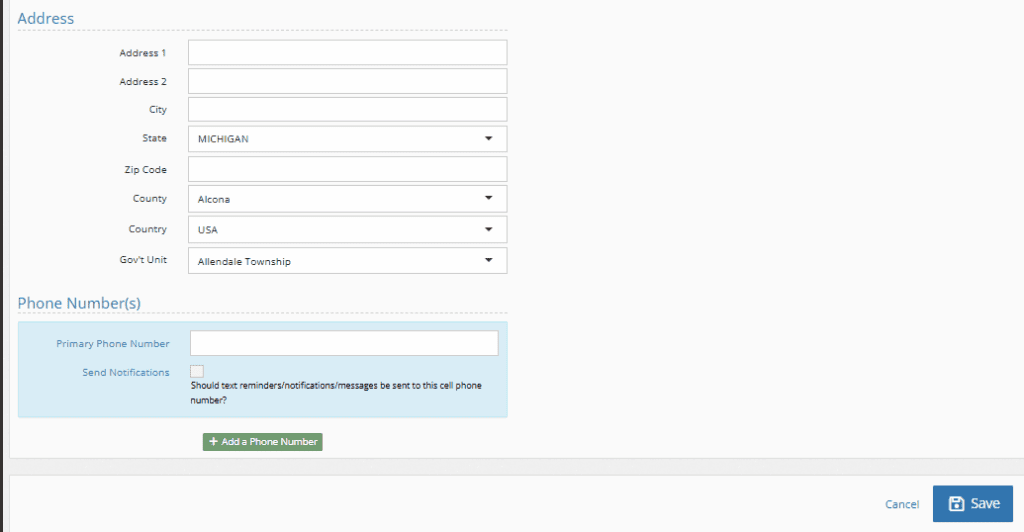
Fill in the information that you would like to be able to access via YouthCenter. Click “Save” when completed.
*Note: the contact will be able to receive calendar notifications when the checkboxes in blue are selected.
For details on adding Therapists, Judges, or Referees, see the information shared here.
For details on adding Attorneys, see the information shared here.
Updating Picklist admin drop-downs for a new person (admin) #
In the new Person form, there are three drop-down options that can be updated to fit your team’s needs.
These include:
- Relationship Type
- Person Type
- Programs Offered
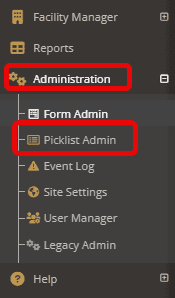
For each you will access them, by choosing the “Administration” tab followed by “Picklist Admin.”
Relationship type #
Search and find “Relationship Type” under the Picklist Admin.
Choose the green “Create a New Relationship Type.”

Fill in the necessary information below. Click “Save”
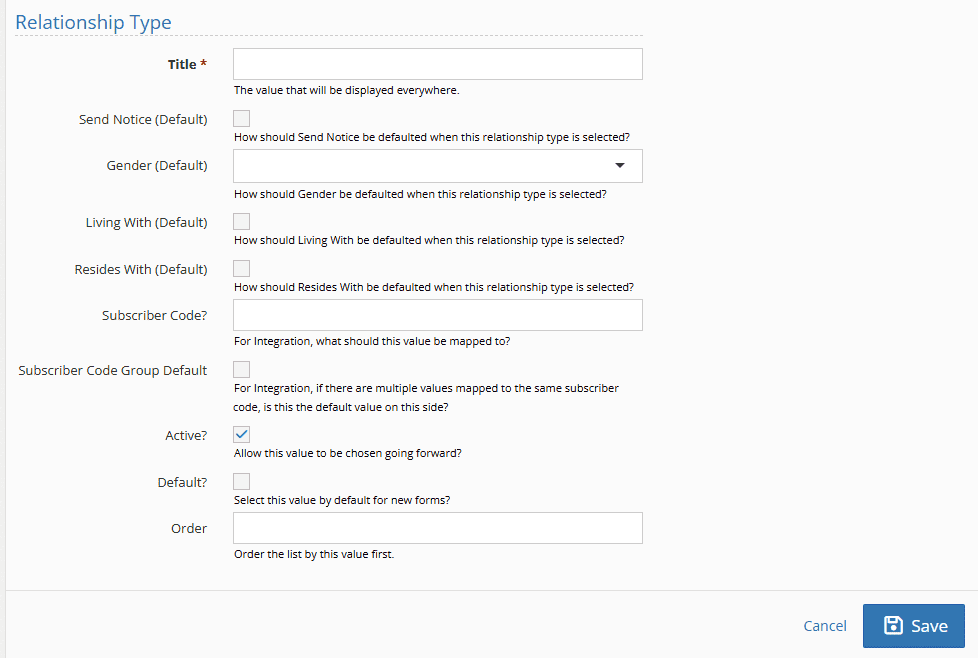
Field descriptions:
- Title: The name of the relationship you’ll see in the drop-down menu
- Send Notice: When checked, by default, a notice flag on the contact screen will be added and can be used to designate who should be notified of important events.
- Gender: When checked, by default, the chosen gender will be associated with this relationship type.
- Living With: When checked, by default, this relationship type will be marked as a contact the youth is living with.
- Resides with: When checked, by default, this relationship type will be marked as a contact the youth is residing with.
- Subscriber code: If your team is using integrations, what value is this going to be mapped to.
- Subscriber code default: When checked, by default, and if your team is using integrations, this will be the default value.
- Active: A checkbox indicates whether the contact is viewable by default in the contacts application and can be selected in other applications.
- Default: When checked, this relationship will be defaulted on any new forms.
- Order: Adding values here allows you to create a list of relationship types that are outside of alphabetical order.
Person Type #
Search and find “Person Type” under the picklist admin.
Choose the green “Create a New Person Type.”

Fill in the necessary information below. Click “Save”
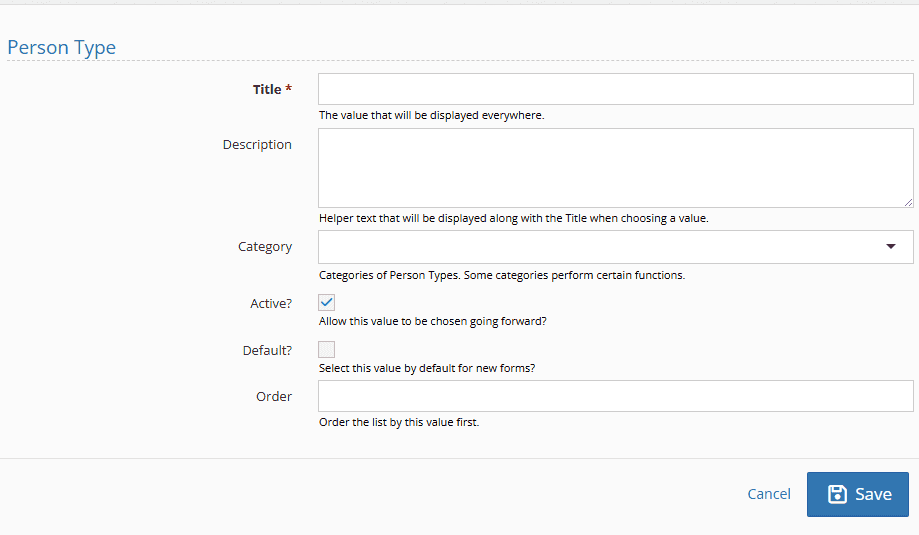
Field descriptions:
- Title: The name of the Person Type you’ll see in the drop-down menu
- Description: Any information that will help your team determine the correct Person Type
- Category: 4 categories that allow the contact to show under Therapists, Referees, Judges, or Attorneys
- Active: A checkbox indicates whether the Contact is viewable by default in the contacts application and can be selected in other applications
- Default: When checked, this Relationship will be defaulted on any new forms
- Order: Adding values here allows you to create a list of Relationship Types that are outside of alphabetical order
For more information on adding a client relationship-specific contact, see the documentation shared here.
Programs Offered #
For information on adding new Programs, see the documentation shared here.
Adding a New Company #
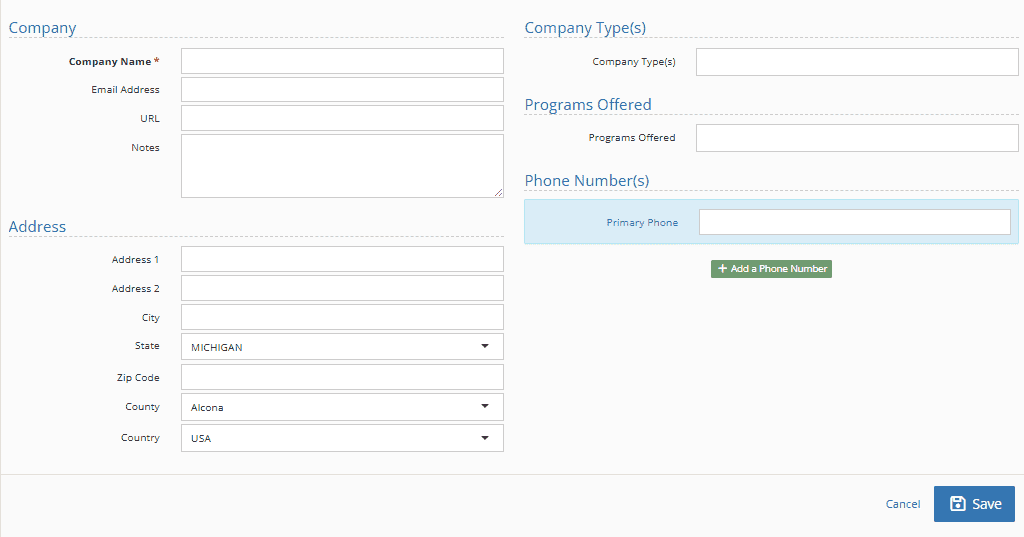
Click on the “Contact Manager” menu followed by “Add a New Company.”
Fill in the information that you would like to be able to access via YouthCenter. Click “Save” when completed.
For information on how to add details that will allow this Company to be listed as a referring Company, please see the information listed here.
Updating Picklist admin drop-downs for a new company (admin) #
In the “New Company” form, there are two drop-down menu options that can be updated to fit your team’s needs.
These include:
- Company Type
- Programs Offered
For each, you will access them by choosing the “Administration” tab followed by “Picklist Admin.”
Company Type #
Search and find “company type” under the picklist admin.
Choose the green “create a new company type.”

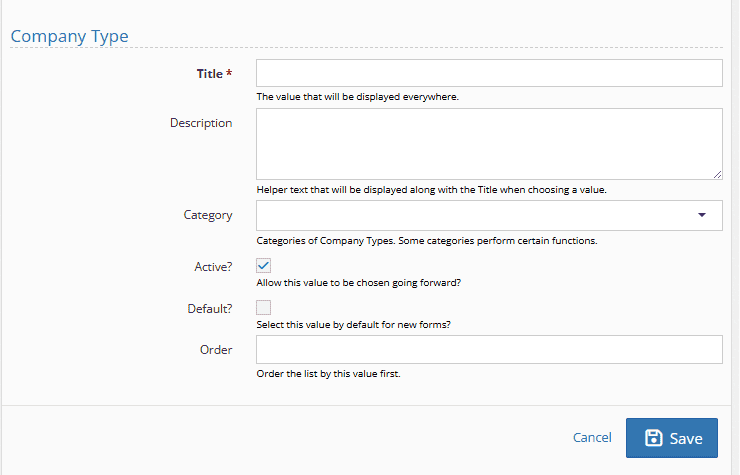
Field descriptions:
- Title: The name of the Company type you’ll see in the drop-down menu
- Description: Any information that will help your team determine the correct Company Type
- Category: Allows you to choose if this Company is a Service Provider or other
- Active: A checkbox indicates whether the Company is viewable by default in the Contacts application and can be selected in other applications
- Default: When checked, this relationship will be defaulted on any new forms
- Order: Adding values here allows you to create a list of company types that are outside of alphabetical order
Programs Offered
For information on adding new programs, see the documentation shared here.
