The Transactions and Daily Point Tracking features can be used to monitor time-based programs—such as community service or restitution—or to support point-based systems in detention or residential settings.
For a detailed webinar review, watch here
Adding or Editing a Program to Use Points/Transactions. #
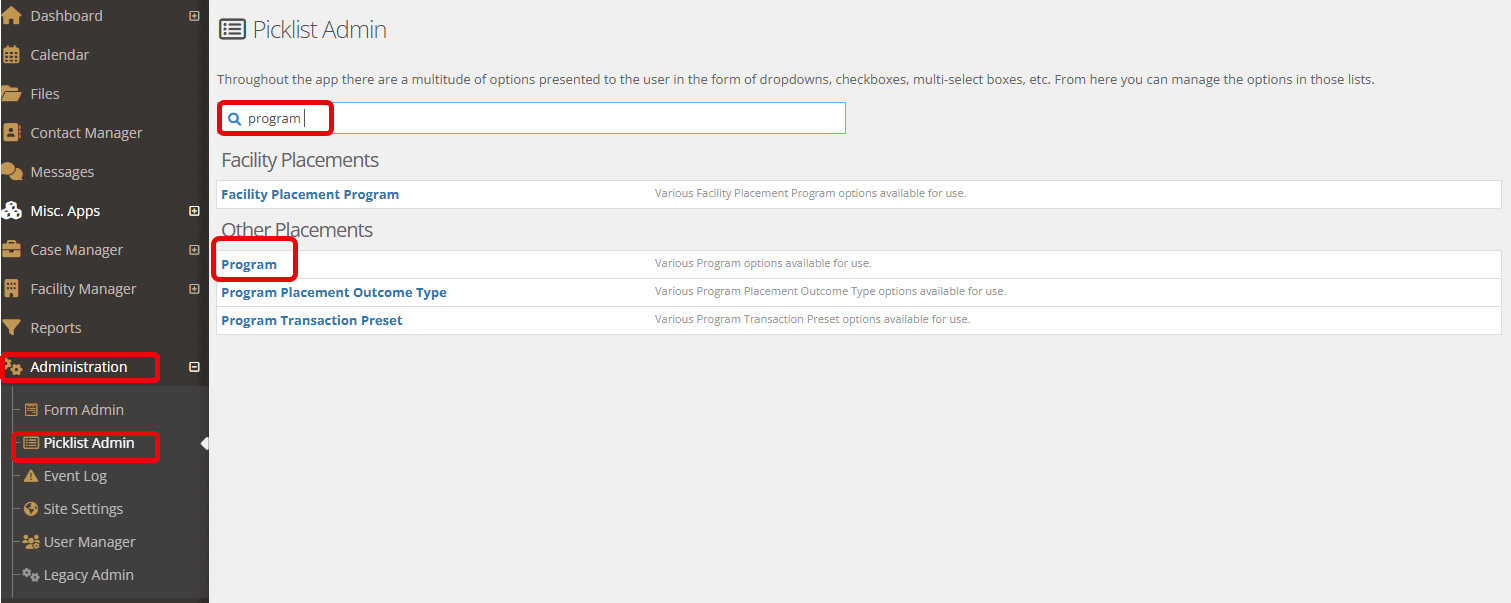
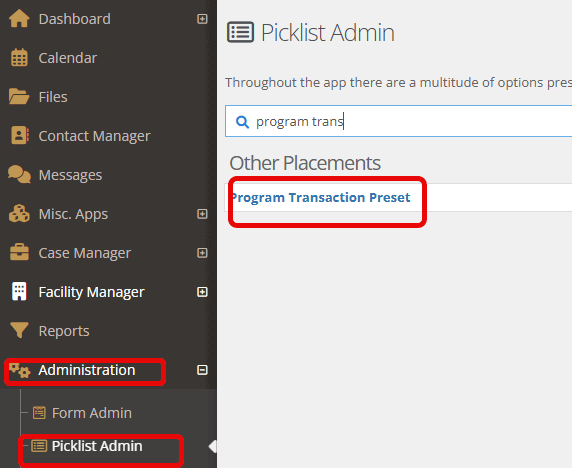
Open the “Administration” tab and choose “Picklist admin.”
Search for “Program” and select it as shown below.
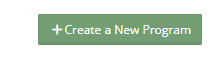
Choose to “Create a New Program” by clicking on the green bar.
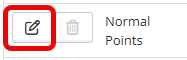
OR edit a current program to allow for points/transactions, by selecting the edit button to the left of the current program.
Outside of the Title and Description, the following fields will be available to fill out and ensure the transactions meets your needs.
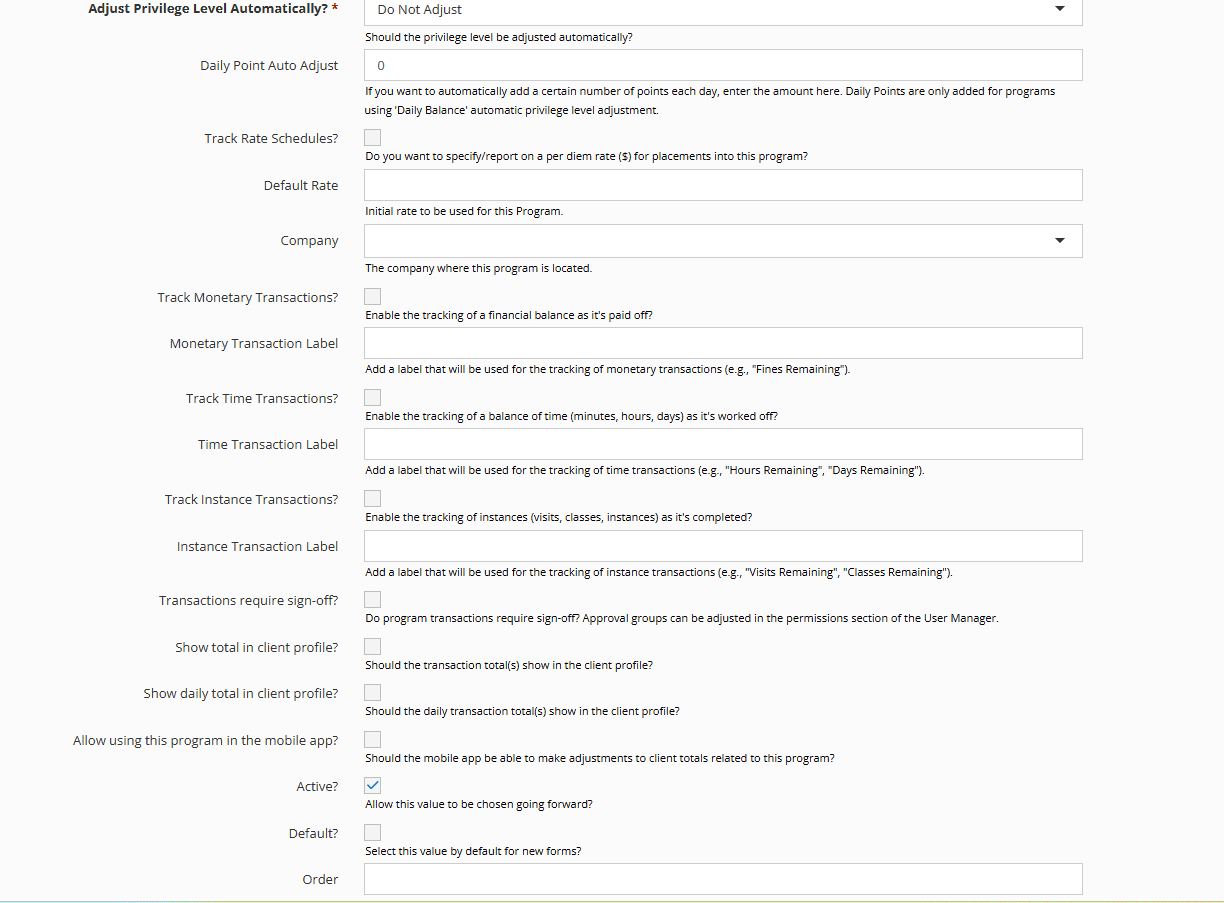
Privilege Level Adjustment #
Points can be attached to privilege levels.
You can choose to do either a manual adjustment, adjusting automatically daily, or adjusting based on total balance.
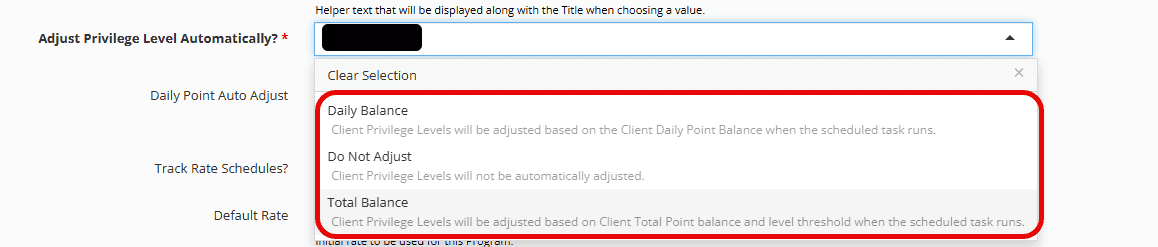
Please note: Clients can only go up in privileges. They cannot go down automatically in case the commissary, for example, impacts the points/transactions.
Labeling Transactions #
Labels can be added to match your specific tracking needs

Requiring Sign-Offs #
When checked, this ensures that any transaction in this program will need approval.

See below for “Giving Permissions” to the necessary groups for approval.
Adding points to Client Summary #
Before saving, be sure that the following checklists are chosen if you would like to see the following information on the client profile:

Creating the ability to Adjust Balances in Widgets #
Choose your Dashboard and select “Manage Dashboard.”
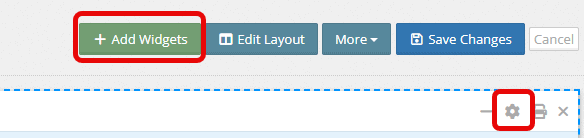
Choose to either add a new widget OR, if a current widget is selected, click the gear icon to edit the widget.
In this example, the “Clients in Program” widget is being used
To ensure point adjustments in the widget directly, select the following columns to display:

Click “Apply” & “Save Changes.”
Now, you will be able to click on any of the green bars below and adjust quickly as needed right on your dashboard.

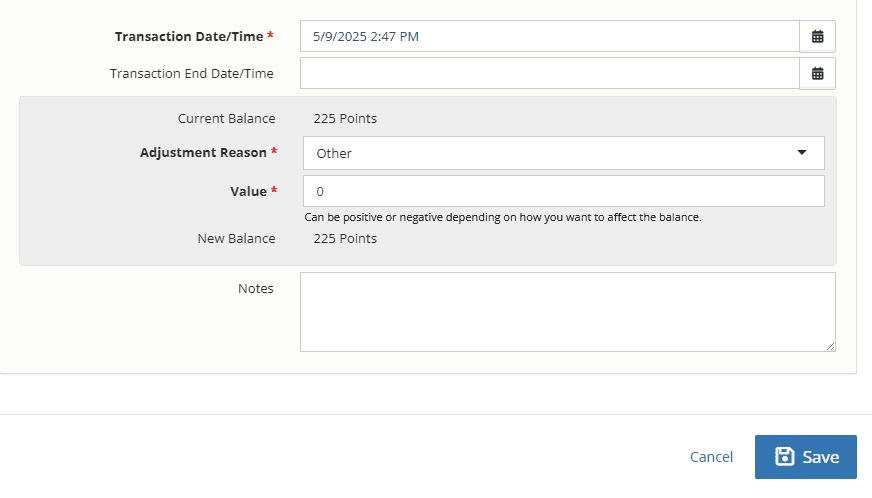
When the green bar is clicked, the following box will appear. Complete and click “Save.”
Pre-Define Transactions based on Programs #
Some groups have points/transactions that are regularly used within their programs.
These can be predefined and accessible in program drop-downs.
To create these, open the “Administration” menu and choose “Picklist Admin.”
Search or choose “Program Transaction Preset.”
Select “Create a New Program Transaction Preset” and fill in the fields to match your needs.
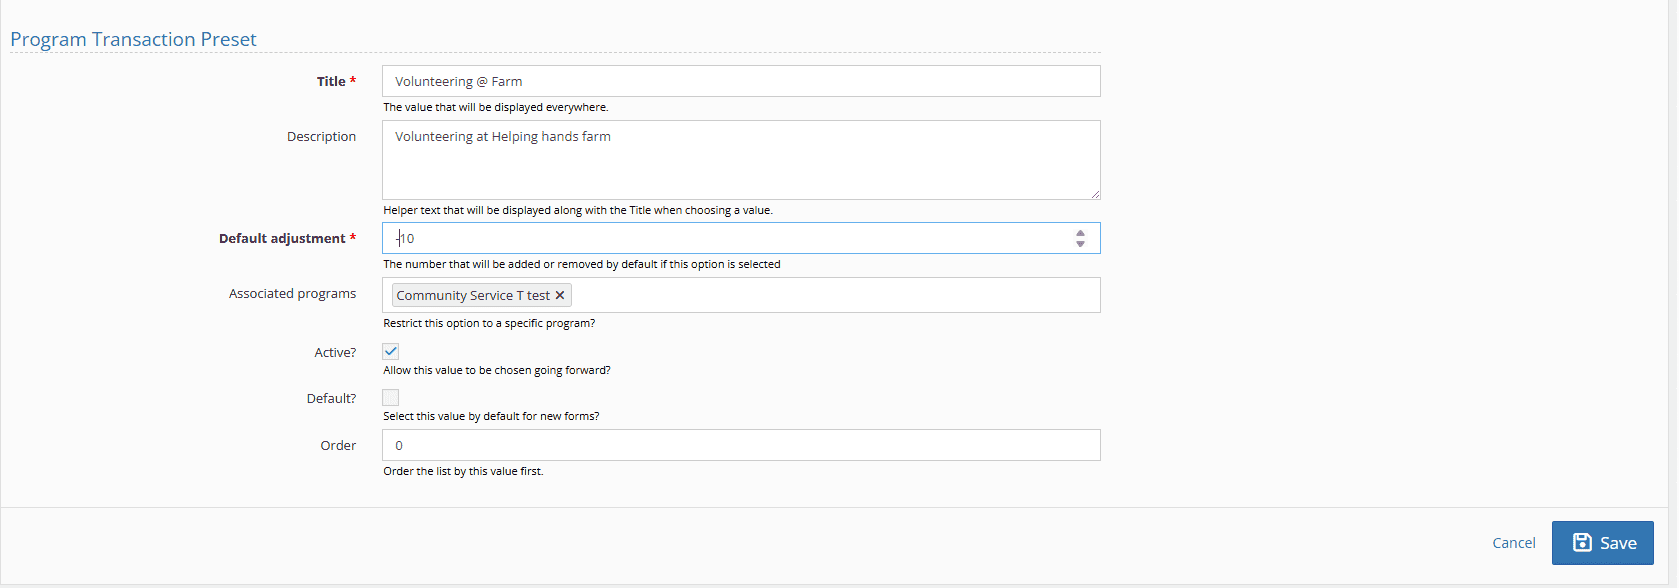
Fields available:
- Title
This is the initial label users will see. It should be descriptive enough to help your team quickly identify if the option is relevant. - Description
Provides additional context to assist your team in selecting the most appropriate dropdown option. - Default Adjustment
A numeric value that will be automatically added or subtracted when this option is selected. - Associated Programs
Specify any programs that this dropdown option should be linked to. Note: If left blank, the option will be available across all programs. - Active
When checked, this option becomes available for selection by users. - Default
When checked, this option will automatically appear as the first/default selection in the dropdown. - Order
Determines the position of this option within the dropdown list when multiple options are available.
Click “Save” upon completion.
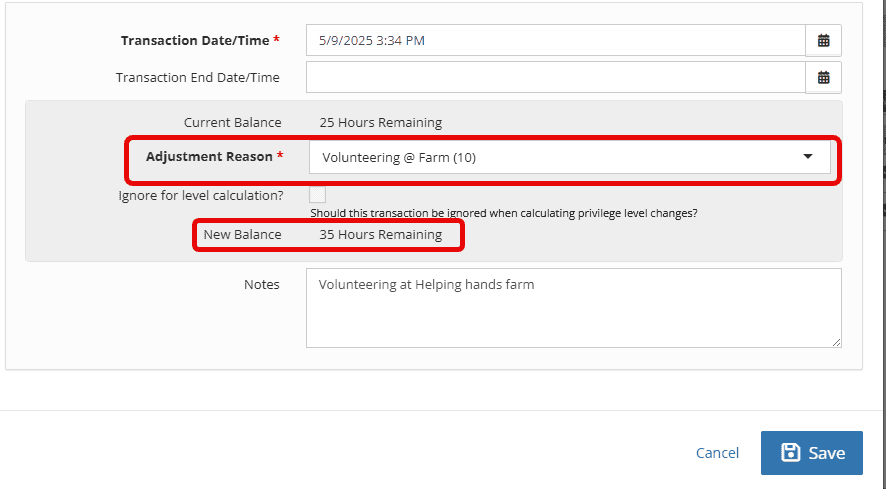
Once saved, your option will appear when a new Transaction is logged. This option will appear in the Adjustment Reason drop-down as shown below.
Giving Permissions & Reviewing Transactions #
If the “Transactions require sign off” is checked under a program, the User Manager function must be used to ensure appropriate groups can approve transactions/points.
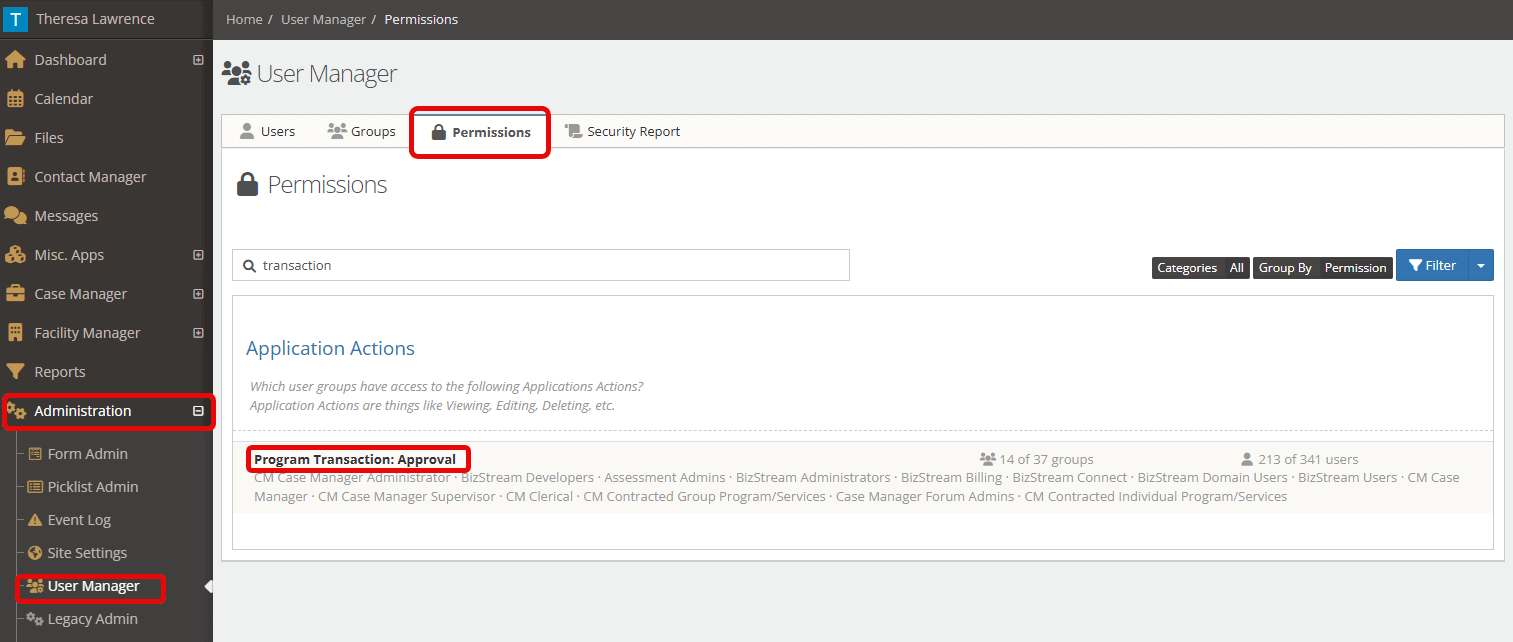
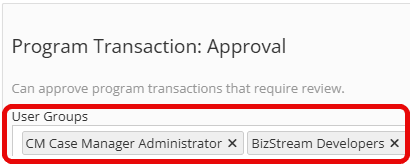
To add groups that can do sign-offs, open your “Administration” tab, followed by “User Manager.”
Select the “Permissions” tab and either search for “Program Transaction: Approval” or click on it in the associated list.
Add in the groups you would like to approve transactions/points in the section titled “User Groups.”
Once a user group has access, they can either use the widgets mentioned above or go to each client’s account and click the green “Approve” button.

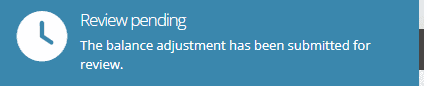
If a user doesn’t have access to approve, they will receive a brief notification like below.
What notifications are received by approvers for transactions? #
When an approver has a transaction needing approval, they will be notified in the following locations:
- In the upper left-hand corner of any screen, you will see a bell area. If a need for approval comes through, the bell shown below will have a notification number next to it. Click on the bell for more details and the link to approval.

2. An email will also come automatically to the supervisor’s email informing the supervisor/administrator of the approval needed.
3. As needed, a widget can be created on the dashboard for viewing approvals. For more information on widgets, please see “Widgets & Advanced Filtering.”
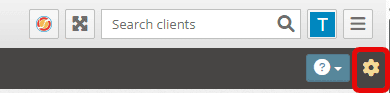
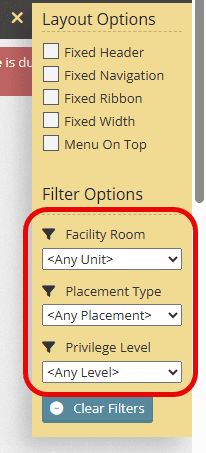
- The global filter can also help to narrow down facility rooms/placement type/privilege level.
- To use the global filter, click on the gear icon on the upper right-hand side of your screen
Reporting on Transactions #
Using the reports in YouthCenter to report on Transactions can help to see overall trends in your points and transactions.
To create a report, click on the Bizstream logo in the upper right-hand corner of any screen.

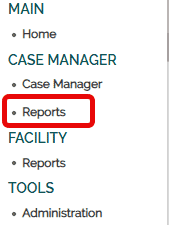
Choose “Reports” under Case Manager.
Click the green “Add a Report” plus.

Name your report and choose your data source to be “Client: Program Placement Transactions.”
From there, you can add any Data Fields that would help you to get a good view of your program’s needs.
Below are some examples.
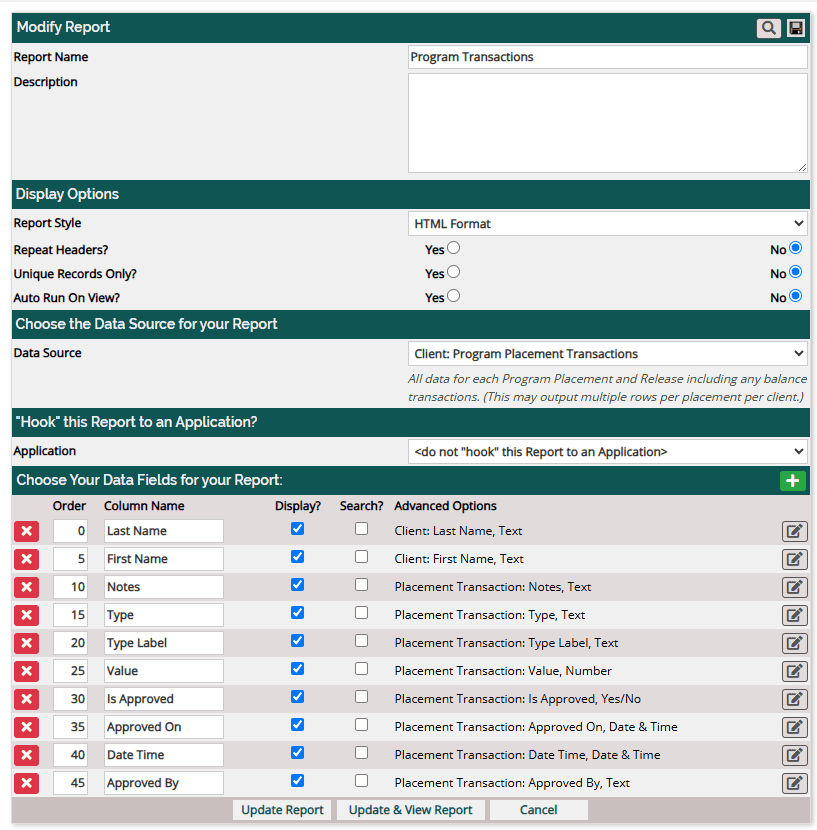
Click “Update & View Report” followed by “Run Report.”
