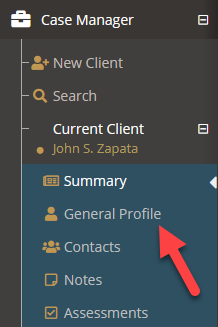
Granted that you have proper permissions to edit a client’s educational information, you must first select a client through either the Search application under the Case Manager application or by using the Search Clients search bar in the top right of the screen.

Once a client has been selected, navigate to the General Profile application in the main navigation menu.

Adding Educational Information #
- From the General Profile application select Education from the quick navigation section or scroll down to the Education section
- Select the Create a new Eduction button

- Fill out educational information as available
- Press the blue Save button
Field Details:
Last Attended indicates when the client last attended the educational institution. This can be left blank if the client is still attending the institution.
The Facility drop-down identifies which location they are attending. These options can be changed by your administration team.
The Grade drop-down indicates the current or last grade attended at the institution. These options can be changed by your administration team.
The Status drop-down indicates their standing with the institution. These options can be changed by your administration team.
The Special Ed? checkbox indicates if the client is in the special education track of an institution.
The Is Primary checkbox if selected designates this institution as the primary record shown in reports. Only one institution can be the primary.
The Truancy drop-down by default indicates how many times the client was truant. As this can be customized by your administrator, some groups choose to make this their truancy status rather than a numerical range.
The GPA field is the numerical representation of the client’s grade point average if available and applicable.
The Notes field allows for general notes about this entry.

