The facility placement application allows you to quickly intake a client into detention and maintain proper documentation throughout a client’s stay.
Using the Program Placements for Facility/Residential #
Intake #
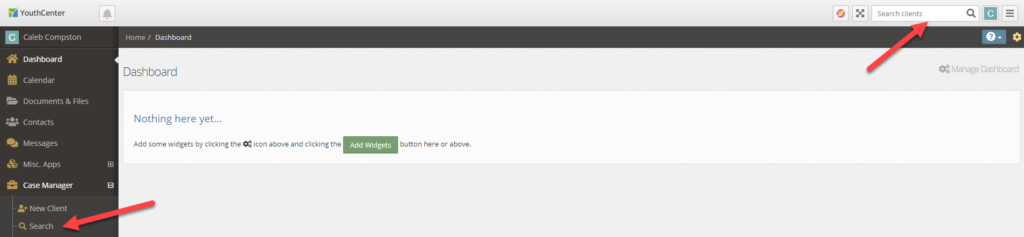
Given that you have the proper permissions to intake a client, you must first select a client through either the Search application under the Case Manager application or by using the Search Clients search bar in the top right of the screen.
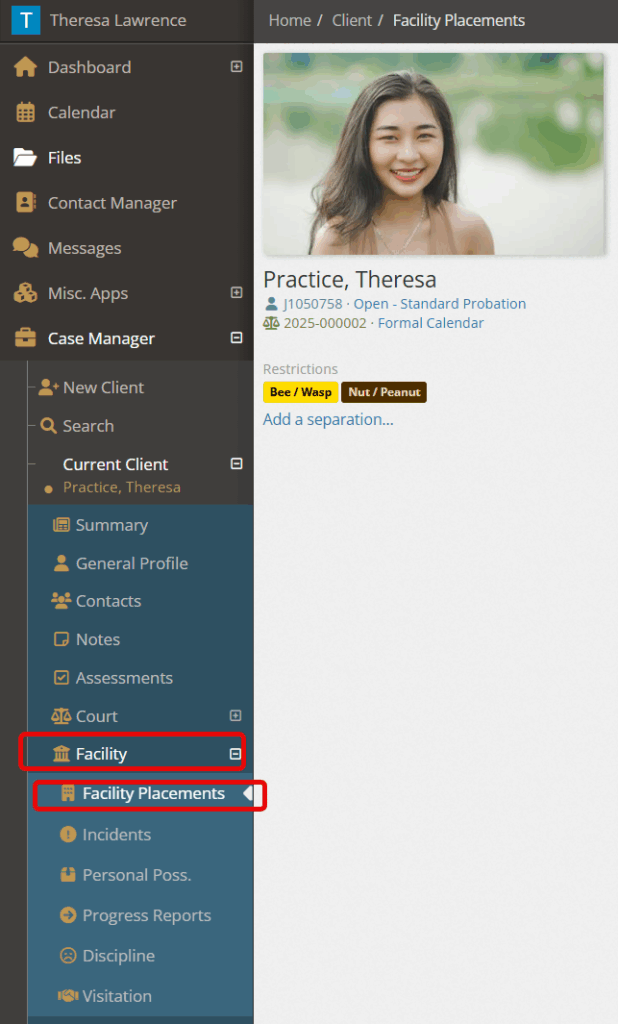
Once you have selected or created the client account, choose “facility” followed by “facility placements.”
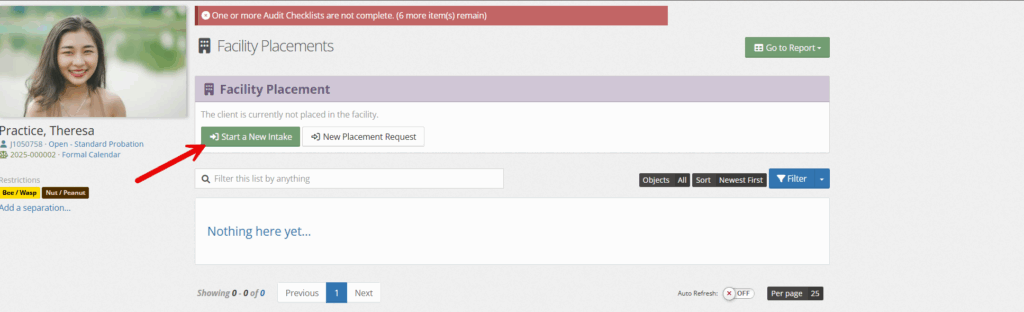
Select “Start a New Intake.”
Note: A client can only be in a single facility placement at a time. If a client is participating in programs or facilities in conjunction with their primary placement, you can add those other placements in either the Physical Placements or Program Placements applications.
Fill out any necessary intake details and click save.
Field descriptions part 1: #
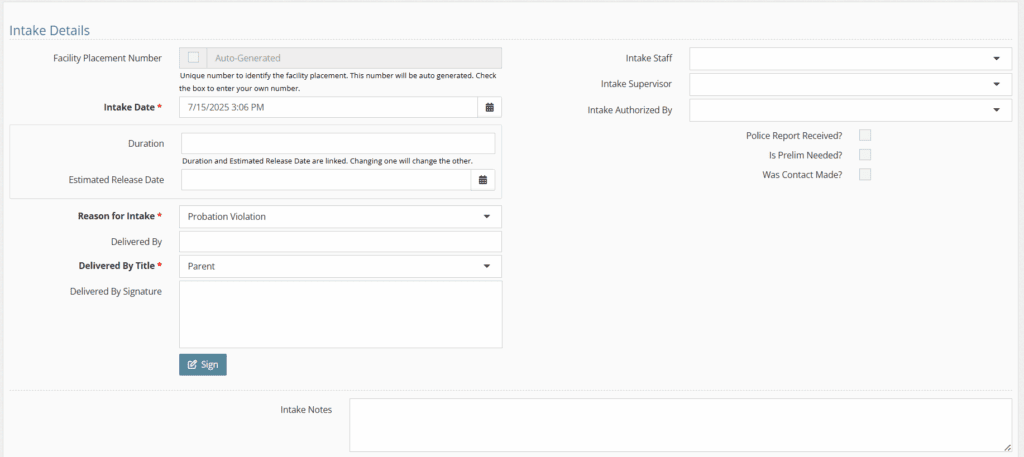
- Intake Details
- Facility Placement number: if box is unchecked, a number will be auto-filled. If checked, enter your own number. Used to help identify the facility placement.
- Intake Date: will autofill when you fill out the intake. Date and time can be edited.
- Duration/Estimated Release Date: these two fields are connected to each other. If one is filled, the other will autofill. This indicates the time in days that the client is expected to be in the facility.
- Reason for Intake: drop-down indicates why the client is being intaken. This is a modifiable dropdown menu from the picklist admin ‘facility placement intake reason type’
- Delivered by: text field allows you to record the person who delivered the client.
- Delivered by Title: indicates the party responsible for the delivery. Modifiable dropdown menu from the picklist admin ‘delievered by title type’
- Delivered by Signature: Esignature that can be used with a touch screen or touch pad.
- Intake staff: indicates which YC user staff member is in charge of the initial intake.
- Intake Supervisor: indicates the YC user supervisor of the intake. This can be the same as the Intake Staff.
- Intake Authorized by: indicates which YC user authorizes the intake.
- Checkboxes:
- Police Report Received: indicates if the intake included a police report.
- Is Prelim needed: checkbox for confirmation.
- Was contact made: checkbox opens up contact information if someone (typically a family member or associated support contact) was notified of the intake.
- Intake notes: Any notes needed to be shared about the intake process.
Field Descriptions Part 2: #
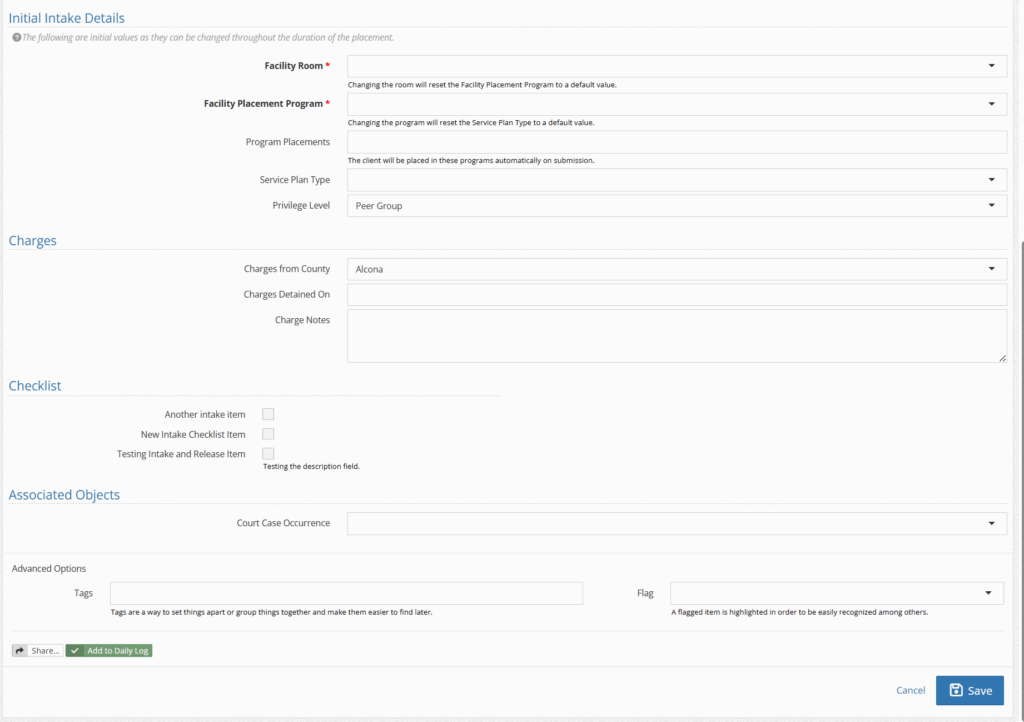
- Initial Intake Details
- Facility room: drop-down allows you to make an initial placement into a room within your facility. Modifiable drop-down from admin picklist ‘facility location’
- Facility Placement Program: drop-down allows you to select from your facility placement programs.Modifiable drop-down from admin picklist ‘facility placement program”
- Program Placements: drop-down allows you to select from programs that the client can be enrolled in during their time. Modifiable drop-down from admin picklist ‘program’
- Service Plan Type: allows you to select from a Service Plan Type
- Privelege Level: indicates what level of privilege the client is entitled to Modifiable drop-down from admin picklist ‘privelege level’
- Charges
- Charges from County: indicates which county the charges originate from.
- Charges Detained on: indicates what charge or charges this intake relates to. Modifiable drop-down from admin picklist ‘charges’
- Charge Notes: optionally can contain additional details about the charge.
- Checklist (modifiable options from admin picklist ‘checklist’)
- Associated Objects
- Court Case Occurrence: Allows you to sync with the associated court case occurrence that created this facility placement.
- Advanced Options
- Tags/Flags: you may set tags and flags on the detention intake, along with using the notification system within YouthCenter. See this article for sharing with internal team members.
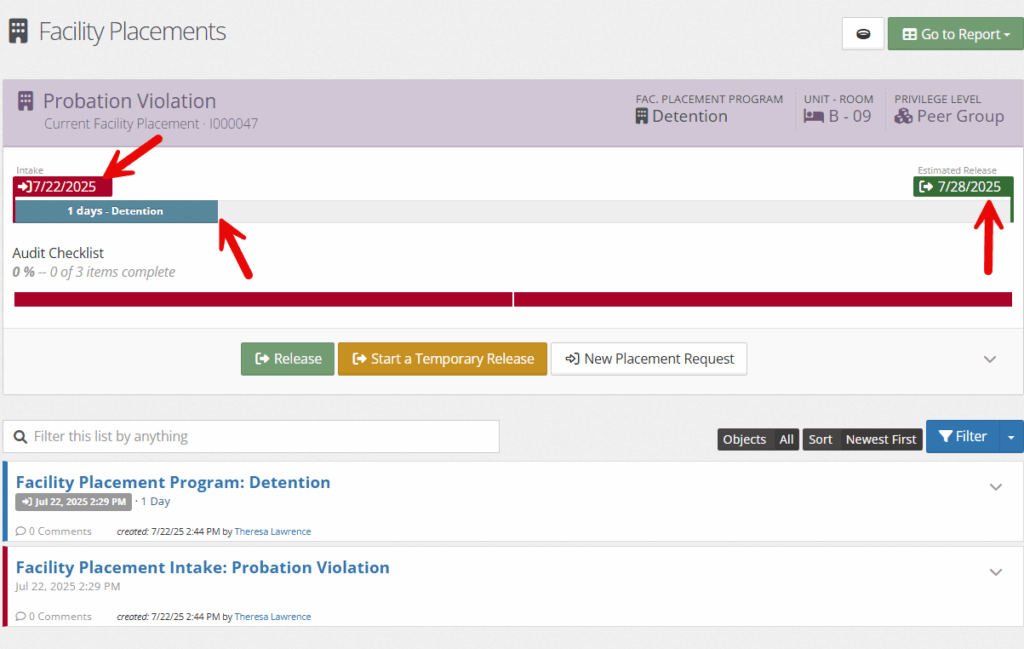
Once completed, a facility placement intake summary page will be created.

The following is possible on this page:
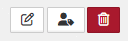
- Edit the Placement: Correct any errors in initial intake
Print Tags can also be printed by the 2nd image in the upper right-hand corner. (Allows for tagging items, wristbands, etc. - Delete: remove the intake information
- Adding attachments: Link any necessary attachments

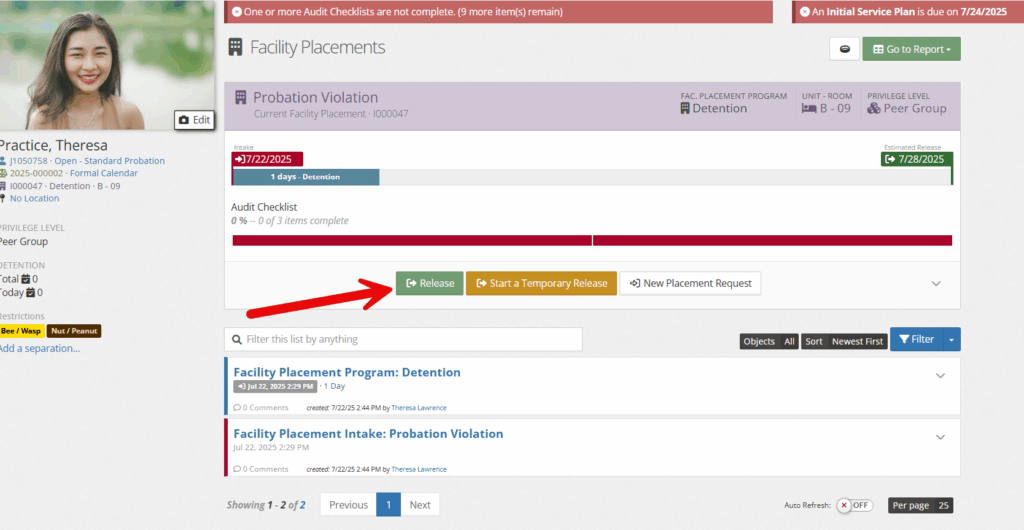
On the client’s facility page, there will be a summary box that shares brief details such as initial intake date, dates in detention, units, and estimated release dates (if added).
Release #
To release a client, select the green “release” button on the facility page.
Fill out any necessary intake details and click save.
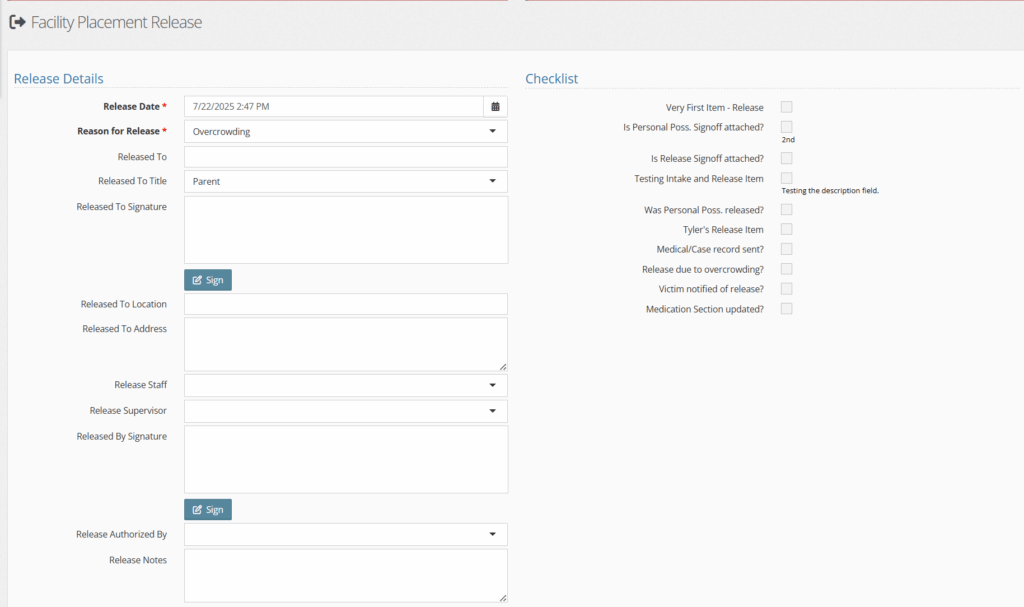
Field descriptions part 1: #
- Release Details
- Release Date: will autofill when you fill out the release. Date and time can be edited.
- Reason for release: drop-down indicates why the client is being released. Modifiable dropdown menu from the picklist admin ‘facility placement release reason type’
- Released to: text field allows you to record the person who the client was released to.
- Released to Title: indicates the party responsible for the client at release . Modifiable dropdown menu from the picklist admin ‘realesed to title type’
- Released to Signature: Esignature that can be used with a touch screen or touch pad.
- Released to location: Text box to fill in
- Released to Address: Text box to fill in
- Release Staff: indicates which YC user staff member is in charge of the release.
- Release Supervisor: indicates the YC user supervisor of the release. This can be the same as the Release Staff.
- Released by Signature: Esignature that can be used with a touch screen or touch pad.
- Release authorized by: indicates which YC user authorizes the release.
- Release notes: Any notes needed to be shared about the release process.
- Checklist: modifiable options from admin picklist ‘checklist’
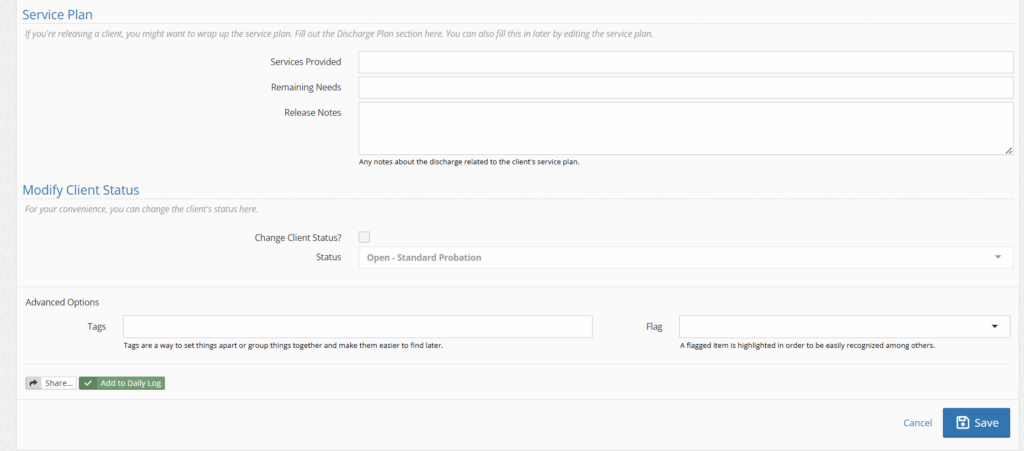
Field Descriptions Part 2: #
- Service plan
- Services provided: Modifiable dropdown from picklist admin ‘service provided’
- Remaining Needs: Modifiable dropdown from picklist admin ‘remaining need’
- Release notes: Any notes associated with the service plan
- Modify Client Status
- Change client status: Checkbox option
- Status: usual status options to showcase client’s stages in YC
- Advanced Options
- Tags/Flags: you may set tags and flags on the release, along with using the notification system within YouthCenter.
- Sharing: see this article for sharing with internal team members.
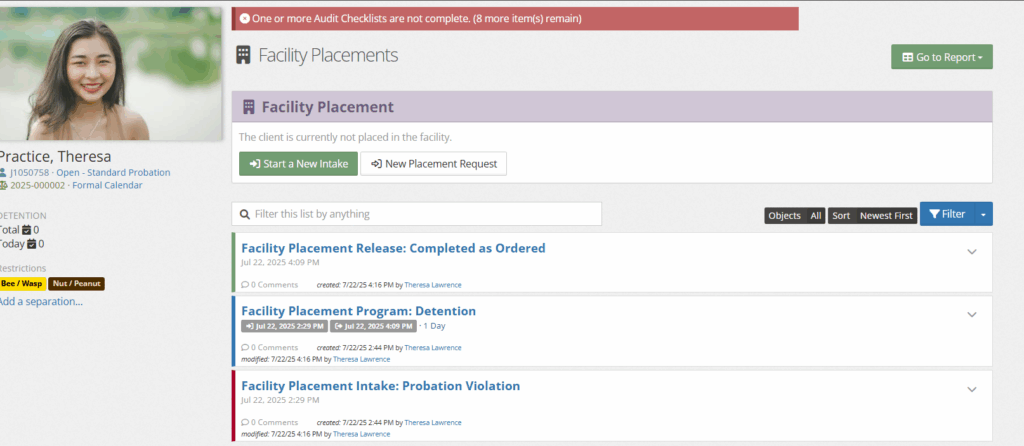
Once the release details are completed the facility placement will look like something below:
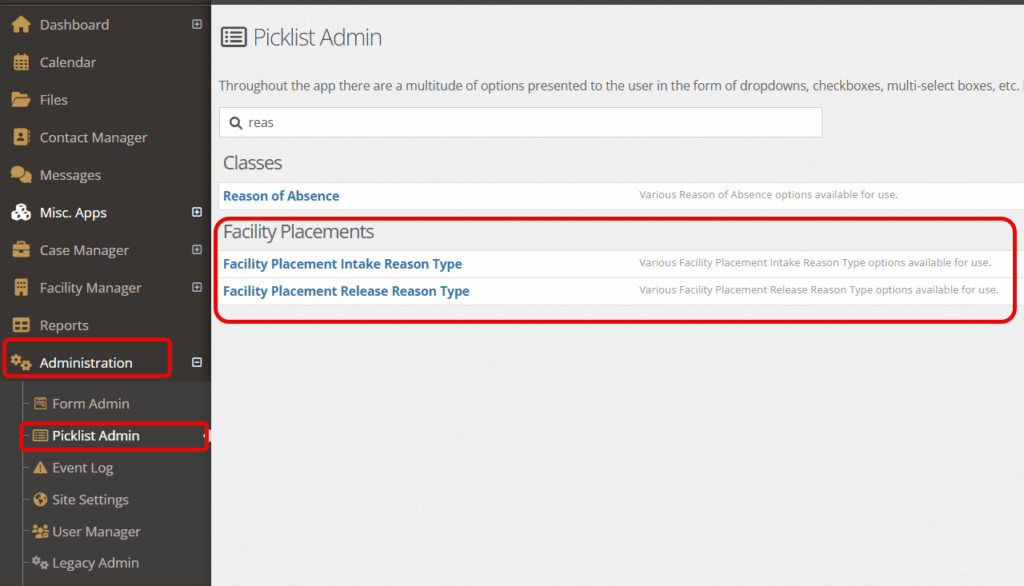
Picklist Setup (Administration) #
If a user has administrative access, then updating the drop downs and checklists mentioned above are possible by going to the administration tab, followed by picklist admin.
Using the search bar and selecting the field type, you will be able to edit or create new options.